


 简体中文
简体中文 English
搜索结果建议
快速链接
FAQ
Q: How to upgrade the firmware of AT9/AT9S/AT9S Pro?
Q: How to upgrade the firmware of AT9/AT9S/AT9S Pro?
A: For AT9/AT9S/AT9S Pro with V3.0/V3.1 hardware, please follow the below tutorial:
https://www.youtube.com/watch?v=6_lJ9EPHzLo
For AT9S Pro with V3.2 hardware, please follow the below tutorial:
https://www.youtube.com/watch?v=IzM0YFTmhXg
For details on how to check the hardware version of your AT9S Pro, please refer to the below link:
https://www.radiolink.com.cn/at9spro_firmwares
All the necessary files can be downloaded via https://www.radiolink.com.cn/at9spro_firmwares
Q: How to set PROG.MIX on AT9/AT9S/AT9S Pro/AT10II/AT10?
Q: How to set PROG.MIX on AT9/AT9S/AT9S Pro/AT10II/AT10?
A: Please follow this tutorial: https://www.youtube.com/watch?v=DKTS3X66tCE
Q: Can I play simulator with AT9/AT9S/AT9S Pro?
Q: Can I play simulator with AT9/AT9S/AT9S Pro?
A: You can play simulator with AT9/AT9S/AT9S Pro, but you need a dongle. You can search the dongle online. Here is a tutorial to show how to use AT9/AT9S/AT9S Pro to play simulator:
https://www.youtube.com/watch?v=y5i_OSgdGvE
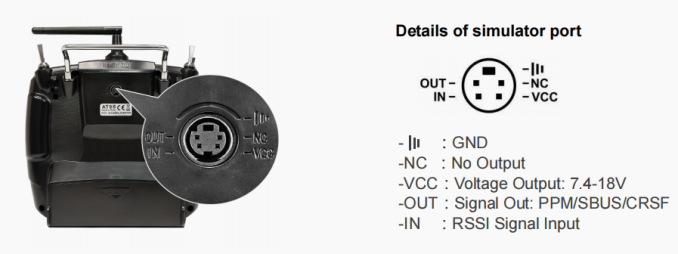
And here is the simulator port of AT9/AT9S/AT9S Pro(Note: The simulator port of AT9/AT9S does not support CRSF signal out):
Q: Will the parameters of different model types set before be cleared or modified once the firmware flashed/upgraded?
Q: Will the parameters of different model types set before be cleared or modified once the firmware flashed/upgraded?
A: No. The firmware upgrade won't change any personalized parameters already set.
Q: Can the stick mode of AT9/AT9S/AT9S Pro be changed?
Q: Can the stick mode of AT9/AT9S/AT9S Pro be changed?
A: Yes. Please follow the below tutorial: https://www.youtube.com/watch?v=UA1GjnnHnY0
Q: How to calibrate the joysticks of AT9/AT9S/AT9S Pro?
Q: How to calibrate the joysticks of AT9/AT9S/AT9S Pro?
A: For AT9/AT9S, please press END key and PUSH key at the same time, then turn on the power switch to enter the interface of joystick calibration and follow the steps shown on the screen. Click below link to check the tutorial video: https://www.youtube.com/watch?v=84lEYy-d_Uo
For AT9S Pro, please follow the below tutorial to calibrate the joysticks:
https://www.youtube.com/watch?v=5Dox0bfupoM
Q: What are the compatible receivers to AT9/AT9S/AT9S Pro?
Q: What are the compatible receivers to AT9/AT9S/AT9S Pro?
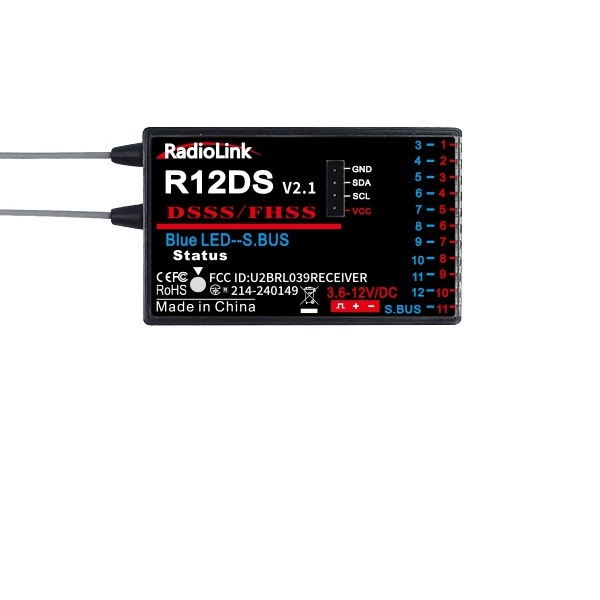
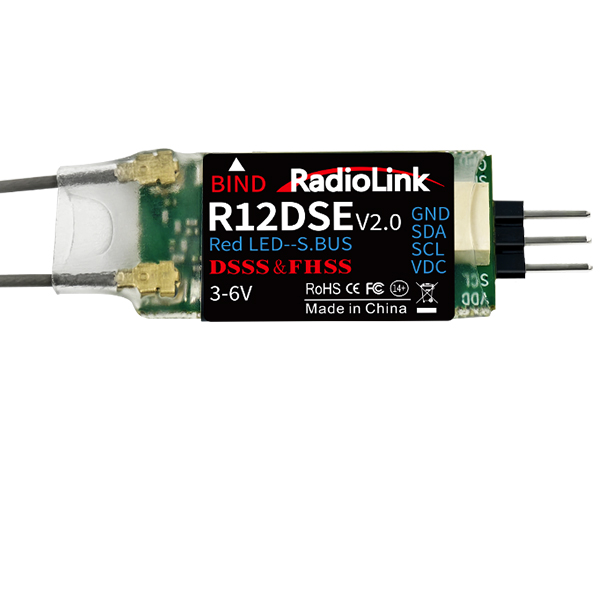
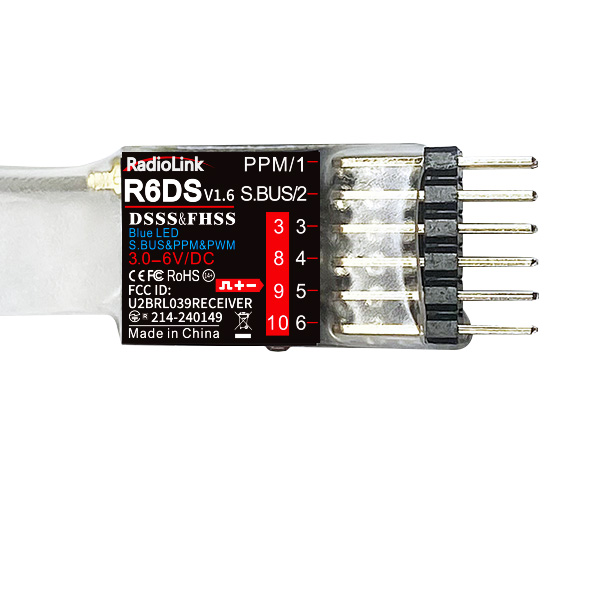
A: RadioLink control system is not open sourced. So RadioLink transmitters are only compatible with RadioLink receivers. AT9/AT9S/AT9S Pro is compatible with RadioLink R12DS, R12DSE, R12DSM, R9DS, R6DS, R6DSM receivers.
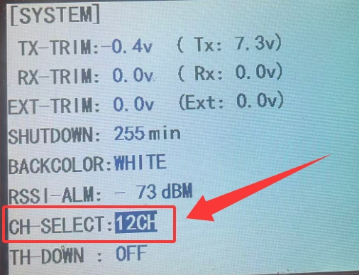
Note: The default channel quantity of AT9/AT9S/AT9S Pro is 10 to work with the standard packed receiver R9DS. When working with the 12-channel receivers (R12DSE, R12DSM, R12DS), the channel quantity of AT9/AT9S/AT9S Pro should be changed as 12CH.
Long press the Mode key to enter the BASIC MENU -> Rotate the scroll Dial to highlight the SYSTEM option and press Push to enter -> Select the CH-SELECT and change the number as required.
Here is a tutorial of it for your reference:
https://www.youtube.com/watch?v=gB4pu0t3F2s
Q: Can I use the TBS Crossfire Nano TX with the AT9S Pro? How?
Q: Can I use the TBS Crossfire Nano TX with the AT9S Pro? How?
A: Yes.
Setting steps as below:
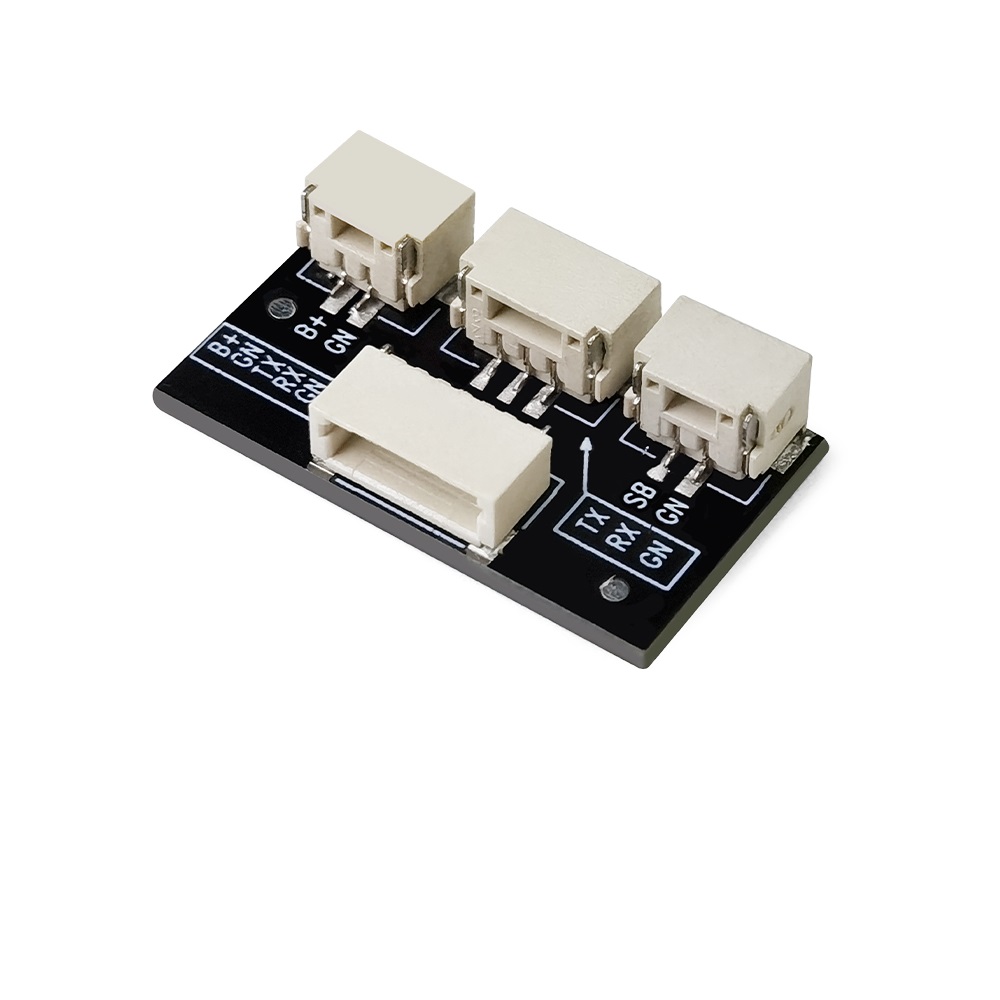
① Connect TBS Crossfire Nano TX with the AT9S Pro as the picture
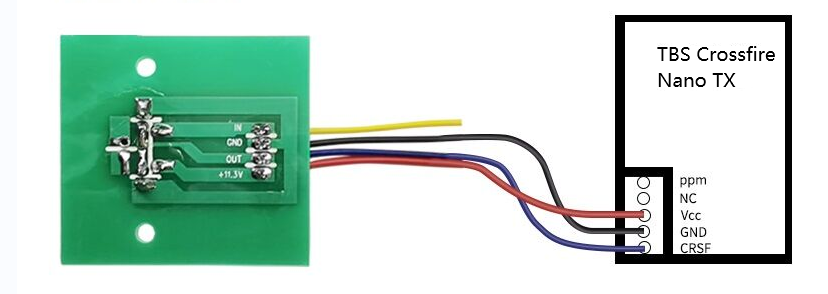
The backboard of the simulator port of AT9S Pro

② Enter the BASIC MENU of AT9S Pro and select SYSTEM.
Set OUT to CRSF.
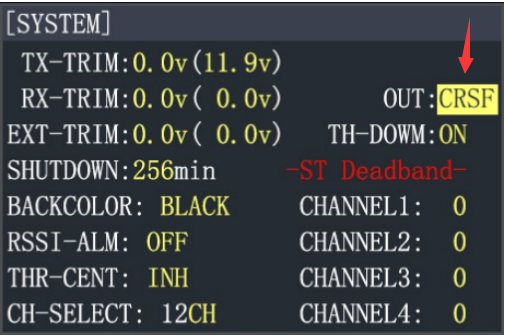
Note: The setting is to define the signal output of the simulator port at the back of AT9S Pro.
Q: How to turn off the WARNING!!!?
Q: How to turn off the WARNING!!!?
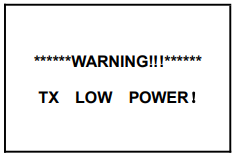
A:1. TX LOW POWER! means the transmitter Battery voltage is lower than setting value. You can:
① press PUSH to enter PARAMETER menu. Choose TX ALARM by DIAL and lower the alarm voltage by PUSH button.
② if the low voltage alarm is setup depend on your battery already(e.g. your battery is a 2S, the TX-ALARM is setup 7.4V), but your transmitter still WARNING with TX LOW POWER, please change a battery with full power or just higher than 7.4V.
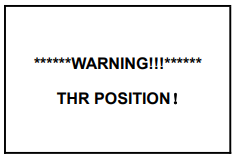
A: 2.THR POSITION! means safety reminder for low throttle.
You can remove the reminder by
① pulldown the throttle stick to the lowest position
② turning the DIAL button
If you do not need this hint, you can turn off this function by press Mode button to BASIC MENU, turn DIAL button to SYSTEM, press Push into SYSTEM menu, setup TH-DWON: ON to OFF.
Q: The screen of AT9/AT9S/AT9S Pro is blank after updating the firmware. How to fix it?
Q: The screen of AT9/AT9S/AT9S Pro is blank after updating the firmware. How to fix it?
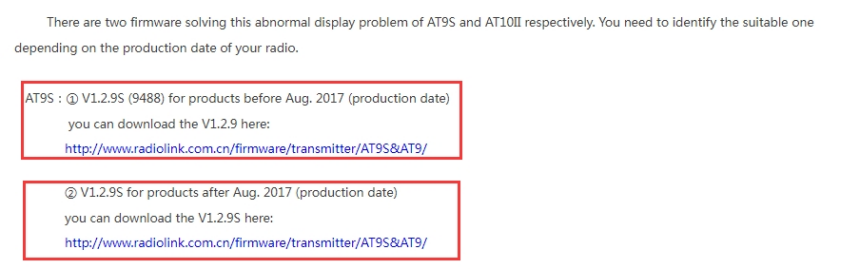
A: If the screen is blank after you update the firmware, please click the below link to solve the problem: https://www.radiolink.com/newsinfo/477826.html
Please choose the suitable firmware and download it from this website to solve the white screen problem. After the screen problem is solved, you can install the suitable or latest firmware you want.
Q:Can AT9/AT9S be upgraded to AT9S Pro by firmware update ?
Q:Can AT9/AT9S be upgraded to AT9S Pro by firmware update ?
A: No. AT9S and AT9S Pro are different on both the communication and hardware, so AT9/AT9S cannot be upgraded to AT9S Pro by firmware update. But users can take part in our trade in activity. Here is the link of trade in activity: https://www.radiolink.com/newsinfo/844239.html
Q: What’s the difference between AT9S and AT9S Pro?
Q: What’s the difference between AT9S and AT9S Pro?
A: AT9S Pro is compatible with TBS Crossfire while AT9S is not.
Q:How to distinguish AT9S and AT9S Pro?
Q:How to distinguish AT9S and AT9S Pro?
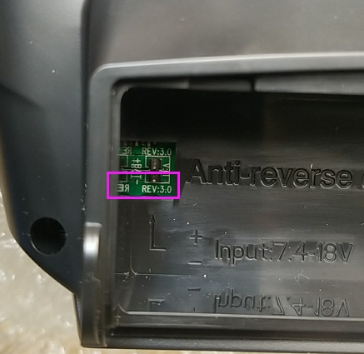
A:You can check the hardware version on the PCB board from the battery box of AT9S/AT9S Pro as the picture below. If the hardware version of your AT9S is 2.0, It is AT9S, which is not compatible with the TBS crossfire. If it is V3.0, it is AT9S Pro and compatible with TBS crossfire.
Q: Can AT9S upgrade with the firmware of AT9S Pro?
Q: Can AT9S upgrade with the firmware of AT9S Pro?
A: Yes. AT9S can upgrade with the firmware of AT9S Pro with V3.0 and V3.1 hardware. AT9S cannot upgrade with the firmware of AT9S Pro with V3.2 hardware.
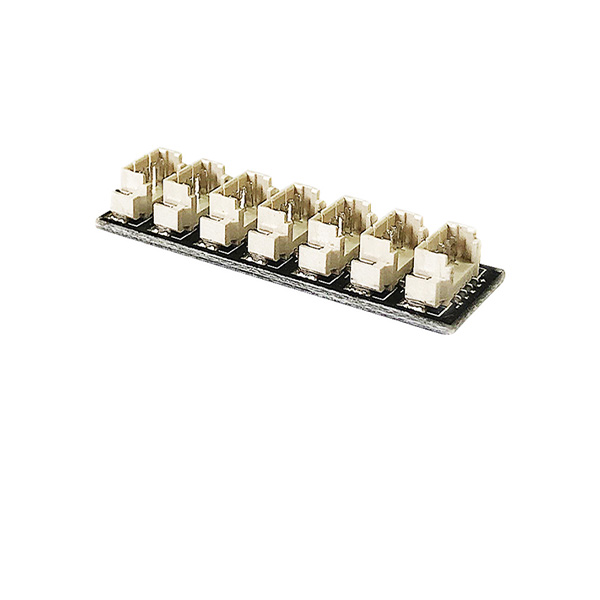
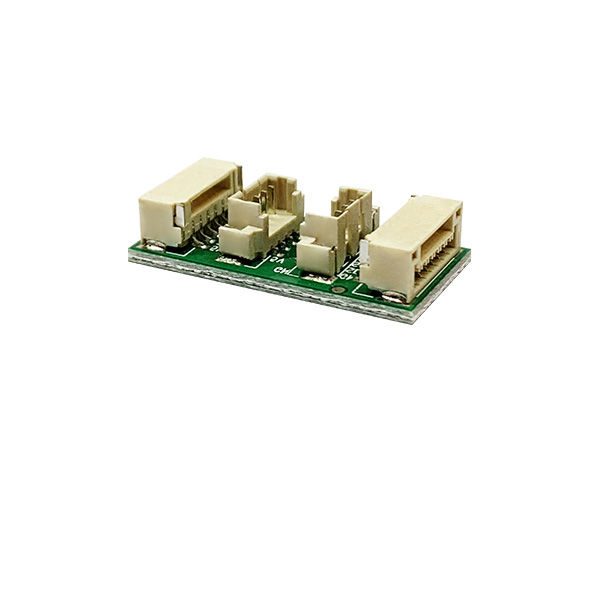
Q: How to set to turn on or off the light?
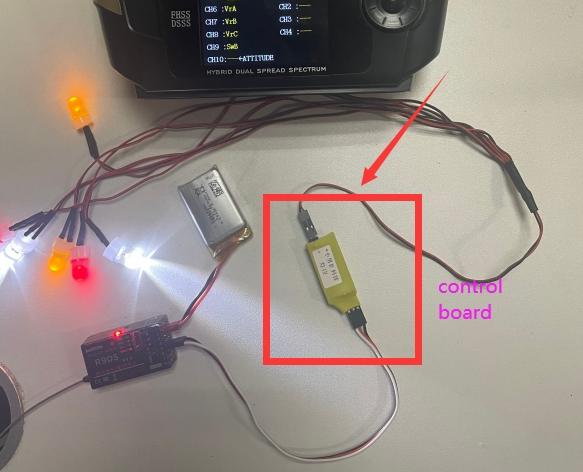
Q: How to set to turn on or off the light?
A: Set AUX-CH in the menu. Assign one channel to control the light. Make sure there is a control board with your light as below. If there is no control board, your light will be on all the time.
Q: Can AT9/AT9S/AT9S Pro be bound with spectrum receivers?
Q: Can AT9/AT9S/AT9S Pro be bound with spectrum receivers?
A: No. RadioLink control system is not open sourced, so RadioLink transmitters are only compatible with RadioLink receivers.
Q: How to reset AT9/AT9S/AT9S Pro?
Q: How to reset AT9/AT9S/AT9S Pro?
A: If you want to reset setting, enter BASIC MENU- MODEL TYPE- RESET- EXECUTE. But please note the reset is only for this type. If you want to reset all settings, you need to reset every type. Here is a tutorial to show how to reset AT9/AT9S/AT9S Pro:
https://www.youtube.com/watch?v=bU1bCPYQmqQ
Q: How to use the boat model on AT9/AT9S/AT9S Pro?
Q: How to use the boat model on AT9/AT9S/AT9S Pro?
A: Enter the basic menu- MODEL TYPE- choose boat type. Then go to the basic menu and advanced menu to set up the function you want.
Q: What’s the function of USB port of AT9/AT9S/AT9S Pro? Can it be used on a computer as a controller as well?
Q: What’s the function of USB port of AT9/AT9S/AT9S Pro? Can it be used on a computer as a controller as well?
A: The USB port of AT9/AT9S/AT9S Pro is for upgrading the firmware and for copying the data to the computer. It cannot be used on the computer as a controller.
Q: What to do when the screen is locked as below?
Q: What to do when the screen is locked as below?
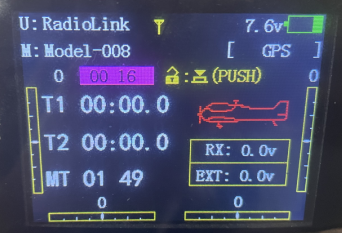
A: The screen is locked because of LockScreen function. Long press PUSH button, the screen will be unlocked. You can set the time from 1s to 254s. You can also turn off the function. Enter the BASIC menu- PARAMETER- set LockScreen to OFF. Here is a related tutorial of screen lock function:
https://www.youtube.com/watch?v=tQb-ZF2PzJg
Q: How to set head tracking functions on AT9S/AT9S Pro?
Q: How to set head tracking functions on AT9S/AT9S Pro?
A: Follow the below steps.
① Set channel 5/6 and PPM output on FPV goggles, and connect the transmitter with FPV goggles.
② Enter the BASIC menu of AT9S Pro- AUX CH- assign VrA to channel 5, and VrB to channel 6.
③ Enter the BASIC menu of AT9S Pro- TRAINER- set the mode to TRIGGER and set MIX to ON(make sure to upgrade the firmware to the newest version)
④ Set channel 5 and 6 to NORM, and other channels to OFF.
Q: How to upgrade the firmware of AT9S Pro on WIN11?
Q: How to upgrade the firmware of AT9S Pro on WIN11?
A: The update method of AT9S on Windows 11 is the same with that of Windows 10. So please refer to Windows 10 to update the firmware of AT9S Pro.
Q: How to setup parameters to use transmitter AT9/AT9S/AT9S Pro to control a RC car/boat with dual ESCs?
Q: How to setup parameters to use transmitter AT9/AT9S/AT9S Pro to control a RC car/boat with dual ESCs?
A: Please follow the below tutorial to set PROG.MIX:
https://www.youtube.com/watch?v=DKTS3X66tCE
Q: I would use AT9S Pro to control 2 models. Is it possible to switch the control of the two models without powering off the two models?
Q: I would use AT9S Pro to control 2 models. Is it possible to switch the control of the two models without powering off the two models?
A: No. If the two models are powered on at the same time, AT10II/AT9S Pro will control both models at the same time.
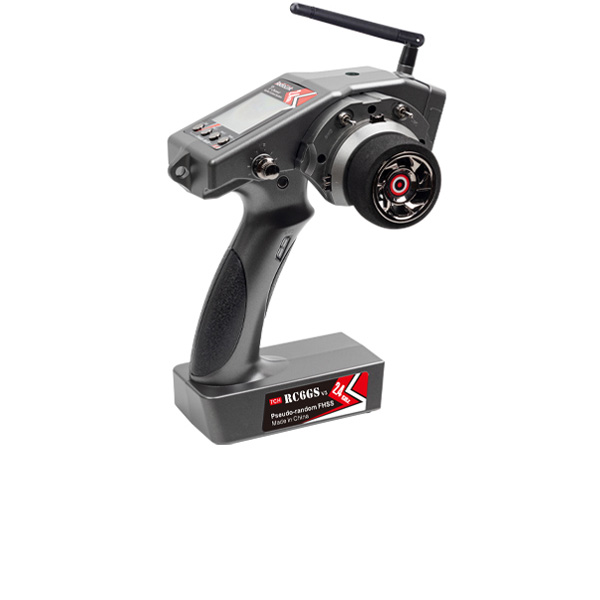
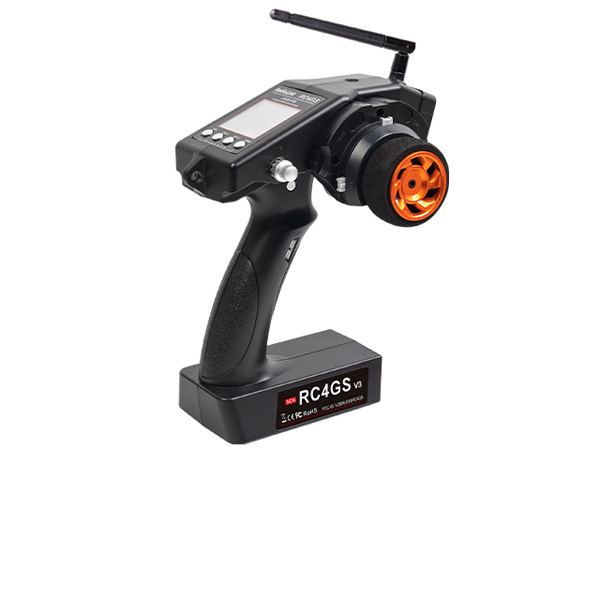
If you need a transmitter that can control two models alternately without powering them off, you can consider RadiodLink T16D, T12D, RC8X, RC6GS V3 and RC4GS V3. These transmitters support subsidiary ID function. When multiple models are powered on at the same time, you can control one of them alternately. Here is a related tutorial for your reference: https://www.youtube.com/watch?v=_I68EFqkm7Q
Q: Can AT9S/AT9S Pro control cars/boats with metal or carbon casing?
Q: Can AT9S/AT9S Pro control cars/boats with metal or carbon casing?
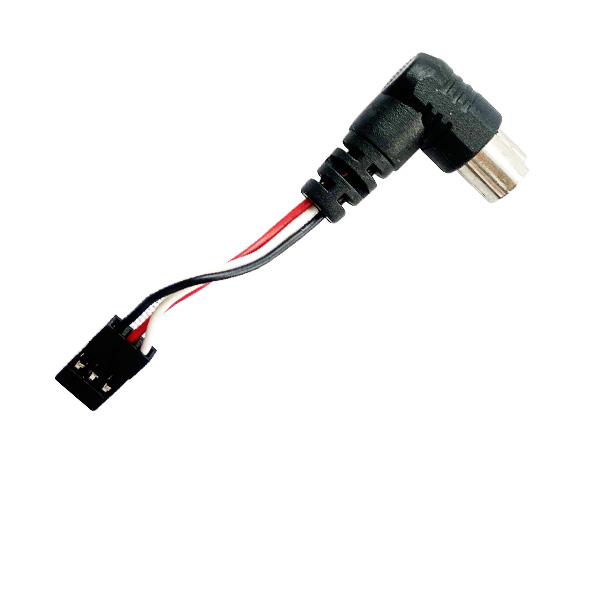
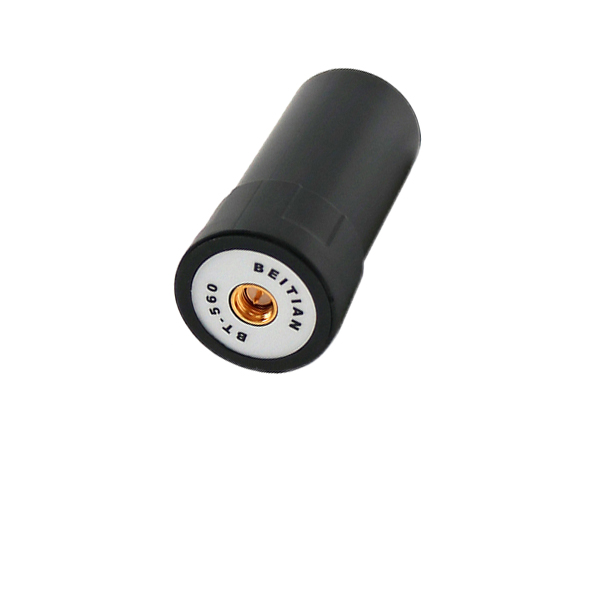
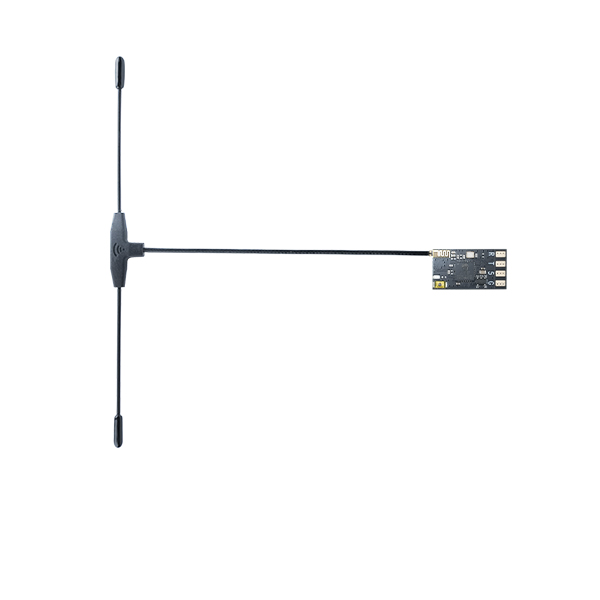
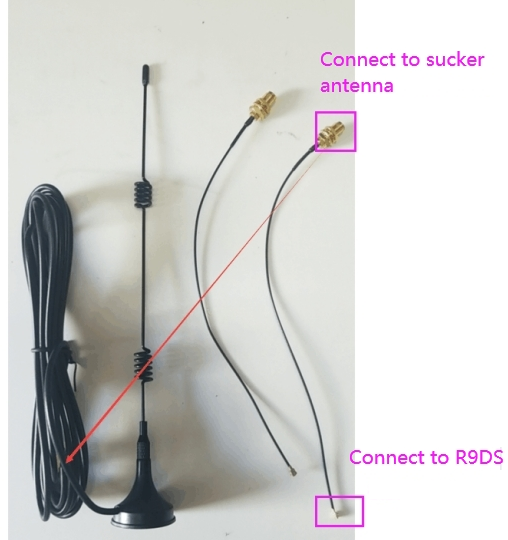
A: Yes. If R9DS receiver needs to be installed in a car/boat with a full metal casing, it is recommended to use an IPEX to SAM with a sucker antenna. The antenna needs to be drawn out, because if the receiver antenna is enclosed in a metal shell, the metal material will weaken the signal of the receiver, thereby affecting the control distance.
The antenna connector of R9DS receiver is IPEX. Make sure the sucker antenna has the IPEX connector. Please refer to the picture below:
Q: After updating the latest firmware, I connect a module to AT9S Pro. The OUT in the SYSTEM menu can be selected: CRSF1, CRSF4, ELRS1, ELRS4. What is their difference?
Q: After updating the latest firmware, I connect a module to AT9S Pro. The OUT in the SYSTEM menu can be selected: CRSF1, CRSF4, ELRS1, ELRS4. What is their difference?
A: When connecting TBS Crossfire module to AT9S Pro, select CRSF (CRSF1 with baud rate 115200; CRSF4 with baud rate 416000); when connecting ELRS module, select ELRS (ELRS1 with baud rate 115200; ELRS4 with baud rate 416000). ELRS1/ELRS4 only support 50HZ/500HZ now. Please reboot the transmitter after selecting the protocol.
Q: AT9S Pro cannot be powered on although there is no problem of battery voltage or battery connection. The screen does not light up. The red LED indicator on AT9S Pro is off, and the green LED indicator is flashing slowly. Why?
Q: AT9S Pro cannot be powered on although there is no problem of battery voltage or battery connection. The screen does not light up. The red LED indicator on AT9S Pro is off, and the green LED indicator is flashing slowly. Why?
A: Note: There may be something wrong with the firmware or firmware update process. There are several versions of AT9S Pro hardware, including V3.0, V3.1 and V3.2. The firmware for AT9S Pro with V3.2 Hardware is different from that for AT9S Pro with V3.1 and previous hardware. The firmware update method for AT9S Pro with V3.2 Hardware is also different from that for AT9S Pro with V3.0 and V3.1 hardware. So please check the hardware version of your AT9S Pro and then choose the right firmware and use the correct firmware update methods. For more details, please click the below link:
https://www.radiolink.com.cn/at9spro_firmwares
Q:Can I set delta wing mixing function on AT9/AT9S/AT9S Pro?
Q:Can I set delta wing mixing function on AT9/AT9S/AT9S Pro?
A: Yes. Please set ELEVON in the ADVANCE MENU of AT9S Pro. Here is the detailed manual of AT9S Pro: https://www.radiolink.com.cn/at9spro_manual
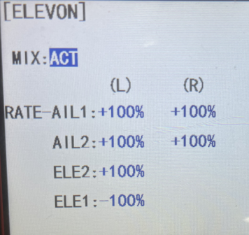
Note: Do not set ELEVON when the aircraft is equipped with a flight controller, because the mixing in the transmitter will conflict with the mixing in the flight controller. Please refer to the manual of the to flight controller view the setting method.
Q: Does AT9/AT9S/AT9S Pro support hall gimbals?
Q: Does AT9/AT9S/AT9S Pro support hall gimbals?
A: No.
Q: How to customize the control switches of channel 1-channel 4 on AT9/AT9S/AT9S Pro?
Q: How to customize the control switches of channel 1-channel 4 on AT9/AT9S/AT9S Pro?
A:
Channel 1-Channel 4 are controlled by joysticks by default. If you want to change to other switches, please follow the following steps:
Enter the BASIC MENU--PARAMETER--STK-MODE. Set STK-MODE to -, as shown below:
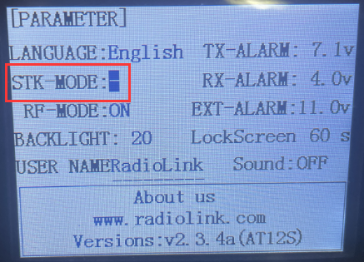
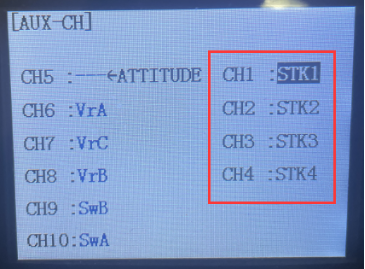
Enter the BASIC MENU--AUX-CH. You can assign the switches you want to control channel 1 to channel 4, as shown below:
Here is a tutorial to show how to customize the stick mode of AT9/AT9S/AT9S Pro:
https://www.youtube.com/watch?v=coEGaq7ewdY
Q: How to bind R9DS receiver with AT9/AT9S/AT9S Pro transmitter?
Q: How to bind R9DS receiver with AT9/AT9S/AT9S Pro transmitter?
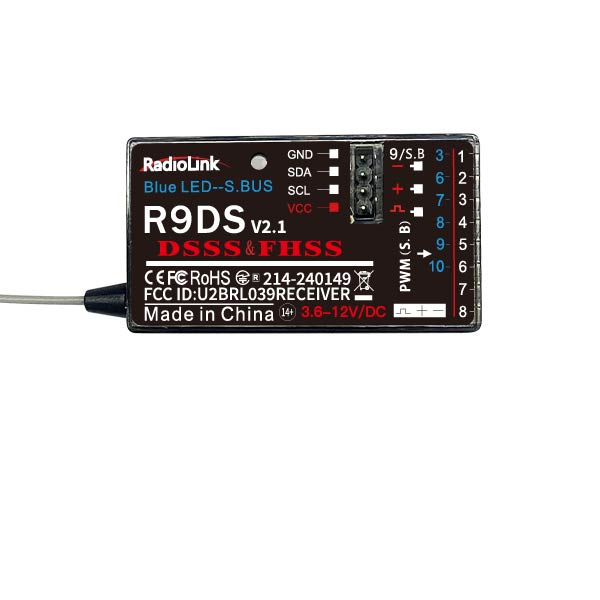
A: R9DS is not compatible with AT9 transmitter, but is compatible with AT9S/AT9S Pro transmitter. Turn on the transmitter first, and the supply power for the receiver. Then press the binding button of R9DS for 1 second, the LED will start to blink and then keeps always on. And top of the transmitter's screen will have a signal tower, that means bind successfully. Here is a binding tutorial of R9DS: https://www.youtube.com/watch?v=c3K19QB2_xE
Q: Can the transmitter charge the battery through the micro USB port?
Q: Can the transmitter charge the battery through the micro USB port?
A: No, this USB port is only used for the firmware update, not for battery charging. You could choose to use 8 * AA batteries (AT9S Pro comes with an AA battery tray) or 2S~4S JST 2 pin connector lithium battery as the power supply battery of the transmitter. You need to use the charger to charge the battery.
Q: How many models can AT9/AT9S/AT9S Pro store?
Q: How many models can AT9/AT9S/AT9S Pro store?
A: AT9S Pro supports up to 15 models storage.
Q: Do you have a list of models that will bind to the Radiolink AT9/AT9S/AT9S Pro?
Q: Do you have a list of models that will bind to the Radiolink AT9/AT9S/AT9S Pro?
A: Sorry, we don't have a list, cause there is a tremendous amount. AT9/AT9S/AT9S Pro transmitter can work with most 2.4GHz models. The come-with receiver R9DS support SBUS/PWM signal, and could operate with most of Racing drone, RC plane, fixed-wing, RC helicopter, multirotor drone, RC car, RC boat, RC robot in the market.
Q: Can AT9/AT9S/AT9S Pro be bound to multiple receivers at the same time?
Q: Can AT9/AT9S/AT9S Pro be bound to multiple receivers at the same time?
A: Yes. You can bind them one by one. When binding one of the receiver, other receivers need to be powered off. After you have bound all the receivers to AT9/AT9S/AT9S Pro, power on all the receivers, the transmitter can control all the receivers at the same time.
Q: The receiver cannot be bound to AT9/AT9S/AT9S Pro. Why?
Q: The receiver cannot be bound to AT9/AT9S/AT9S Pro. Why?
A: Could you please follow the below methods to troubleshoot the problem?
1.Check if you have turned on the RF-MODE on the transmitter.

2.Then please follow the binding tutorial to bind the receiver to the transmitter:
https://www.youtube.com/watch?v=c3K19QB2_xE
3.You can replace another receiver to have a try to confirm if the problem comes from the receiver or the transmitter.
4.If the problem still exists, please send a binding tutorial to after_service@radiolink.com.cn to confirm the problem.
Q: How to use the trainer function of AT9/AT9S/AT9S Pro?
Q: How to use the trainer function of AT9/AT9S/AT9S Pro?
A: There are two methods to use the trainer function:
1. You can use the trainer cable to connect the two transmitters. But please prepare a trainer cable. Here are the tutorials for your reference:
https://www.youtube.com/watch?v=vgJEzeyxOIY
https://www.youtube.com/watch?v=3WqJO0p0Xv8
And here is the simulator port of AT9/AT9S/AT9S Pro(Note: The simulator port of AT9/AT9S does not support CRSF signal out):

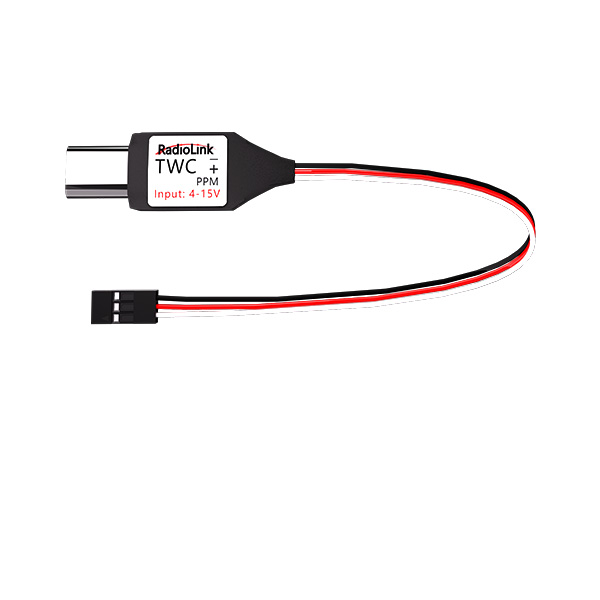
2. You can also use wireless trainer cable. We sell the wireless trainer cable in the video. You need to make sure the other transmitter has the trainer function and its receiver supports PPM signal output, then you can use our wireless trainer cable. Here is the tutorial for your reference:
Q: The servos shake violently. How to fix it?
Q: The servos shake violently. How to fix it?
A: When using different receivers, you need to set CH-SELECT on AT9/AT9S/AT9S Pro. Select 10CH for R9DS/R6DS/R6DSM receiver and select 12CH for R12DS/R12DSE/R12DSM receiver. If the selection is wrong, the servos will shake violently and cannot work well.
Here is a tutorial of it for your reference:
https://www.youtube.com/watch?v=gB4pu0t3F2s
Q: The control range is short. How to troubleshoot the problem?
Q: The control range is short. How to troubleshoot the problem?
A:
- Please test RSSI. Here is the tutorial of RSSI testing: https://www.radiolink.com/newsinfo/477894.html
- Check the antenna condition of the transmitter and the receiver.
- Make sure the antenna is not near the metal or carbon fiber materials.
- Please replace another receiver to have a try. It can help to confirm if the problem comes from the receiver or the transmitter.
Q:R9DS receiver is bound to the transmitter, but the transmitter is not recognized in Mission Planner. Why?
Q:R9DS receiver is bound to the transmitter, but the transmitter is not recognized in Mission Planner. Why?
A: 1. R9DS has different working modes, including PWM and SBUS/PWM working mode. Red LED indicates PWM signal output, while blue/purple LED indicates SBUS&PWM signal output. If your flight controller supports SBUS working mode, please make sure the LED of R9DS is in blue/purple. Short press the ID SET switch twice within 1 second, the signal will be changed from PWM to SBUS.
2. Please check the setting of the CH_SELECT on the transmitter. Enter SYSTEM menu and select 10CH for R9DS.
Q: What is the PWM signal output frequency of the AT9/AT9S/AT9S Pro? Can the frequency be modified?
Q: What is the PWM signal output frequency of the AT9/AT9S/AT9S Pro? Can the frequency be modified?
A: The PWM output signal frequency is 65Hz and cannot be modified.
Q: How to switch the backlight color of AT9/AT9S/AT9S Pro/AT10II/AT10?
Q: How to switch the backlight color of AT9/AT9S/AT9S Pro/AT10II/AT10?
A: Please follow this tutorial: https://www.youtube.com/watch?v=WWtxwOooopY
Q: How to switch stick mode 2 to stick mode 1?
Q: How to switch stick mode 2 to stick mode 1?
A: Please follow this tutorial: https://www.youtube.com/watch?v=1WzMmD5HNJQ
Q: How to get the voltage telemetry on the screen of AT9/AT9S/AT9S Pro/AT10II/AT10?
Q: How to get the voltage telemetry on the screen of AT9/AT9S/AT9S Pro/AT10II/AT10?
A: Please follow this tutorial: https://www.youtube.com/watch?v=7a_Vb8xYQDM
Q: How to Distinguish Between Mode 1 and Mode 2 of the Transmitter?
Q: How to Distinguish Between Mode 1 and Mode 2 of the Transmitter?
A: Please follow this tutorial: https://www.youtube.com/watch?v=DQ0lTE-XTFc
Q: How to set the voltage alarm on AT9/AT9S/AT9S Pro/AT10II/AT10?
Q: How to set the voltage alarm on AT9/AT9S/AT9S Pro/AT10II/AT10?
A: Please follow this tutorial: https://www.youtube.com/watch?v=FK5pwPCWe_s
Q: How to connect AT9S Pro with Blacksheep TBS Crossfire TX?
Q: How to connect AT9S Pro with Blacksheep TBS Crossfire TX?
A: Please follow this tutorial: https://www.youtube.com/watch?v=W3HF_75FHeM
Q: How to switch the RC models before taking off?
Q: How to switch the RC models before taking off?
A: Please follow this tutorial: https://www.youtube.com/watch?v=a8tUnwu4mOw
Q: How to copy the model data of AT9/AT9S/AT9S Pro?
Q: How to copy the model data of AT9/AT9S/AT9S Pro?
A: Please follow this tutorial: https://www.youtube.com/watch?v=bsGsn0xYnK0
Q: How to make the AT9/AT9S/AT9S Pro transmitter work with 12 channels receiver?
Q: How to make the AT9/AT9S/AT9S Pro transmitter work with 12 channels receiver?
A: Please follow this tutorial: https://www.youtube.com/watch?v=ovsJLLQ9XyY
Q: How to replace the Antenna of R9DS & R12DS Receiver?
Q: How to replace the Antenna of R9DS & R12DS Receiver?
A: Please follow this tutorial: https://www.youtube.com/watch?v=ehNG1Tmzyrg
Q: How to test RSSI with AT9/AT9S/AT9S Pro/AT10II/AT10 Transmitter and Receivers?
Q: How to test RSSI with AT9/AT9S/AT9S Pro/AT10II/AT10 Transmitter and Receivers?
A: Please follow this tutorial: https://www.youtube.com/watch?v=jr7ad-_MVoI
Q: How to Replace the Antenna of AT9S/AT9S Pro Transmitter?
Q: How to Replace the Antenna of AT9S/AT9S Pro Transmitter?
A: Please follow this tutorial: https://www.youtube.com/watch?v=s_6DhEJEkQ0
Q: How to connect AT9S Pro to BetaFPV ELRS Module?
Q: How to connect AT9S Pro to BetaFPV ELRS Module?
A: Please follow this tutorial: https://www.youtube.com/watch?v=PuAQxhQXXis
Q: How to adjust the damping of the joysticks of AT9S Pro/AT10II/T8FB/T8S?
Q: How to adjust the damping of the joysticks of AT9S Pro/AT10II/T8FB/T8S?
A: Please follow this tutorial: https://www.youtube.com/watch?v=yn2tnRJeeLA
Q: How to set EPA function?
Q: How to set EPA function?
A: Please follow this tutorial: https://www.youtube.com/watch?v=GM8kkhX2Rqw
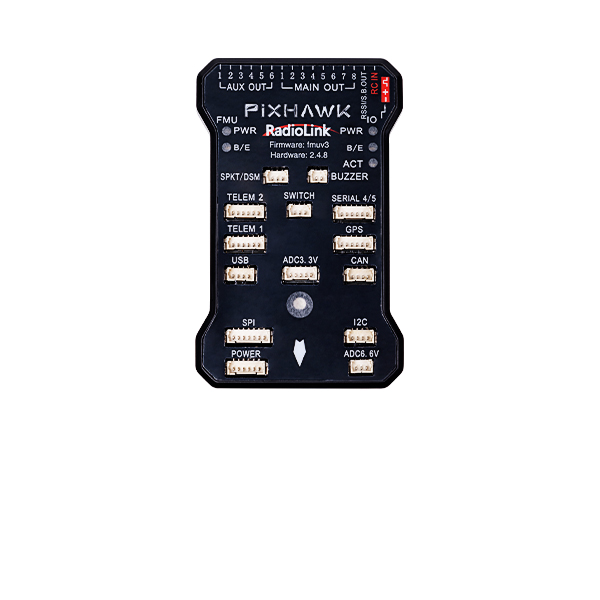
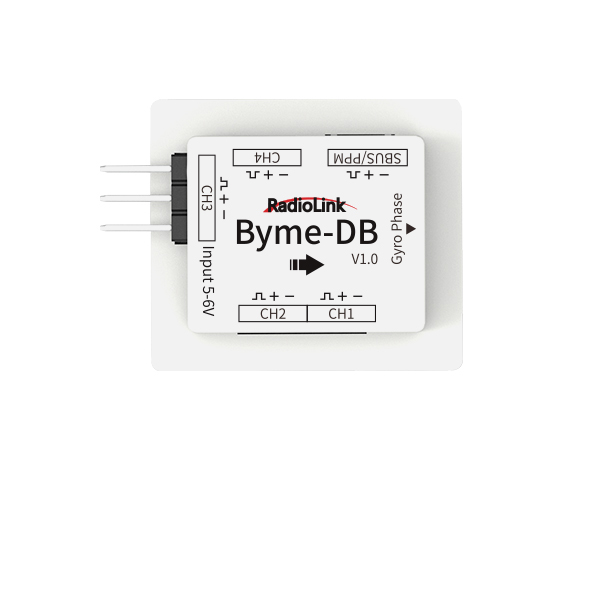
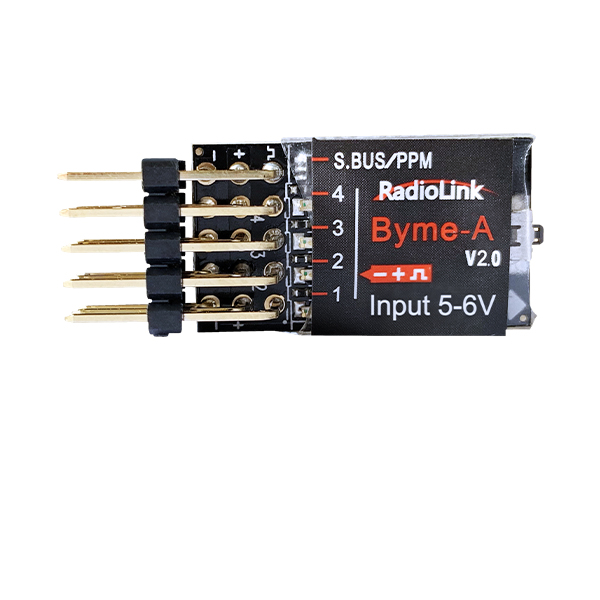
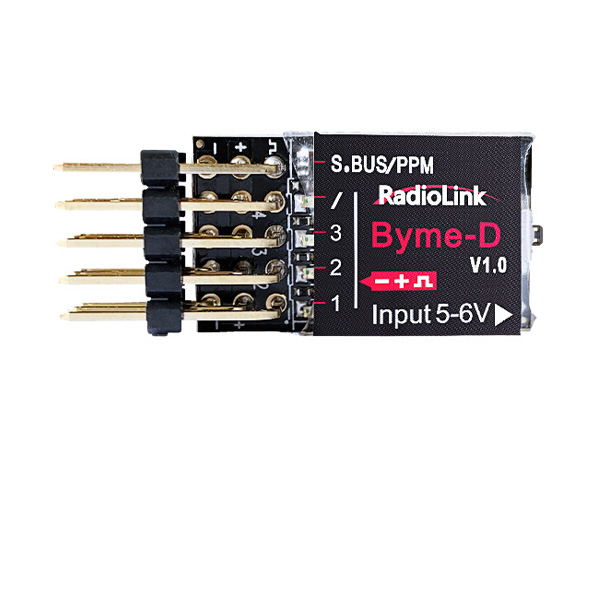
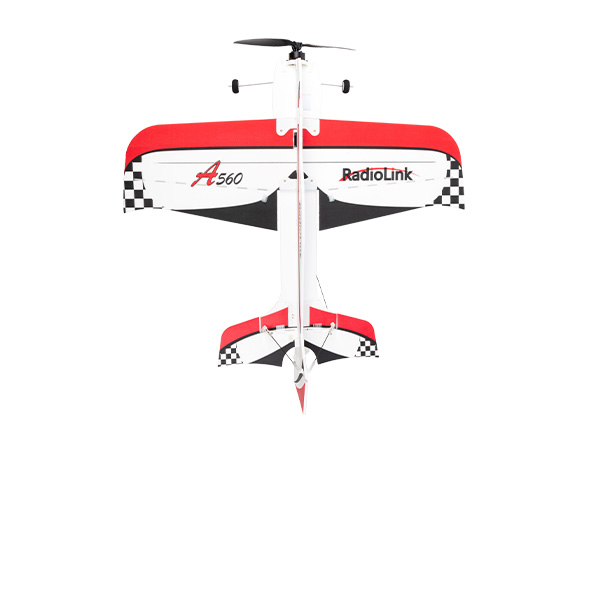
Q: How to set AT9/AT9S/AT9S Pro/AT10II/AT10 to control A560/Byme-A?
Q: How to set AT9/AT9S/AT9S Pro/AT10II/AT10 to control A560/Byme-A?
A: Please follow this tutorial: https://www.youtube.com/watch?v=8b0RTYwO8Yw
Q: How to adjust the throttle stick of AT9/AT9S/AT9S Pro/AT10II/AT10 to be self-centered?
Q: How to adjust the throttle stick of AT9/AT9S/AT9S Pro/AT10II/AT10 to be self-centered?
A: Please follow this tutorial: https://www.youtube.com/watch?v=qCnZlniQ79I
Q: How to set the throttle cut function of AT9/AT9S/AT9S Pro/AT10II/AT10?
Q: How to set the throttle cut function of AT9/AT9S/AT9S Pro/AT10II/AT10?
A: Please follow this tutorial: https://www.youtube.com/watch?v=AfnaRCEnIMA
Q: How to set the timer function of AT9/AT9S/AT9S Pro/AT10II/AT10?
Q: How to set the timer function of AT9/AT9S/AT9S Pro/AT10II/AT10?
A: Please follow this tutorial: https://www.youtube.com/watch?v=23Ml4th_R74
Q: How to set the LOGIC SW function of AT9/AT9S/AT9S Pro/AT10II/AT10?
Q: How to set the LOGIC SW function of AT9/AT9S/AT9S Pro/AT10II/AT10?
A: Please follow this tutorial: https://www.youtube.com/watch?v=3AjPGLGFv08
Q: How to set the End Point and Dual Rate function of AT9/AT9S/AT9S Pro/AT10II/AT10?
Q: How to set the End Point and Dual Rate function of AT9/AT9S/AT9S Pro/AT10II/AT10?
A: Please follow this tutorial: https://www.youtube.com/watch?v=5TQQYLwK3Xs
Q: How to supply power to the receiver without using the ESC?
Q: How to supply power to the receiver without using the ESC?
A: Please follow this tutorial: https://www.youtube.com/watch?v=nquuvM3hmtw
Q:Is it necessary to use the same model transmitter as secondary TX if using the trainer function of AT9/ AT9S/AT9S Pro/AT10/AT10II?
Q:Is it necessary to use the same model transmitter as secondary TX if using the trainer function of AT9/ AT9S/AT9S Pro/AT10/AT10II?
A: The secondary transmitter's model doesn't need to be the same as that of the primary transmitter. E.G. AT9, AT9S, AT9S Pro, and AT10II can use the trainer function.
Q: Why the trainer function can be activated when connect two transmitters via simulator port?
Q: Why the trainer function can be activated when connect two transmitters via simulator port?
A: For the trainer function, it needs to connected by a specialized trainer cable, e.g. Radiolink wireless trainer cable.
Q: How to adjust the L& H travel of CH5 - CH8 from 75 to 100?
Q: How to adjust the L& H travel of CH5 - CH8 from 75 to 100?
A: When adjusting L or H, need to know which switch control is set for each channel first. For example: if the channel 5 is controlled by a VRB switch, it will need to toggle the VRB switch to adjust the value setting to the L position.
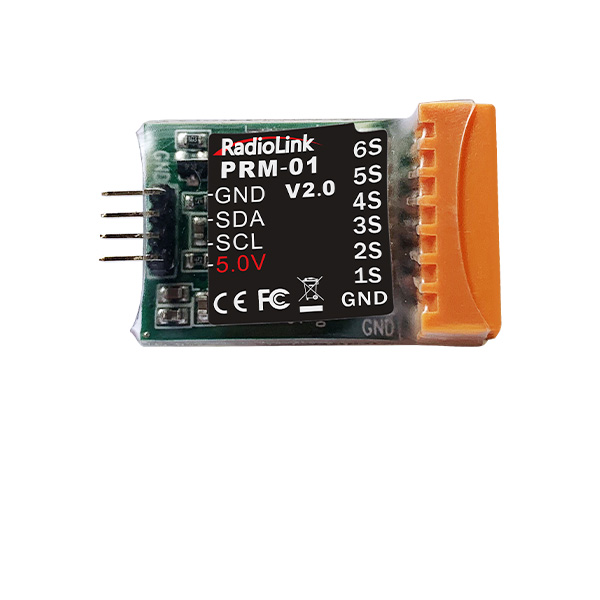
Q: What information can the PRM-01 of the transmitter telemetry?
Q: What information can the PRM-01 of the transmitter telemetry?
A: PRM-01 is capable of returning model battery voltage in real time.
Q: Can SBUS signal be directly connected to the servo to measure signal?
Q: Can SBUS signal be directly connected to the servo to measure signal?
A: No, SBUS signal can only be tested via oscilloscope or flight controller.
Q: Why there is linkage between CH3 and CH6 of new AT10II/AT9S Pro?
Q: Why there is linkage between CH3 and CH6 of new AT10II/AT9S Pro?
A: The factory default model of AT10II/AT9S Pro is helicopter. CH3 and CH6 is combined in helicopter mode. If the model type is not helicopter, please kindly check if the mix control is turned on.
Q: Which Channel needs to be selected for AT10II/AT9S Pro attitude mode while using DJI flight controller?
Q: Which Channel needs to be selected for AT10II/AT9S Pro attitude mode while using DJI flight controller?
A: The default attitude mode of AT10II/AT9S Pro is CH5 for MULTIROTOR. While connecting DJI flight controller, if the receiver output signal is SBUS, change CH7 for ATTITUDE, if receiver output is PWM, choose CH5 for ATTITUDE.
Q: Why the servo range of AT10II/AT10/AT9S Pro/AT9S/AT9 jitters in different ranges? There is an error between the servo range and the actual operation.
Q: Why the servo range of AT10II/AT10/AT9S Pro/AT9S/AT9 jitters in different ranges? There is an error between the servo range and the actual operation.
A:
1) Calibrate the joystick and restore the factory settings (please change the model before restoration to prevent the parameters in the original model from being reset)
2) If after centering the joystick, there are still 1, 2, 3 servo range, and the trim and END POINT have not been set, please flash the latest firmware.
3)Check whether has changed the joystick with new potentiometer, if has changed the joystick without flashing firmware, please flash the latest firmware.
4)If you still can't get it to work well, then please feel free to let us know. We will help you timely.
Q: Why DJI flight controller can't be armed when using RadioLink AT10II/AT9S Pro?
Q: Why DJI flight controller can't be armed when using RadioLink AT10II/AT9S Pro?
A: DJI flight controller needs to be calibrated via Mission Planner when change transmitters of different brands.
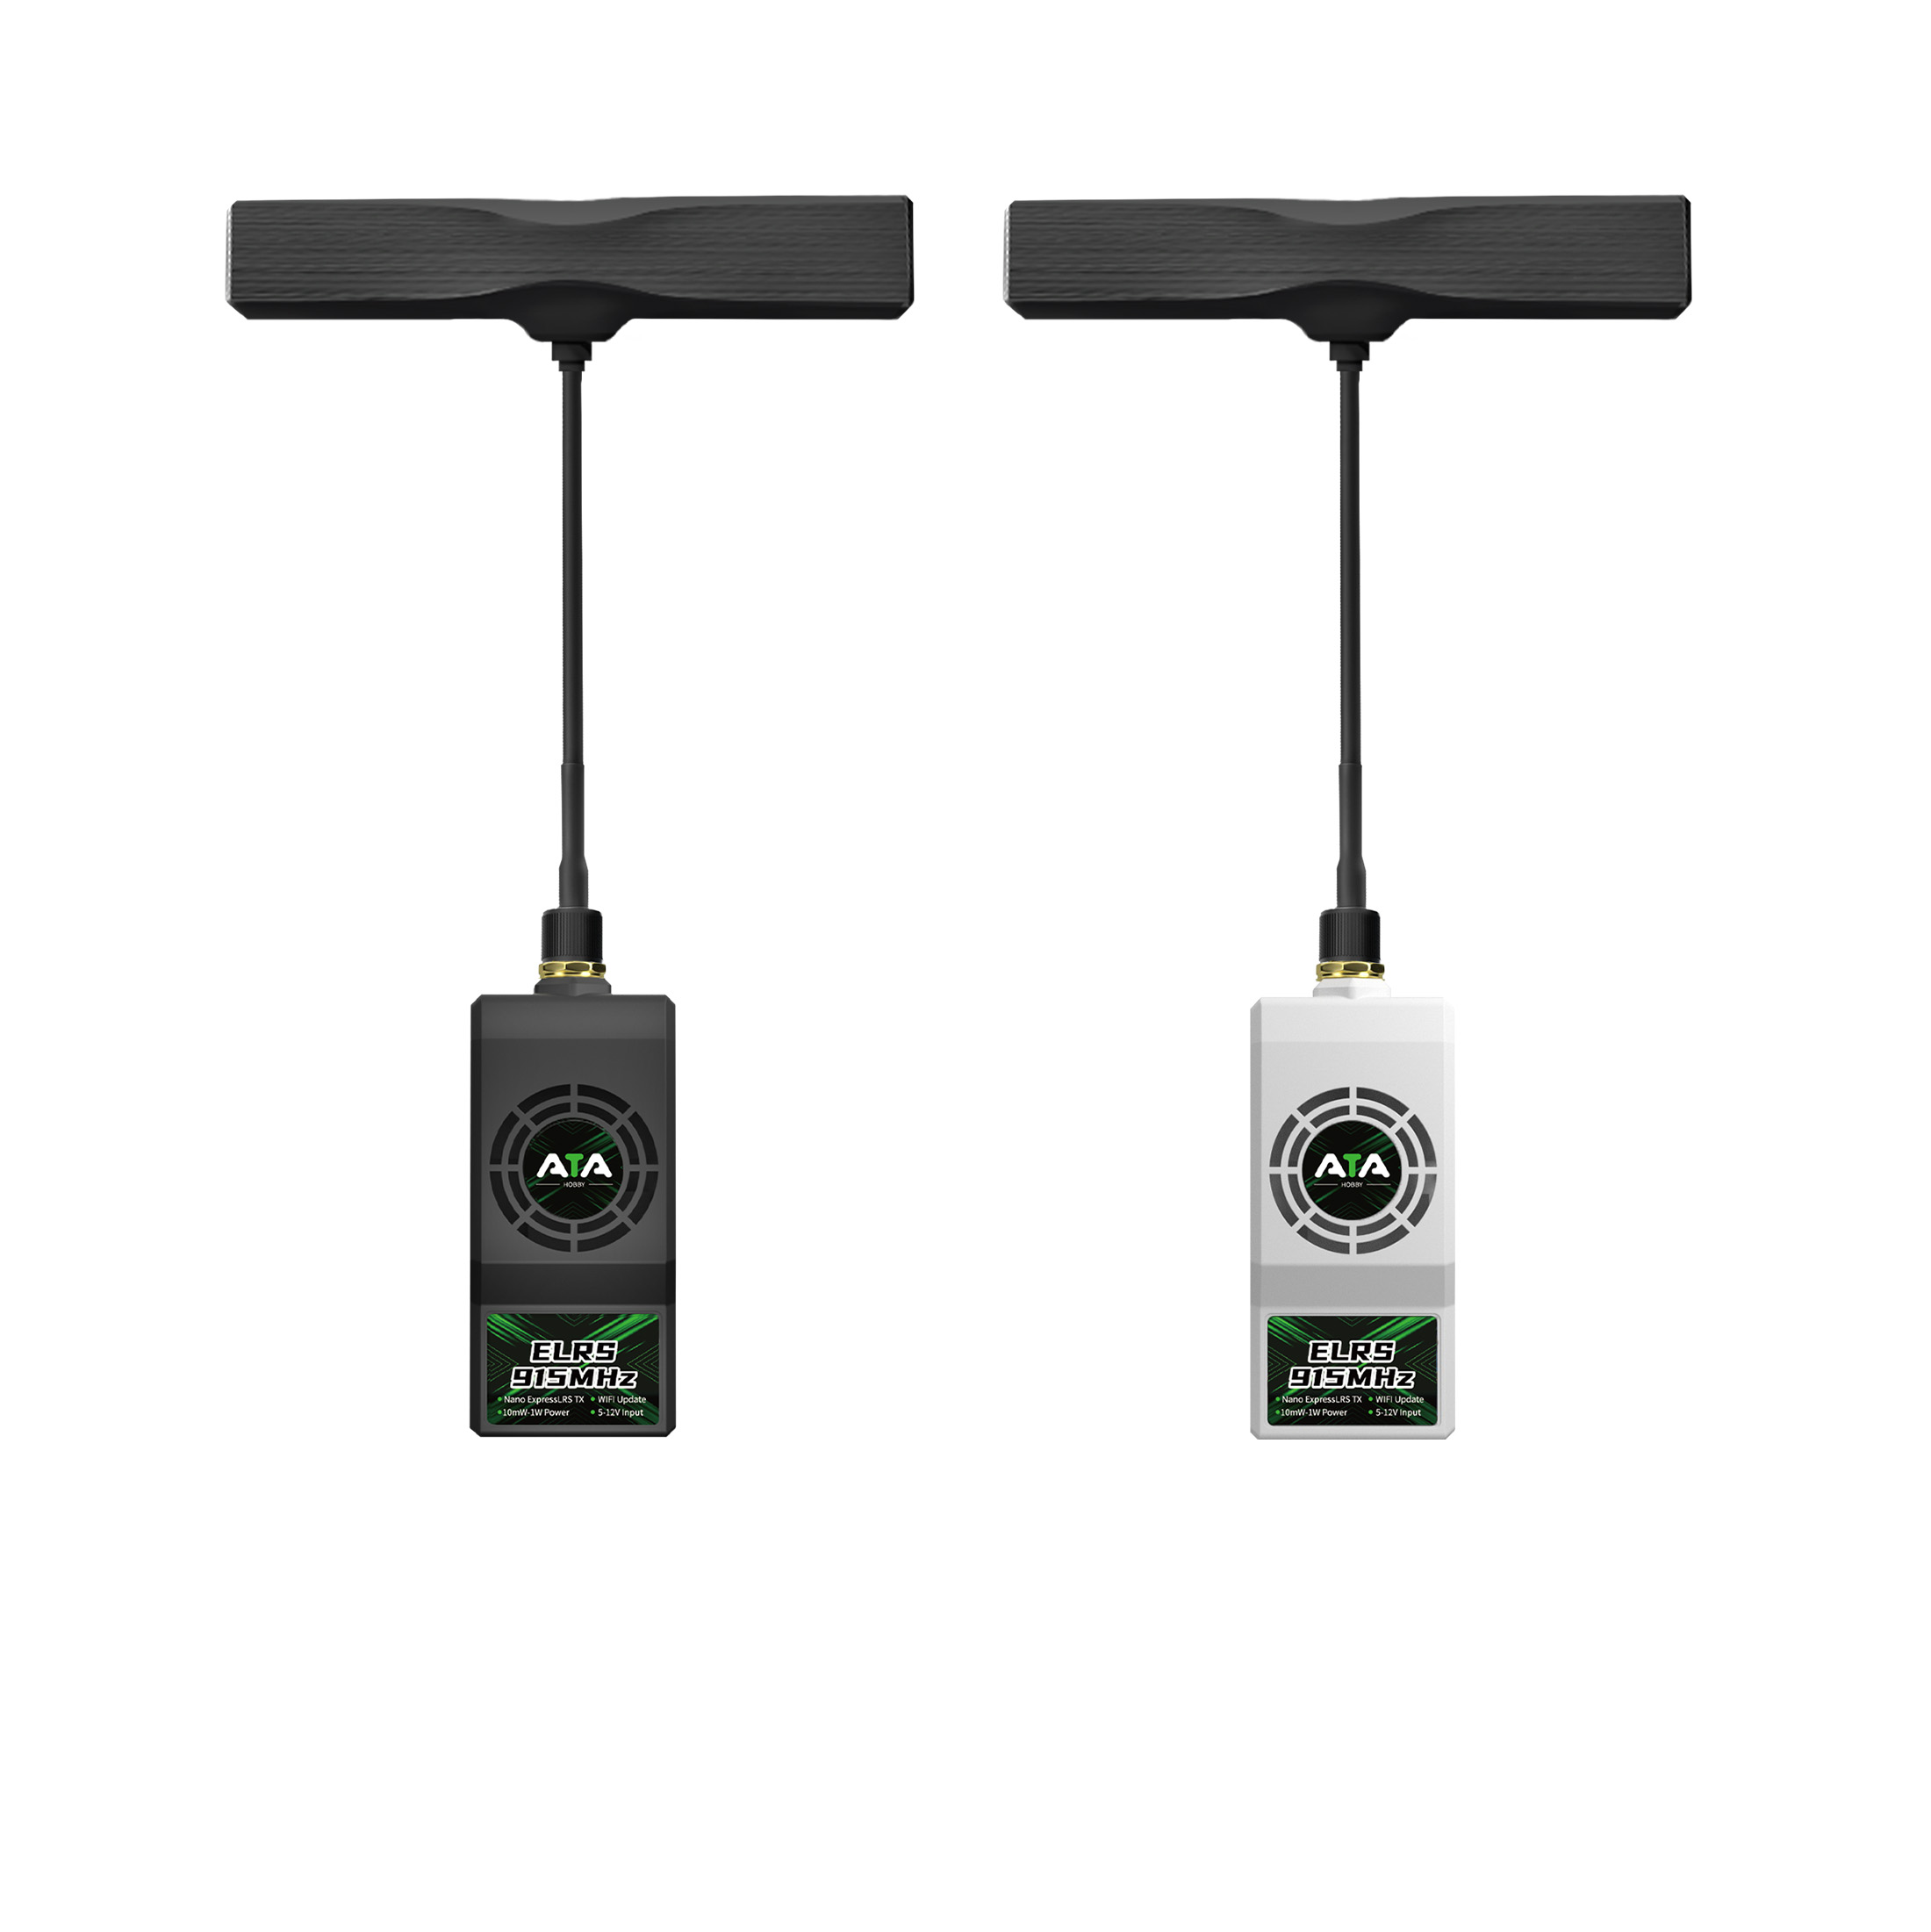
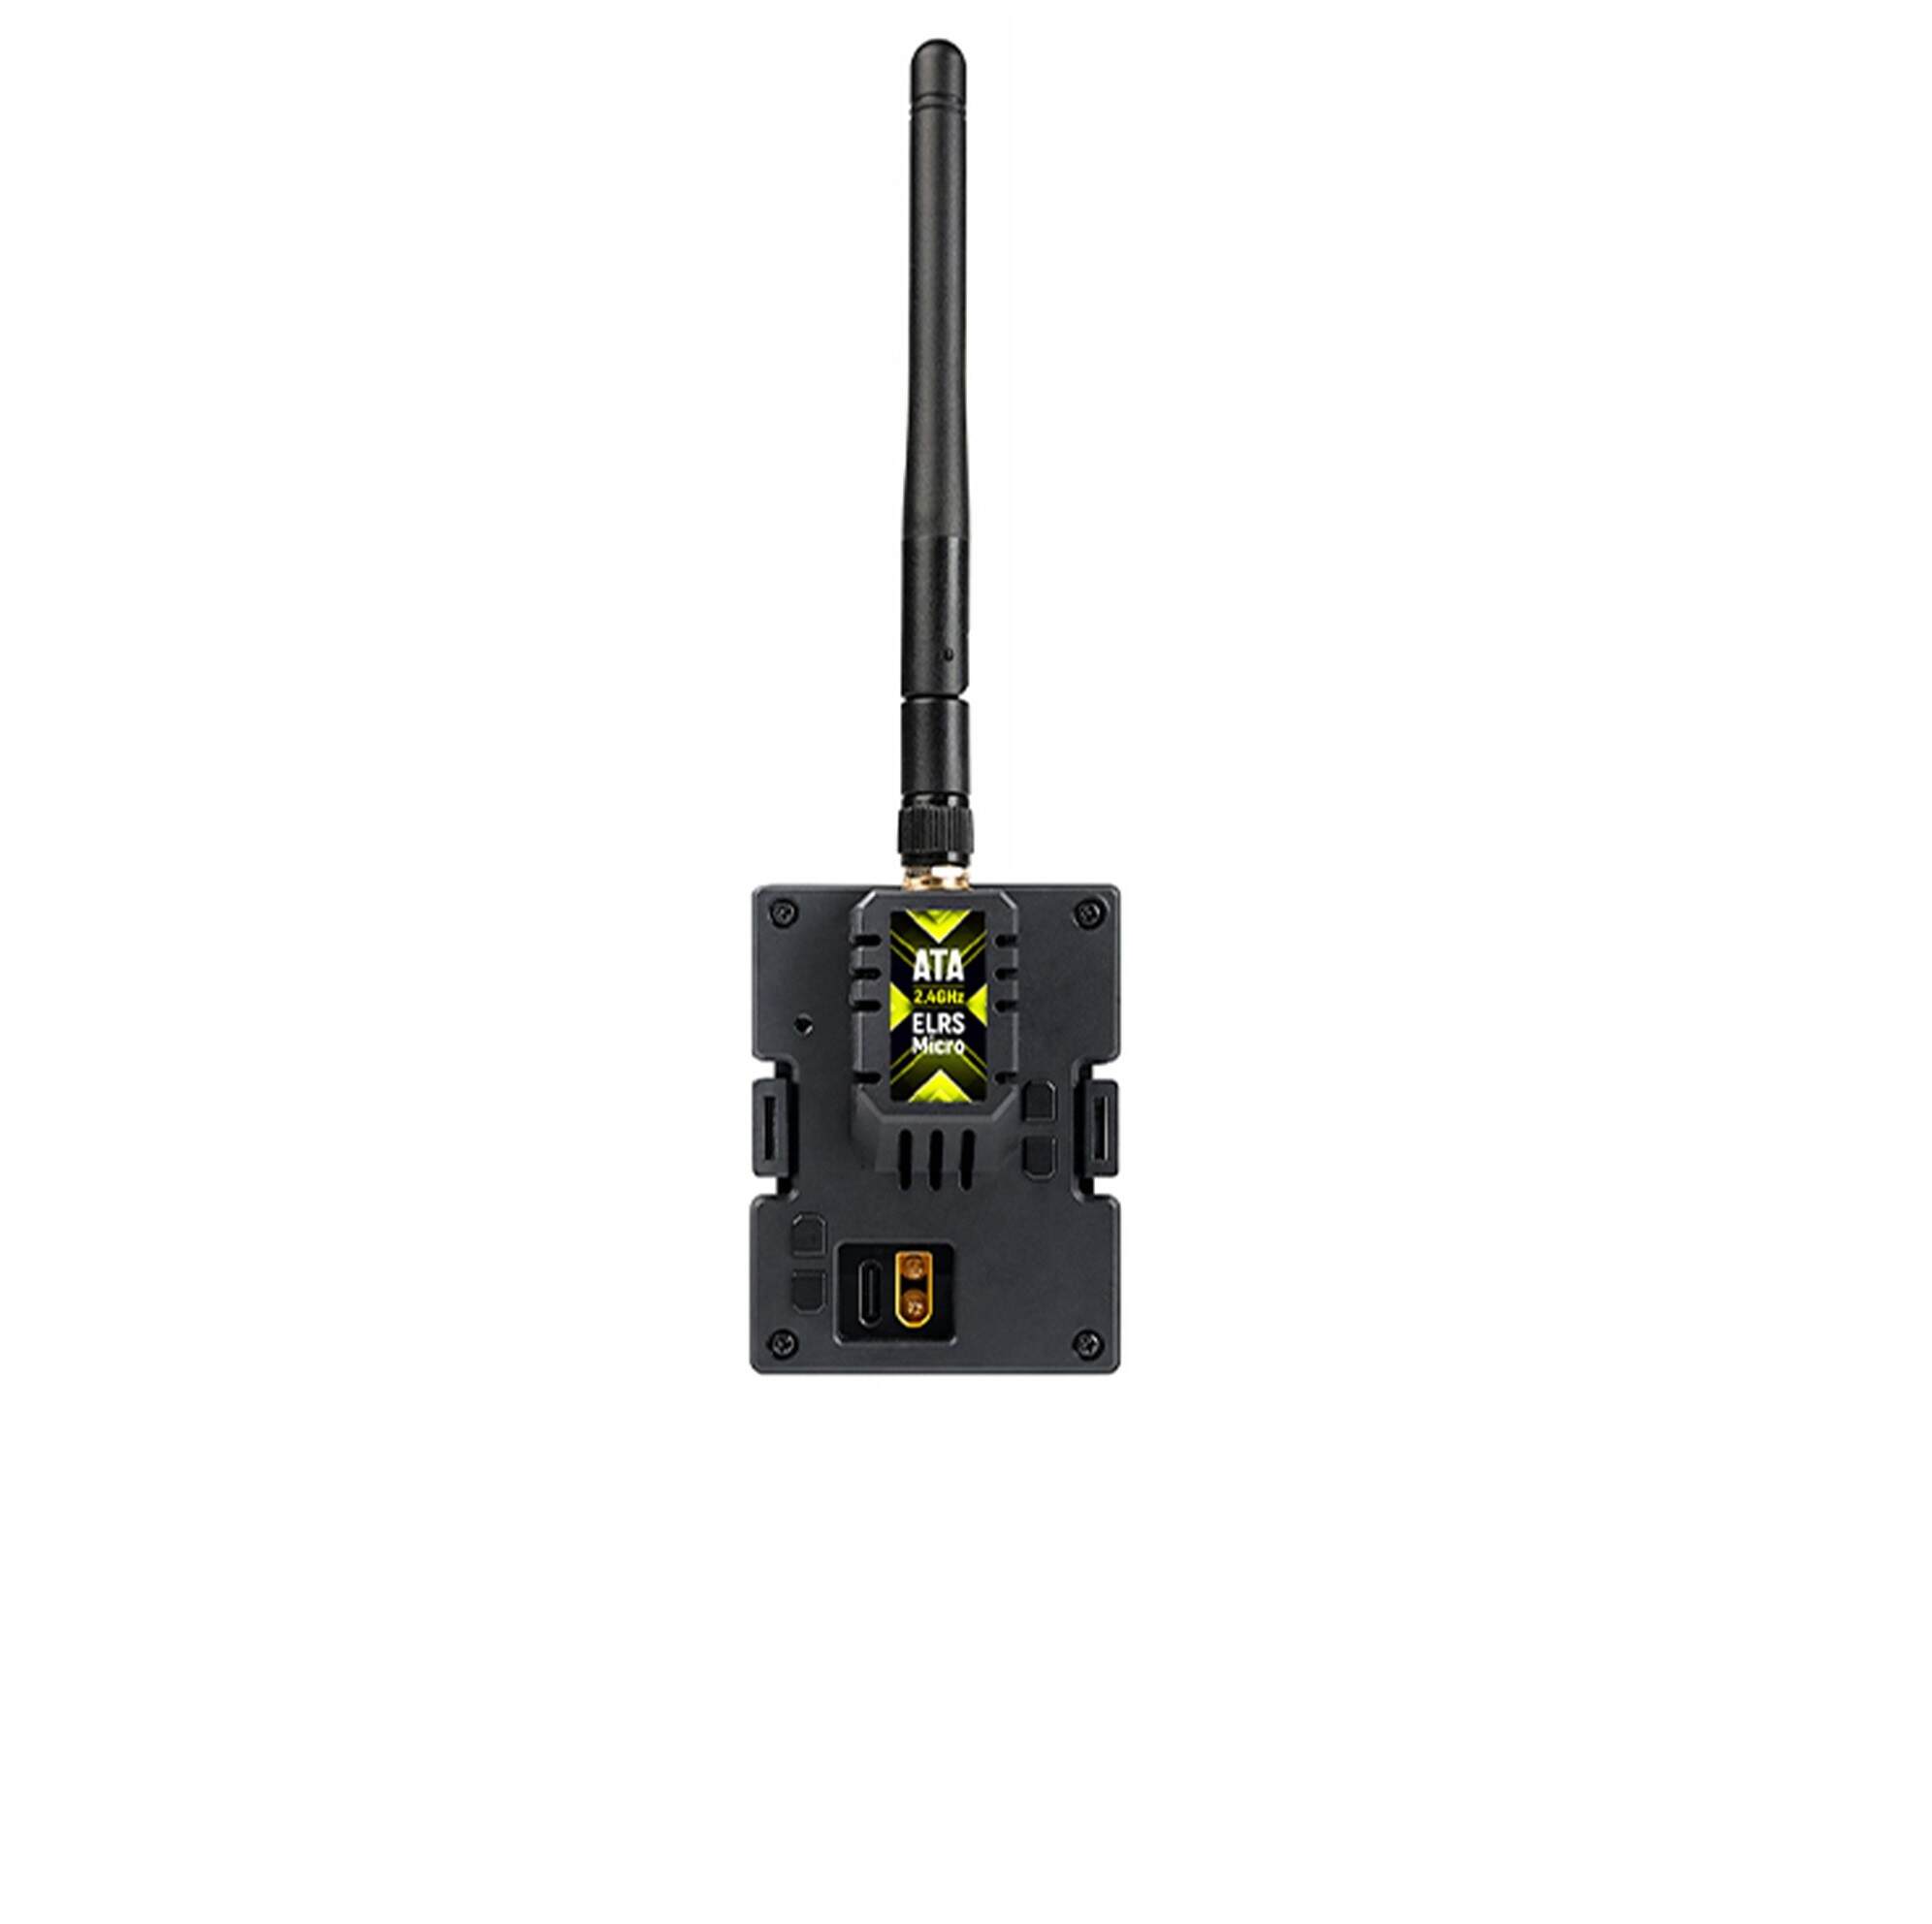
Q: Does AT9/AT9S/AT9S Pro support SIYI module, like FM30?
Q: Does AT9/AT9S/AT9S Pro support SIYI module, like FM30?
A:
1) Check whether the power supply is normal, whether there is insufficient power supply or the battery is inserted backwards.
2) If it can't be turned on after flashing the firmware, please follow the correct steps to flash the firmware again
3)If the power supply is normal and firmware hasn't been flashed, for domestic customers, please return it to the factory for repair; for the foreign customers, please check whether if there is power switch problem. Steps as below:
Short-circuit the two pins in the red box (avoid to connecting the wire in the yellow box), if the transmitter can be turned on after short-circuiting, it means there is a problem on power switch. If you still can't get it to work well, then please feel free to let us know. We will help you timely.
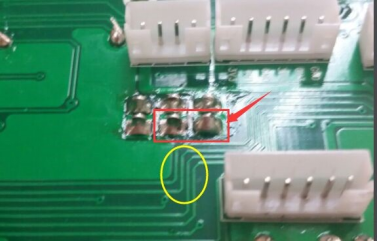
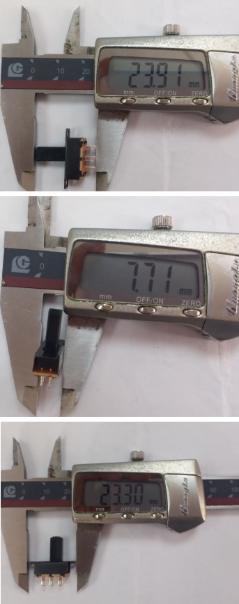
Power switch parameter:Item number SS-22F32
Q: Why AT9/AT9S/AT9S Pro can't be turned on normally?
Q: Why AT9/AT9S/AT9S Pro can't be turned on normally?
A:
1) Check whether the power supply is normal, whether there is insufficient power supply or the battery is inserted backwards.
2) If it can't be turned on after flashing the firmware, please follow the correct steps to flash the firmware again
3)If the power supply is normal and firmware hasn't been flashed, for domestic customers, please return it to the factory for repair; for the foreign customers, please check whether if there is power switch problem. Steps as below:
Short-circuit the two pins in the red box (avoid to connecting the wire in the yellow box), if the transmitter can be turned on after short-circuiting, it means there is a problem on power switch. If you still can't get it to work well, then please feel free to let us know. We will help you timely.
Power switch parameter:Item number SS-22F32


 简体中文
简体中文- English