


 简体中文
简体中文 English
搜索结果建议
快速链接
FAQ
Q: How to update the firmware of RC8X?
Q: How to update the firmware of RC8X?
A: Video tutorial: https://www.youtube.com/watch?v=cUAxwb3nxuw
Q:What receivers are RC8X compatible with?
Q:What receivers are RC8X compatible with?
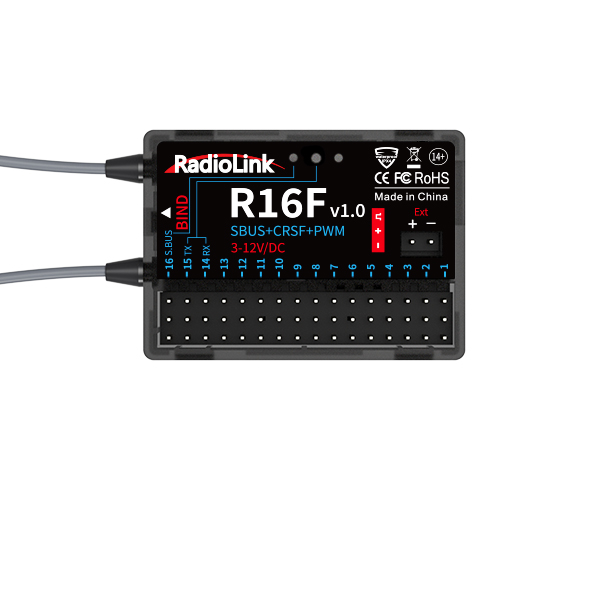
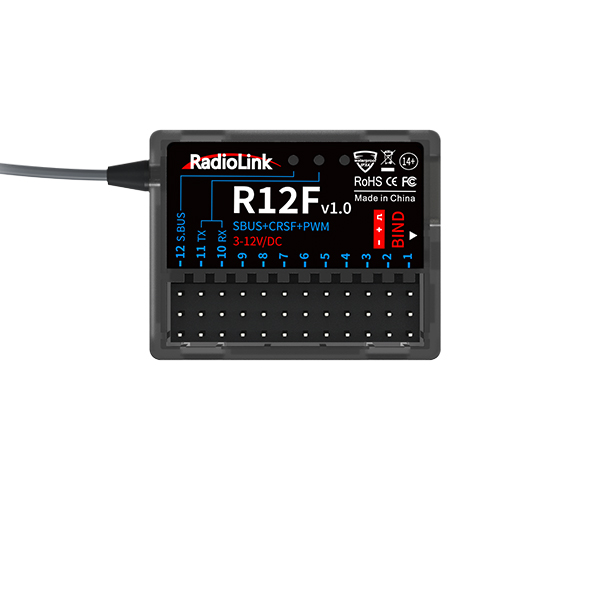
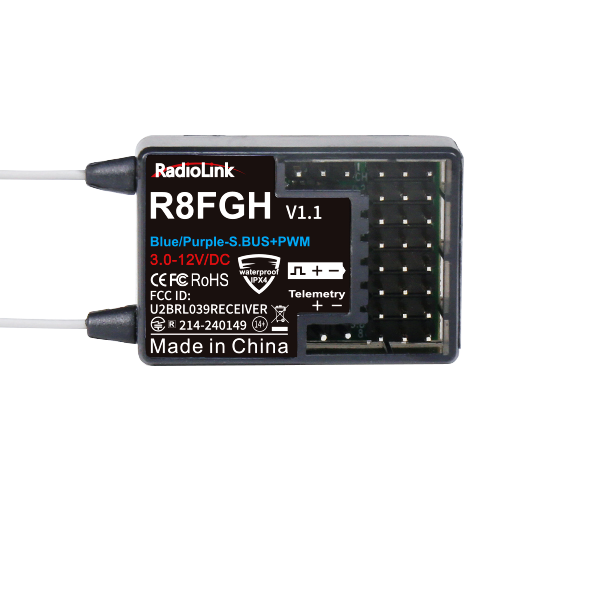
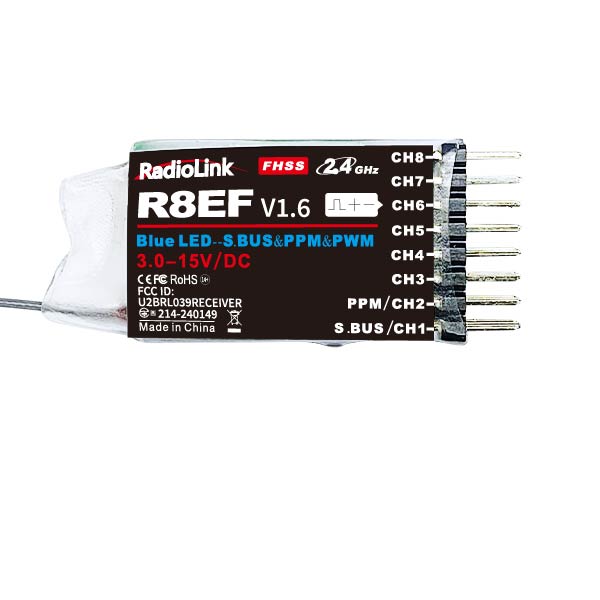
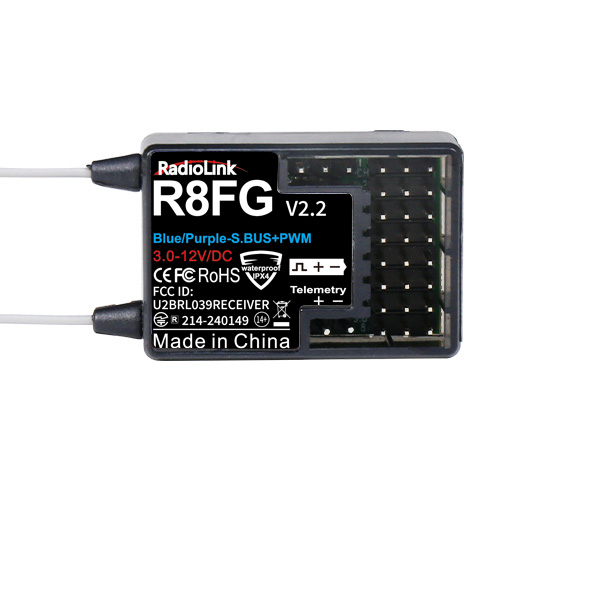
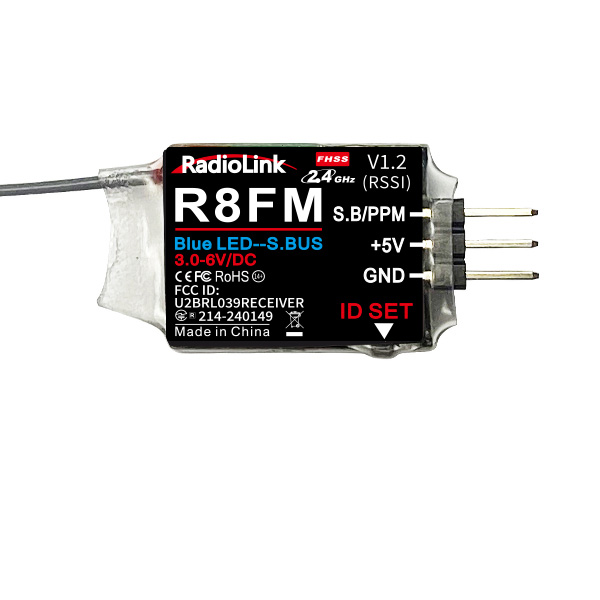
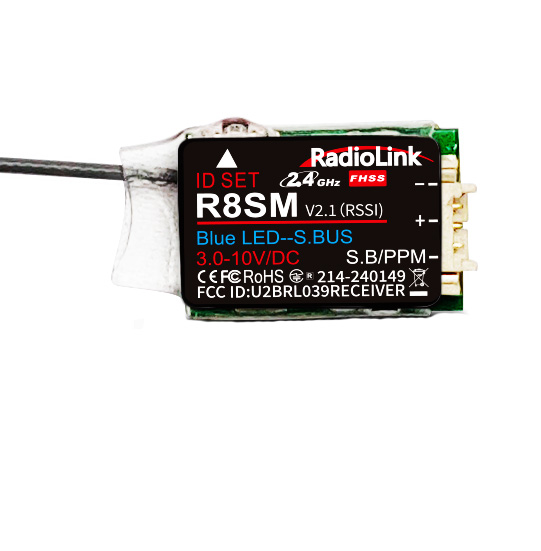
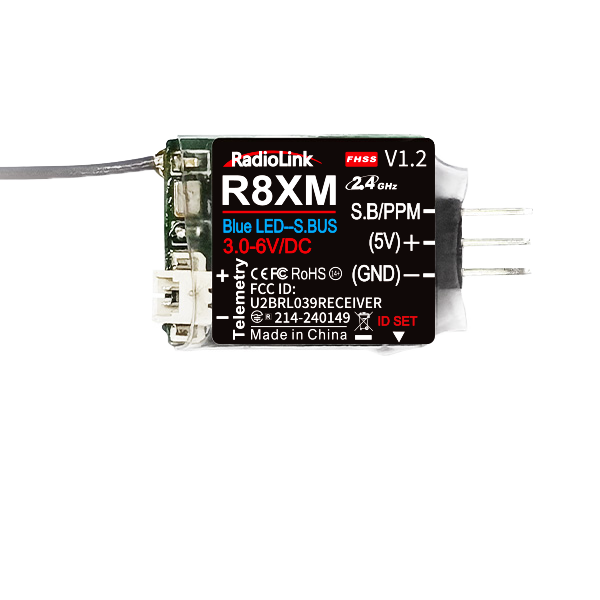
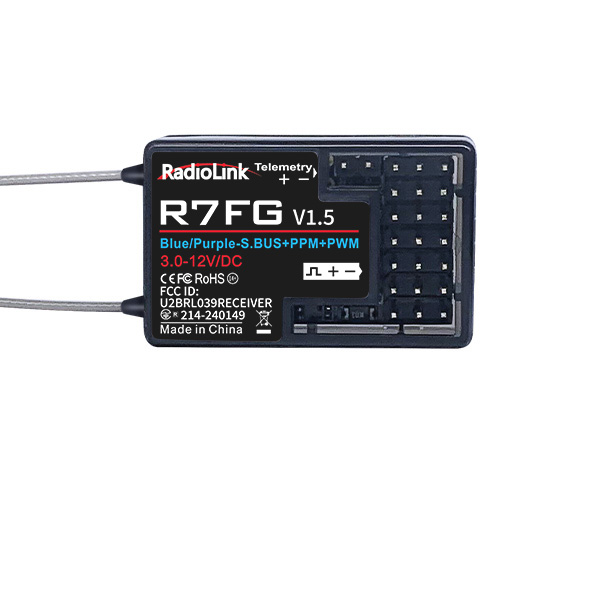
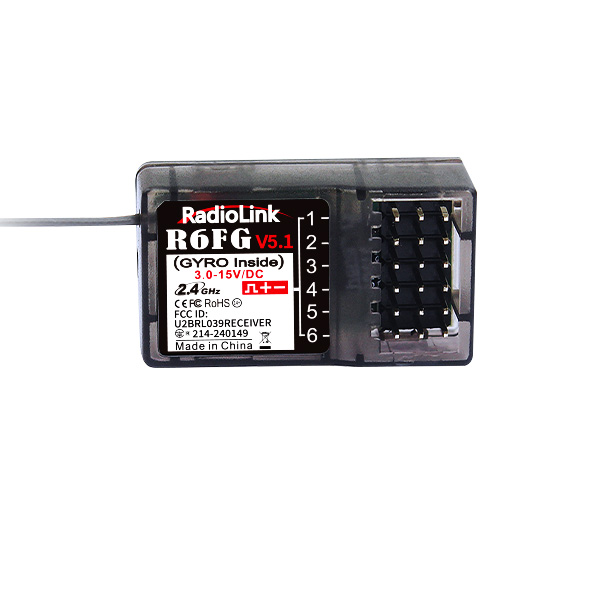
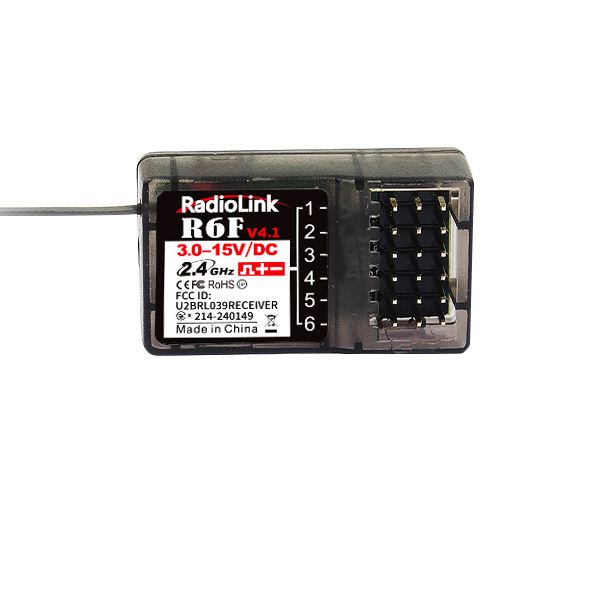
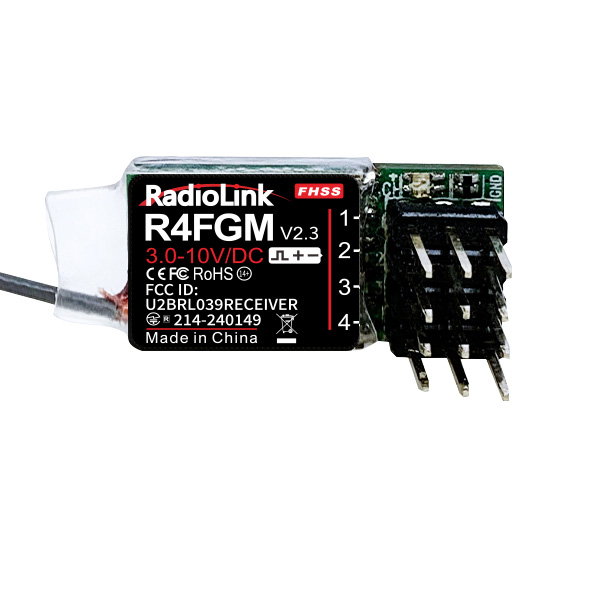
A:R8FG(Standard)/R16F/R12F/R8FGH/R8F/R8EF/R7FG/R6FG/R6F/R4FGM/R4F.
Q: How to bind RC8X to receivers?
Q: How to bind RC8X to receivers?
A: Video tutorial: https://www.youtube.com/watch?v=6dypWw92mWY
Q: How to setup FPV on RC8X?
Q: How to setup FPV on RC8X?
A: Video tutorial: https://www.youtube.com/watch?v=fIBKCq7quLY
Q: Can you introduce the function of R8FG?
Q: Can you introduce the function of R8FG?
A: Video tutorial: https://www.youtube.com/watch?v=uDIiyr9tmYA
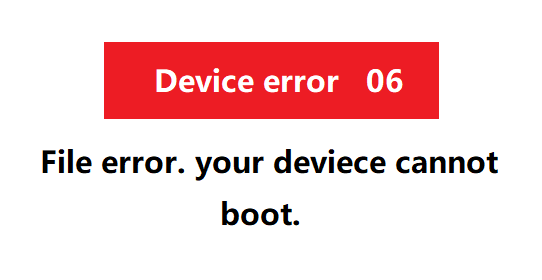
Q: After updating the firmware of RC8X, the screen shows the below Device error 06. How to solve the problem?
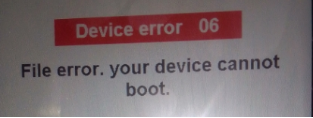
Q: After updating the firmware of RC8X, the screen shows the below Device error 06. How to solve the problem?
If the SD card is in good condition, and the latest firmware has been copied to RC8X-EXT, follow the below instructions:
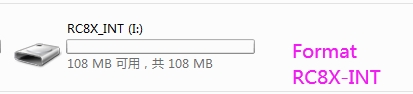
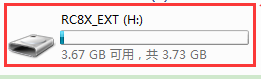
1. Connect RC8X to the computer. There are two files, RC8X-EXT, and RC8X-INT. Please format RC8X-INT.
After formatting RC8X-INT, power off RC8X.
2. Turn on RC8X. The screen will show the below Error. Wait for RC8X to shut off automatically.
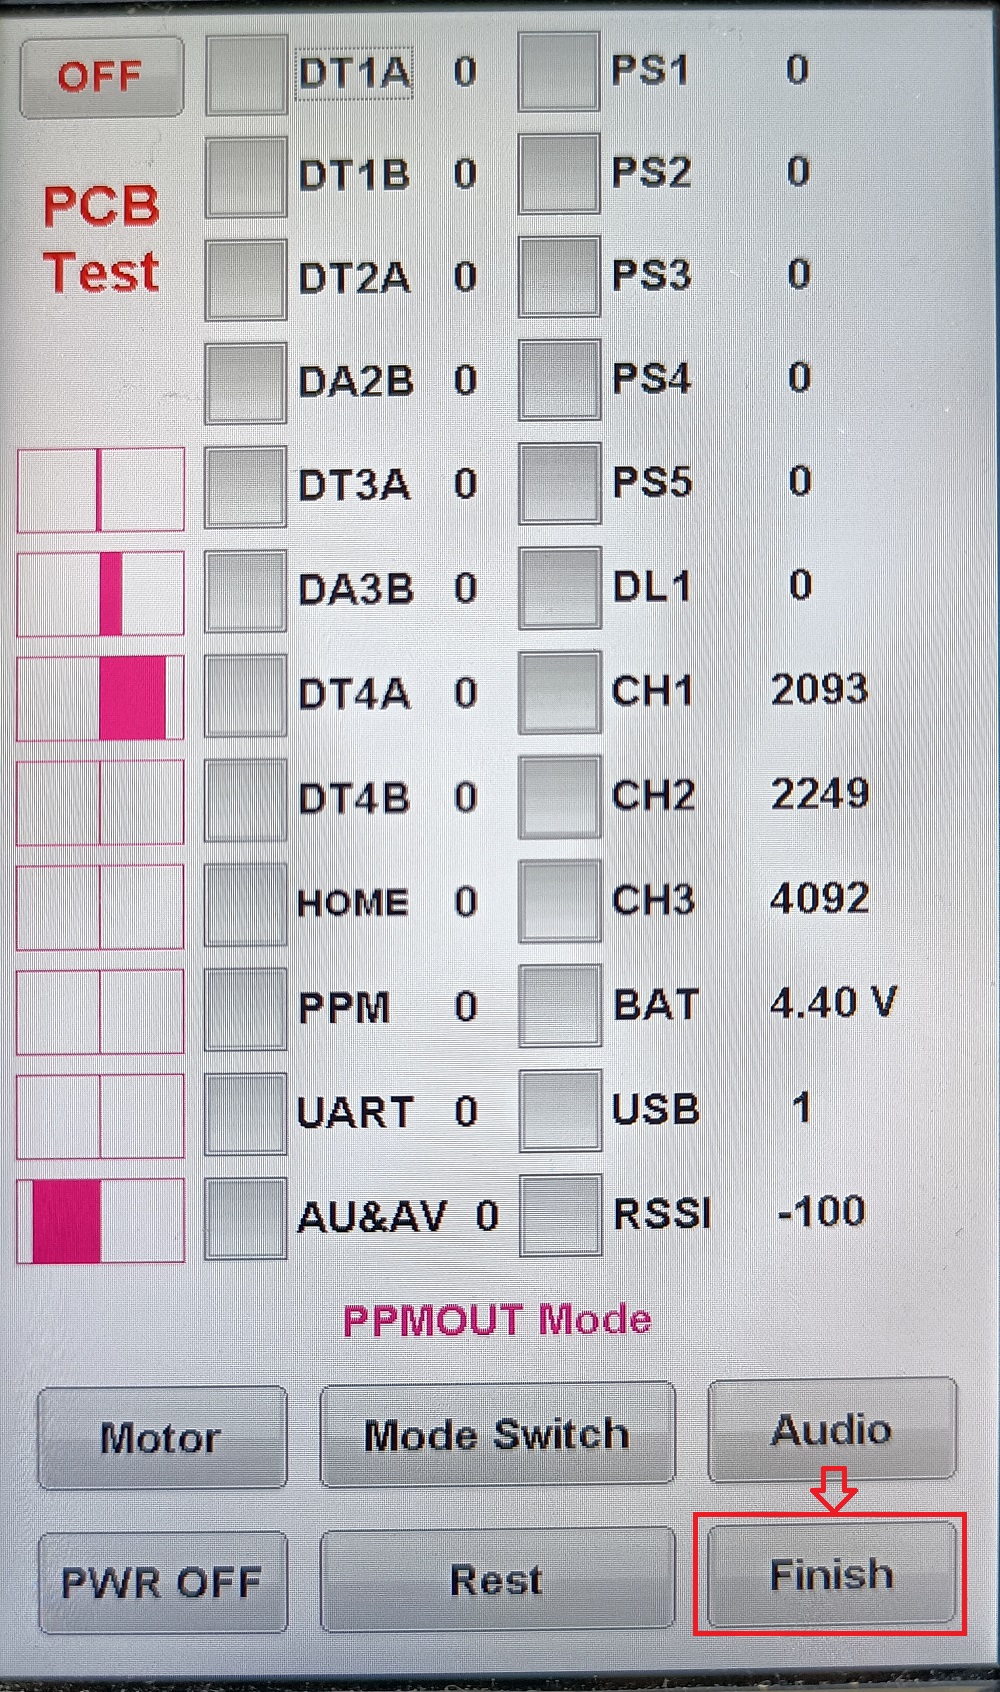
3. Turn on RC8X again. The screen will show the below page. Click Finish several times until RC8X is turned off.

4. Turn on RC8X again. The error will disappear.
Q: The screen of RC8X shows the below Device error 08. How to solve the problem?
Q: The screen of RC8X shows the below Device error 08. How to solve the problem?

A:
1. Connect RC8X to the computer, and enter USB mode. There are two files, RC8X_EXT and RC8X_INT. Please format RC8X_EXT.
2. There are the complete packages and fix packages for RC8X firmware. Please download the complete package of the latest firmware and then copy it to RC8X_EXT.

The link to download the latest firmware of RC8X:
https://www.radiolink.com/rc8x_firmware
3. Update the firmware.
For more details on how to connect RC8X to the computer, enter the USB mode, copy the firmware, and update the firmware, please refer to the below tutorial:
https://www.youtube.com/watch?v=cUAxwb3nxuw
You can also check the detailed manual of RC8X for details on it, which is in Chapter 2.11 Firmware Update
Q: The screen of RC8X shows “SD Card error”. How to solve the problem?
Q: The screen of RC8X shows “SD Card error”. How to solve the problem?
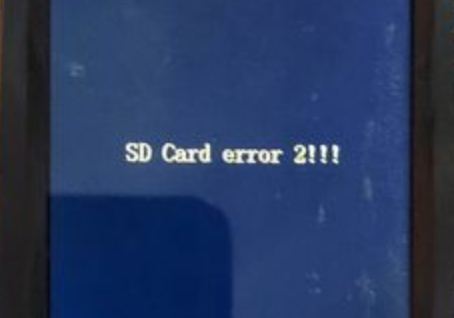
A:
1. Make sure the SD card is in good condition. You can replace a new SD card and update the firmware.
2. There may be something wrong in the firmware update process. Please update the firmware again by following the tutorial in the below link:
https://www.radiolink.com/rc8x_firmware
3. If the error still exists after replacing a new SD card and updating the firmware, the problem may come from the SD card holder or the main board.
Q: The following interface appears on the RC8X screen. How to solve it?
Q: The following interface appears on the RC8X screen. How to solve it?

A:
Click Finish on the lower right corner several times until RC8X is turned off. Then turn on RC8X again. The error will disappear.
If there is still any error after powering on RC8X, please update the firmware again by following the tutorial in the link: https://www.radiolink.com/rc8x_firmware
Q: What is the control distance of RC8X?
Q: What is the control distance of RC8X?
A: 600 meters on the ground, and 500 meters on the water when using R8FG、R7FG,R8F receivers.
Q: What is the size of the battery tray? What battery can I use?
Q: What is the size of the battery tray? What battery can I use?
A:The purchase link of the battery: https://www.aliexpress.us/item/3256802047216624.html
The dimension of the battery tray is 92*52*14.5mm. The JST connector of RC8X can be easily adapted for various battery, including LiPo battery of 2S to 4S, or 8 pieces of AAA batteries, or a 6S Ni-MH battery. The voltage range is 7V to 17V DC.
7.4V 1700mAh lithium battery customized according to the size of the RC8X battery compartment, the standby time is about 7 hours. The purchase link of the battery: https://www.aliexpress.us/item/3256802047216624.html
RC8X also can powered by computer or mobile power bank via Type-C cable. If your RC8X is powered by computer or mobile power bank via Type-C cable, please make sure the input voltage do not higher than 5.5V.
Q: Is there 3-position switch on RC8X?
Q: Is there 3-position switch on RC8X?
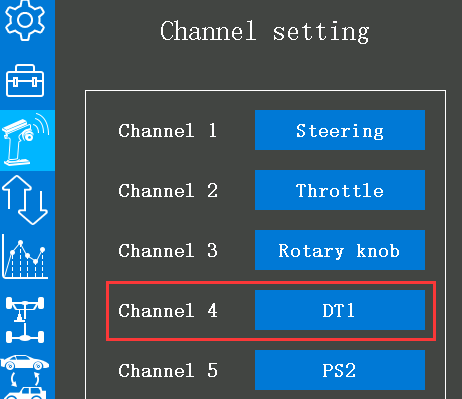
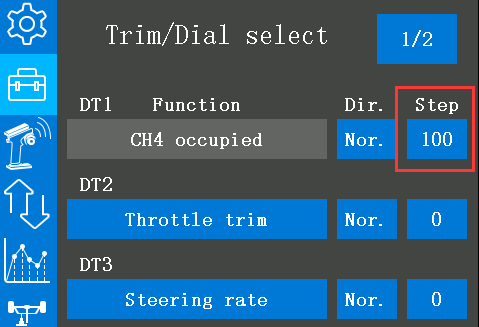
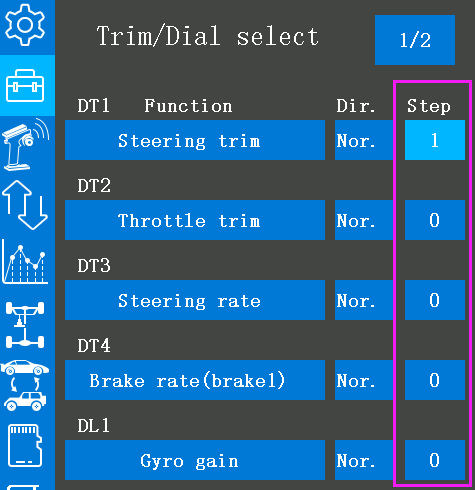
A: Yes. The four DT buttons can also be used as four 3-position switches by setting. The setting method is as follows:
1. Select any DT button for the channel to be set in the "Channel Setting" menu (Take Channel 4, DT1 as an example);
2. Enter the "Trim/Dial select" menu, and set the step of the corresponding DT button to 100, so that every time the DT button is toggled, the travel amount will go directly to 100. You can also set different values according to your needs.
3. After setting, the DT button can be used as a 3-position switch. Return to the home page and toggle the corresponding DT button to check the servo display.
Q: Is there 2 position switch on RC8X?
Q: Is there 2 position switch on RC8X?
A: Yes. PS1, PS2, PS3, PS4, PS5, Steering switch, and Trigger switch can be used as 2 position switches by setting. The setting method is as follows:
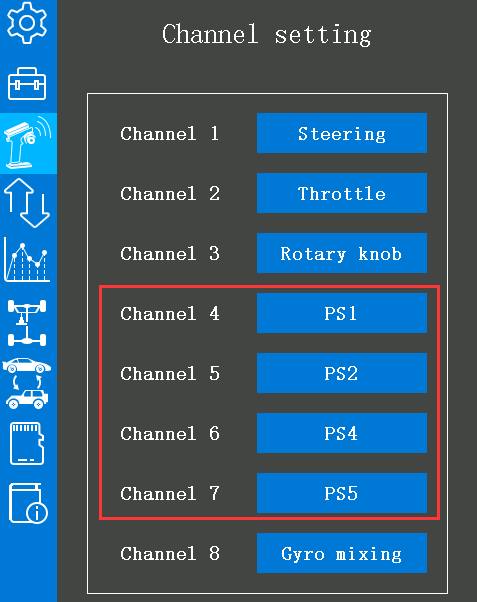
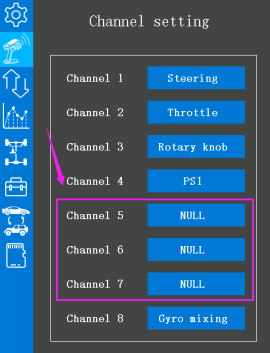
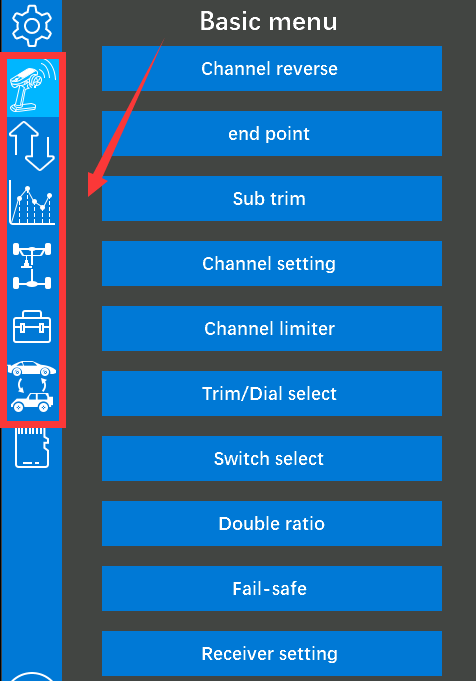
1. Select any one of the PS1/PS2/PS3/PS4/PS5/Steering switch/Trigger switches for the channel to be set in the "Channel Setting" menu (The switches of channel 4 to channel 7 are PS1/ PS2/PS4 /PS5 by default, see picture below);
2. Enter the "Switch select" menu, and set the “Type” of the corresponding switch to “lock”, so that when you press the switch once, the channel output will jump from the initial value to the maximum value (or minimum value); press the switch again, the channel output will jump to the minimum value (or maximum value).
3. After setting, the switch can be used as a 2-position switch. Return to the home page and press the corresponding switch to check the servo display.
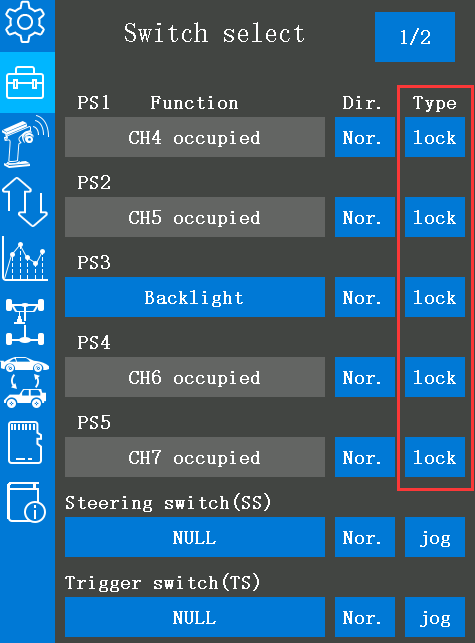
Note: If you set the “Type” of the switch to “jog”, the value will reach the maximum (or the minimum) when pressing the switch, and back to the original value when loosen. For example: if the “Type” of PS1 is “jog”, the servo value will reach +100 when pressing PS1 and will back to -100 when loosen. For more details on the switch setting, please refer to the user manual 2.2.2 Switch Select.
Q: How to test RSSI with RC8X transmitter and Receivers?
Q: How to test RSSI with RC8X transmitter and Receivers?
A: Video tutorial: https://www.youtube.com/watch?v=RA0NasTZS90
Q: How to change the home screen wallpaper of RC8X?
Q: How to change the home screen wallpaper of RC8X?
A: Video tutorial: https://www.youtube.com/watch?v=k2BCKLvqfLw
Q: Why the signal is lost when RC8X transmitter is too close to the model?
Q: Why the signal is lost when RC8X transmitter is too close to the model?
A: Video tutorial: https://www.youtube.com/watch?v=0hWwRhiDdZE
Q: How to install the receiver antenna?
Q: How to install the receiver antenna?
A: Video tutorial: https://www.youtube.com/watch?v=-e1XzRnMnhs
Q: Can the RC8X be left-handed?
Q: Can the RC8X be left-handed?
A: Yes, the wheel on the right of RC8X can be modified to the left, and there are 2 PS2 and PS5 buttons on the left and right sides of the handle, which is designed for both left and right users. For modifying for left-hand use, please refer to Chapter 2.10 Modifying for Left-hand Use in the user manual.
Here is the tutorial to show how to change the wheel of RC8X from the right to left:
https://www.youtube.com/watch?v=ULw-8ui4Bco
Q: Can RC8X play video?
Q: Can RC8X play video?
A: NO.
Q: What is the response rate of RC8X?
Q: What is the response rate of RC8X?
A: 66Hz.
Q: What languages are the RC8X's menus in?
Q: What languages are the RC8X's menus in?
A: The menu interface is available in multiple languages, including Simplified Chinese, Traditional Chinese, English, Japanese, Spanish, German, Russian, French, Korean, and Polish. Other languages are in the process of being added, which can be available by upgrading the firmware in the future.
Q: Does RC8X come with a memory card?
Q: Does RC8X come with a memory card?
A: Yes, RC8X comes with a 32G memory card. The maximum extended memory can be up to 64G.
Note: RC8X cannot work without an SD card inserted.
Q: Does RC8X support digital image transmission?
Q: Does RC8X support digital image transmission?
A: NO.
Q: Can the Type-C port of RC8X be used to charge the battery?
Q: Can the Type-C port of RC8X be used to charge the battery?
A: No. The USB Type-C port of RC8X can be used to update firmware, copy data, and supply power to the 5.8G image transmission module, and temporarily supply power to RC8X. When the battery of RC8X is dead or the simulator is used, you can connect the power supply device such as a mobile power bank or a computer to the USB Type-C port to supply 5V power to RC8X, and then long press the home button to power on RC8X.
Note:
1. When the USB Type-C port is used to supply power to RC8X, please make sure the battery in the battery tray is removed to avoid over-discharging.
2. The maximum input voltage of the RC8X Type-C port is 5.5V.
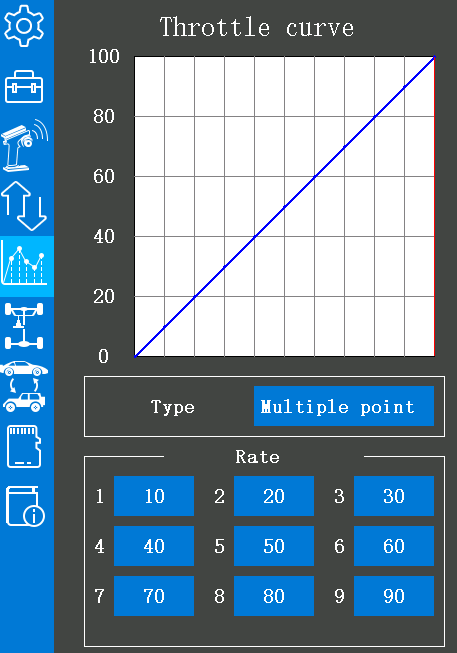
Q: How many points can the RC8X throttle curve support at most?
Q: How many points can the RC8X throttle curve support at most?
A: Throttle curve of RC8X supports 9 points curves
.
Q: What is the minimum adjustment step of RC8X steering trim?
Q: What is the minimum adjustment step of RC8X steering trim?
A: Minimum adjustment step of RC8X trim is 1.
Q: How to control the travel amount of RC8X with one switch?
Q: How to control the travel amount of RC8X with one switch?
A: The travel amount of RC8X can be controlled by setting End point or Double ratio.
For end point function, the left and right sides of each channel can be adjusted independently, and the travel can be increased or reduced.
For the Double ratio, the travel on both sides of each channel will be adjusted simultaneously, and it can only be reduced (Please update the firmware to V1.1.0 or above).
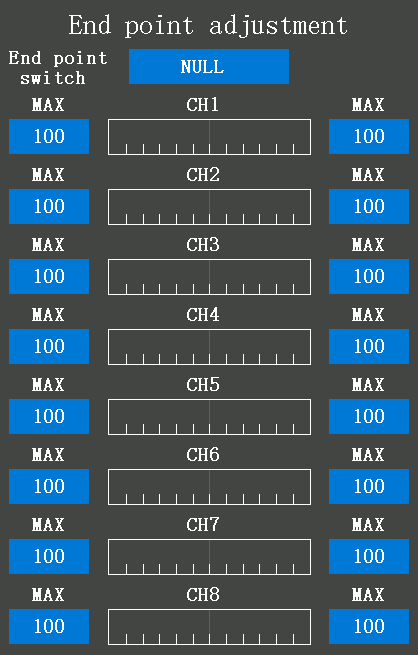
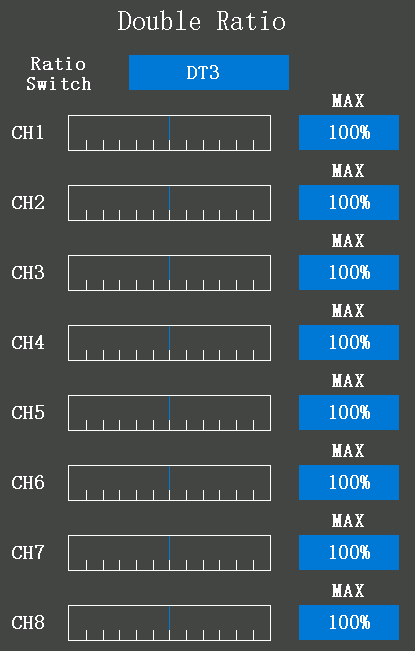
Here is a tutorial of Double Ratio and End point function of RC8X:
https://www.youtube.com/watch?v=m00C4pvAyfI
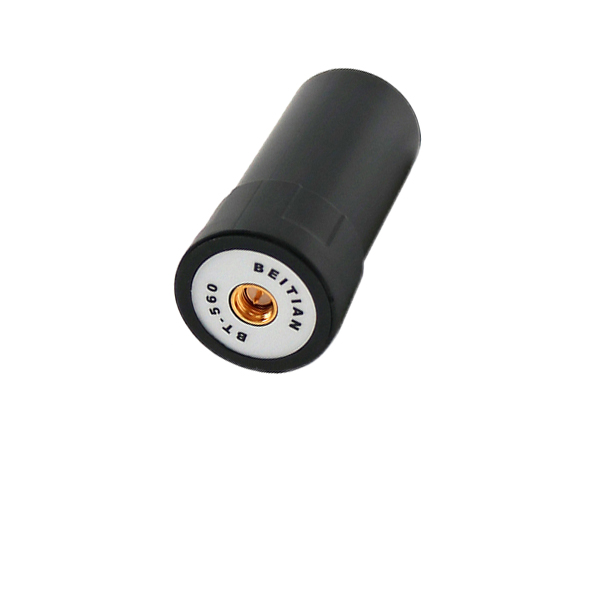
Q: Can RC8X control cars/boats with metal or carbon casing?
Q: Can RC8X control cars/boats with metal or carbon casing?
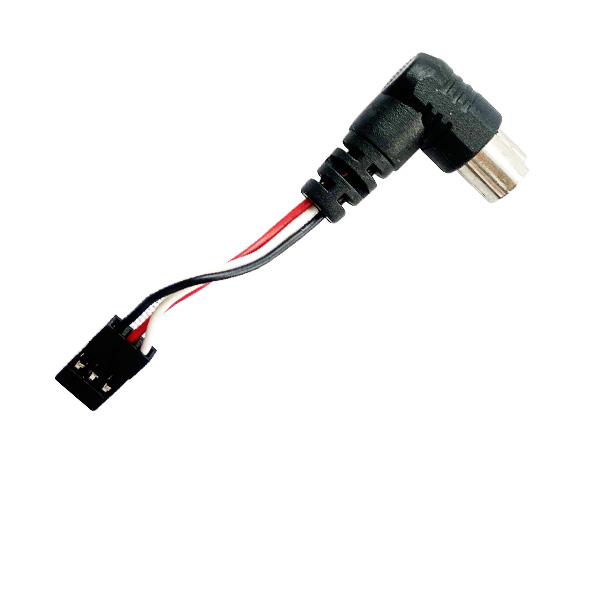
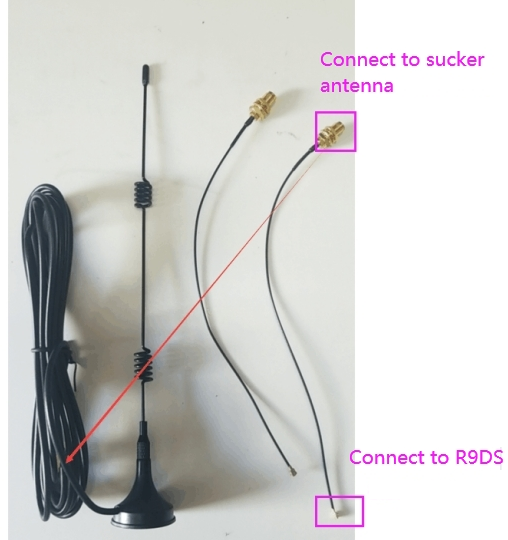
A: If the R8FG receiver needs to be installed in a car/boat with a full metal casing, it is recommended to use an IPEX to SAM with a sucker antenna. The antenna needs to be drawn out, because if the receiver antenna is enclosed in a metal shell, the metal material will weaken the signal of the receiver, thereby affecting the control distance.
The antenna connector of the R8FG receiver is IPEX. Make sure the sucker antenna has the IPEX connector. Please refer to the picture below:
Q: How to connect RC8X to TBS Crossfire?
Q: How to connect RC8X to TBS Crossfire?
A: Please follow the tutorial:
https://www.youtube.com/watch?v=W_5y_OxVn2o
Q: How to save model data on RC8X and paste it into another RC8X?
Q: How to save model data on RC8X and paste it into another RC8X?
A: Model data and system settings of RC8X can be saved and then pasted into another RC8X.
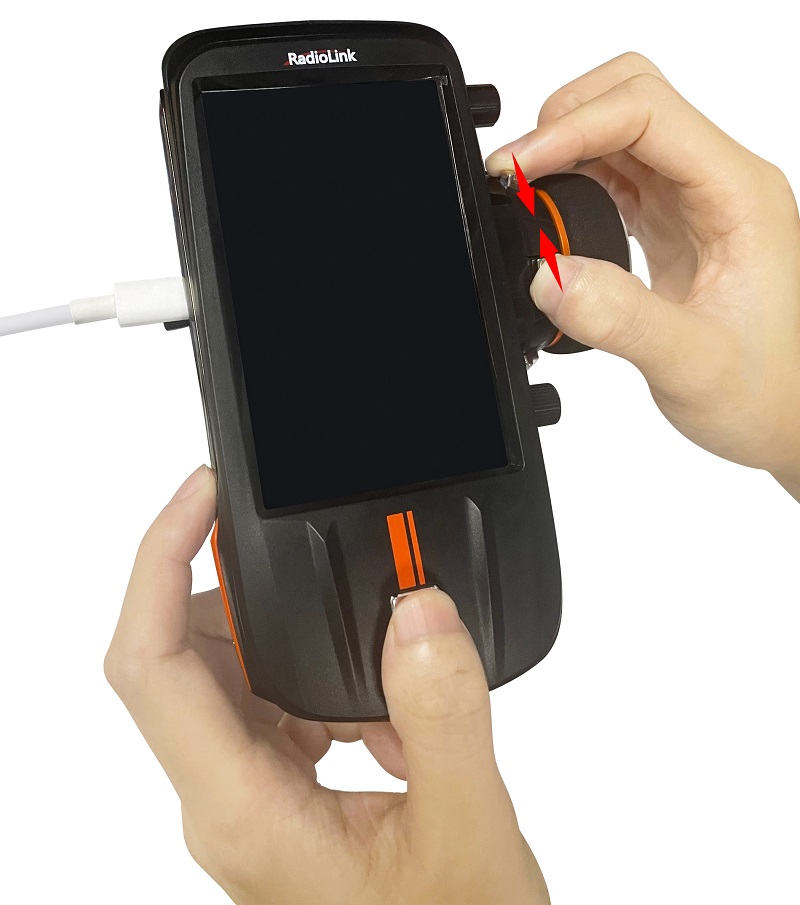
1)keep the RC8X off,
2)use a USB cable (type-c) to connect the RC8X to the computer.
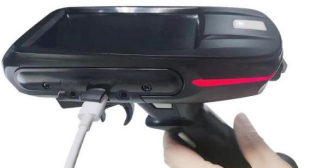
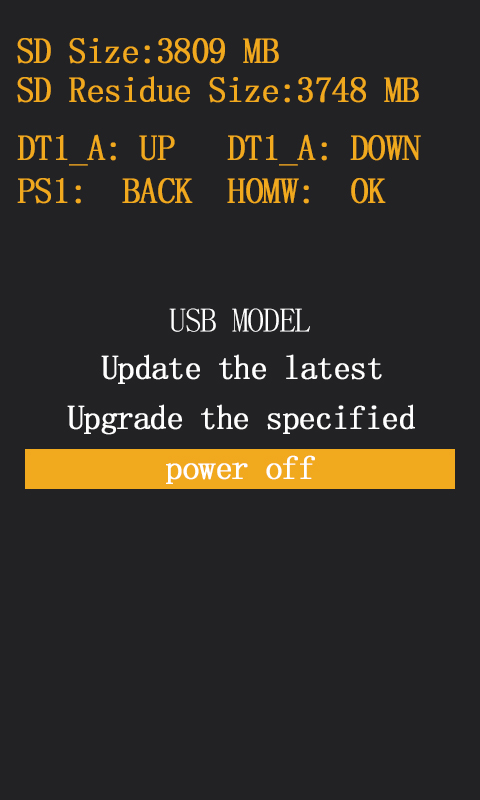
3)Push the DT1 and DT2 TRIM buttons to the middle position, and long press the power button at the same time to enter into the data copy and upgrade mode. The following four options will appear on the screen, and "USB MODE" is selected by default.
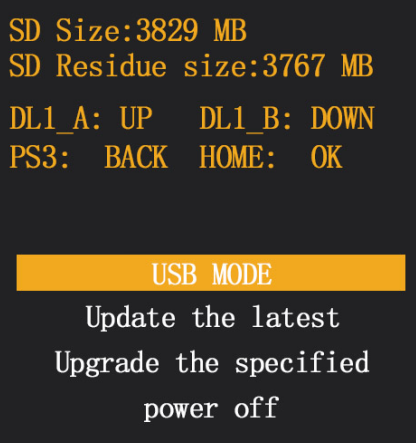
4)Short press the "power button" to enter the USB mode. The computer usually displays two removable disks. RC8X_EXT refers to the SD card, and RC8X_INT refers to RC8X. Model data and system settings are in the RC8X_INT disk.
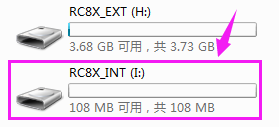
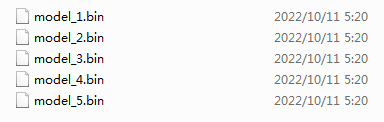
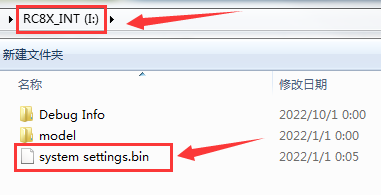
5)Open RC8X_INT, there are the following 2 files. model folder refers to model data, and system settings.bin refers to system settings. Both files can be copied directly.

Double-click to open the model folder. There is a bin file of each model. You can copy any model data individually.
For a video tutorial on how to copy the file of RC8X, you can refer to the link here:
https://www.youtube.com/watch?v=cUAxwb3nxuw
Q: The steering works on RC8X, but there is no throttle response. Why?
Q: The steering works on RC8X, but there is no throttle response. Why?
A:
1. Calibrate RC8X.
2. Calibrate ESC with RC8X. For the ESC calibration method, please check the detailed manual ESC.
Q: There is only Chinese available for my RC8X in the language setting. It cannot be set in English. Why?
Q: There is only Chinese available for my RC8X in the language setting. It cannot be set in English. Why?
A: There are two versions of RC8X, including the Chinese version and a multi-language version. RC8X Chinese version only supports Chinese in language selection, while RC8X multi-language version supports English and many other languages.
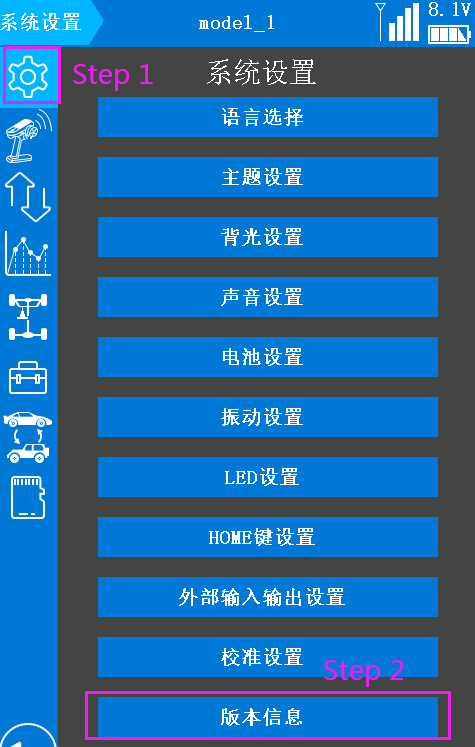
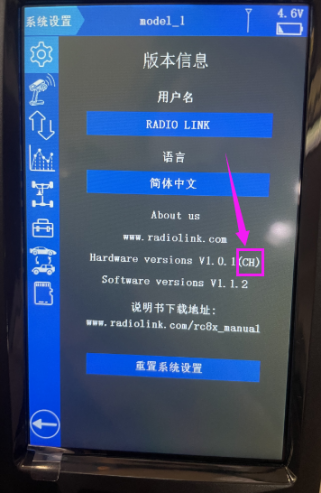
How to distinguish whether it is RC8X Chinese version or a multi-language version?
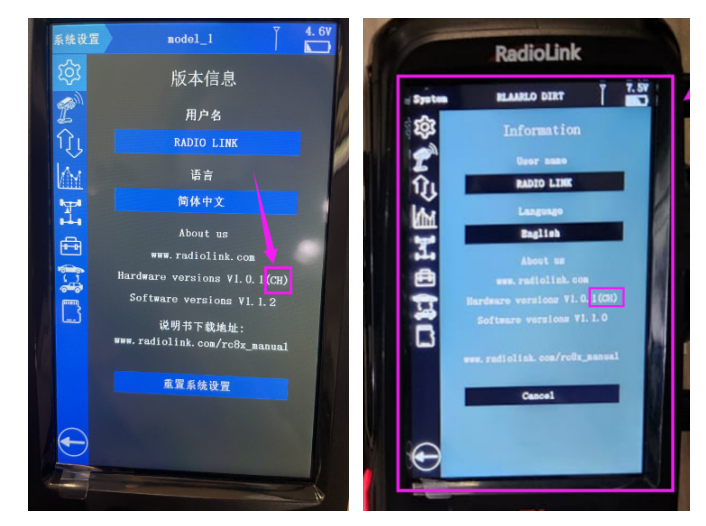
Enter System menu-- Information, as shown below:
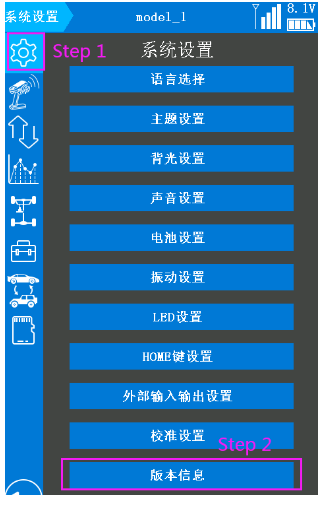
Check the hardware version of RC8X. If the hardware version shows “(CH)”, it is the RC8X Chinese version, which only supports Chinese. If there is no “(CH)” in the hardware version, it is RC8X multi-language version, which supports English and many other languages.
Q: How to select the protocol in the menu “Receiver setting”? Is it V1 or V2 protocol?
Q: How to select the protocol in the menu “Receiver setting”? Is it V1 or V2 protocol?
A: FHSS V1 receivers have a PWM output resolution of 2048, and FHSS V2 receivers have a PWM output resolution of 4096. The higher the resolution, the more delicate the angle of servo motion.
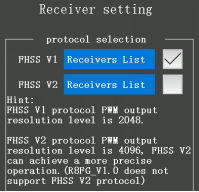
You can click "Receivers List" to check whether the receiver you are currently using belongs to this list. If yes, please click the box on the right to confirm the current receiver type. If not, please do not select this list.
If the receiver list selected here does not include the receiver model you are actually using, the binding may not be successful. For example, if you are using the RC8X with an R7FG receiver, you need to select FHSS V1 to match the code. If FHSS V2 is selected, the binding will not be successful.
Attention: RC8X comes with an R8FG receiver. R8FG V1.0 (production date before Feb. 6, 2023) only supports FHSS V1 protocol, not FHSS V2 protocol; R8FG V2.0 (production date on or after Feb. 6, 2023) supports both FHSS V1 and FHSS V2 protocols. Before operating the model, please make sure the protocol of the receiver is selected correctly, otherwise, some functions will not work properly.
Q: Does EC8X support customized font?
Q: Does EC8X support customized font?
A: NO.
Q:Does RC8X support head track function?
Q:Does RC8X support head track function?
A:Yes. Both 2 axis and 3 axis head track are supported. Set Multi-protocol output mode to PPM_IN. Refer to chapter 2.1.9 External input output in the manual. And you can also check the below tutorial on how to connect DJI goggles to RC8X:
https://www.youtube.com/watch?v=XD9ycqagQeo
Here are some notices when using head track function on RC8X:
1. Generally, you need to set "NULL" in "Channel setting" for the head track channels. For example, if the head track device is connected to channel 5, channel 6, and channel 7, you can set "NULL" for channel 5, channel 6, and channel 7 (see picture below).
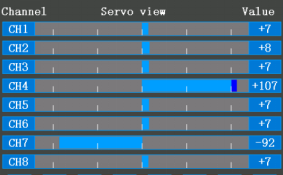
2. Because of the compatibility of different head track devices, there may be trim value added for each channel after successful connection of the goggles(see picture below):
Please adjust the below PPM value in "External input output" to meet the requirements of compatibility.
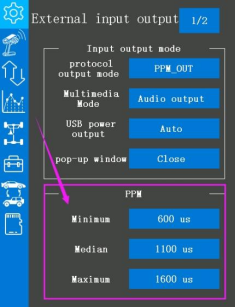
Please adjust the median value first to make the trim near 0.
Then please adjust the minimum to make the largest travel near -100%.
And finally adjust the maximum to make the largest travel near +100%.
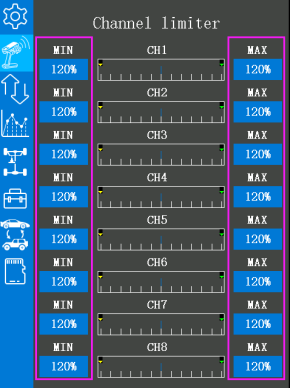
If the largest travel of this channel exceed +100%, you can set the MAX value in Channel limiter to 100%.
Q: The USB port of RC8X can be used to temporarily supply power to RC8X. Is there any requirement for the voltage of the power supply?
Q: The USB port of RC8X can be used to temporarily supply power to RC8X. Is there any requirement for the voltage of the power supply?
A: Users can connect RC8X to a computer or power bank through a type-C cable to temporarily power RC8X. The USB port of RC8X supports an input voltage of 4.5-5.5V, so please ensure that the voltage of the power supply meets the requirements. If the voltage of the power supply exceeds 5.5V , it may damage RC8X.
Q: How to connect the ELRS module to RC8X?
Q: How to connect the ELRS module to RC8X?
A:
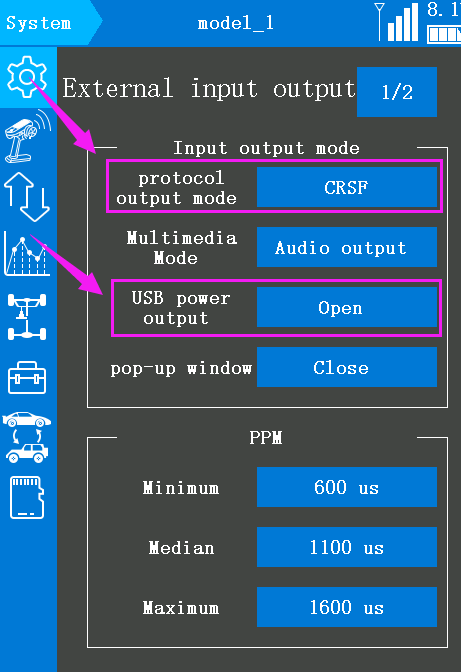
1. First set the protocol output mode in "External input output" to "CRSF";
2. Then set "USB power output" to "Open"
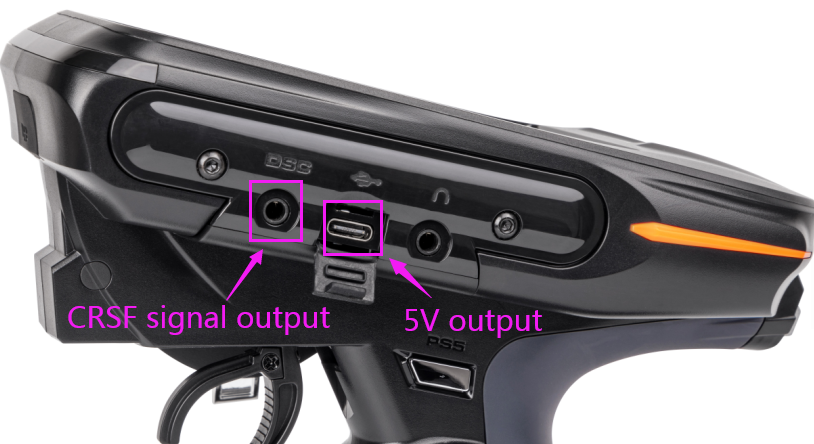
3. Connect the signal line of ELRS to the DSC port of RC8X;
4. Supply power to the ELRS module.
Notice:
1. If you want to use the Type-C port (5V output) of RC8X to power the ELRS module, you need to purchase a 5V boost module separately to power the ELRS module.
2. If you use RC8X to supply power to the ELRS module, in order not to affect the normal work of RC8X, please do not continue to use RC8X to supply power to the ELRS module when the voltage of RC8X is lower than 7V.
Q:How to reset RC8X transmitter?
Q:How to reset RC8X transmitter?
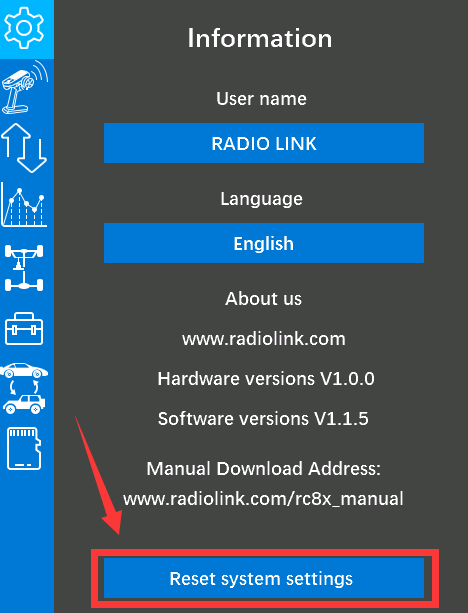
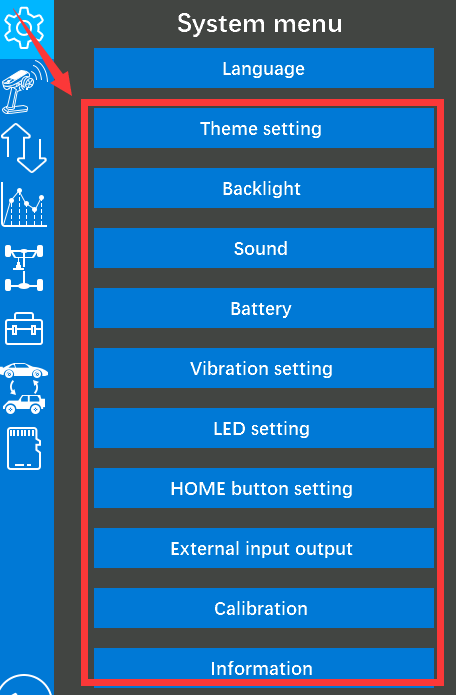
A: You can reset RC8X in the below menu.
(1) System menu--Information--Reset system settings
The "Reset system settings" button can reset various parameters in the system menu, such as theme, backlight, sound, battery, etc.
NOTE: "Reset system settings" will not change the selected menu language.
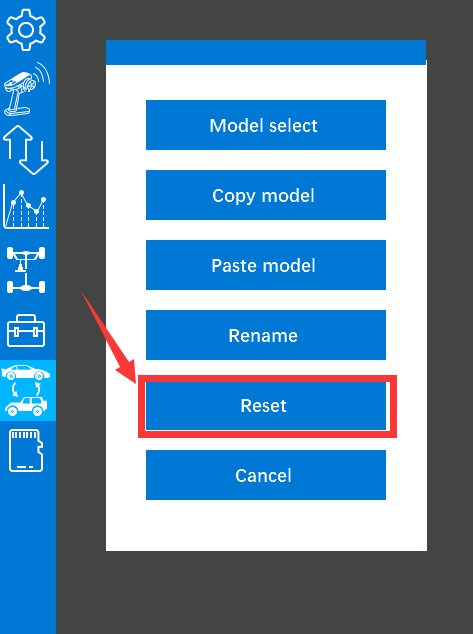
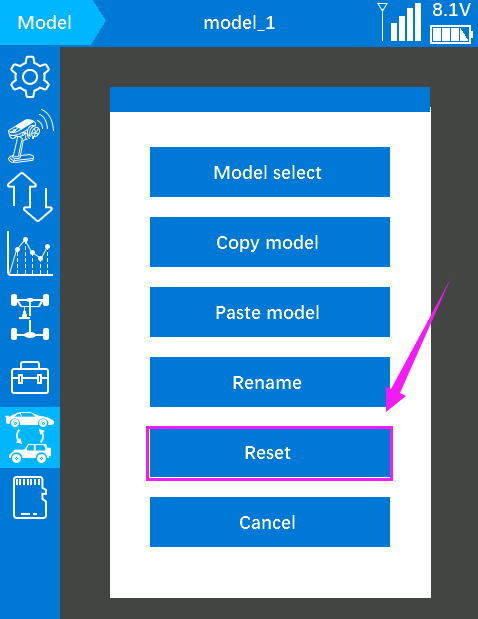
(2) Model select--Reset
"Reset" in Model select can reset the setting parameters of the current model, including the Basic menu, Telemetry setting, Racing menu, Mixing setting, and Tool menu.
Q: When setting the theme, the color of the theme and text are accidentally changed into the same color, resulting in no text being visible on the screen. How should I restore the initial settings?
Q: When setting the theme, the color of the theme and text are accidentally changed into the same color, resulting in no text being visible on the screen. How should I restore the initial settings?
A: When choosing a theme, pay attention to avoiding the same color setting of the theme and text. If you accidentally set it to the same color, you can solve it in two ways:
1. Refer to the video.
2. You can also contact after-sales (Email: after_service@radiolink.com.cn) to obtain a copy of the RC8X default system settings document system settings.bin, then connect the RC8X to the computer and replace the system settings.bin in RC8X_INT with the default system settings.bin.
Q:The telemetry voltage displayed on the screen of the transmitter is less than voltage actually measured. Is that normal?
Q:The telemetry voltage displayed on the screen of the transmitter is less than voltage actually measured. Is that normal?
A: Make sure to test the battery voltage by multi-meter. Because the voltage tested by other voltage test equipment is not accurate. 0.1V difference between the telemetry voltage and the real voltage is normal. If the difference is more than 0.1V, calibrate the voltage of the multi-meter and check the difference again.
Q: How to adjust the power of the steering and throttle?
Q: How to adjust the power of the steering and throttle?
A:
1. You can set Channel Delay in the Basic menu or set Steering delay and Throttle delay in the Racing menu to slow down the speed of throttle and steering. Here is the tutorial on Throttle delay (similar to Steering delay):
https://www.youtube.com/watch?v=6r8rWS79ups
2. You can also set the endpoint or Double Ratio in RC8X to adjust the travel of steering and throttle. Here are the tutorials:
Double Ratio and endpoint tutorial: https://www.youtube.com/watch?v=m00C4pvAyfI
Q: I use the transmitter to run a winch and LED lights. They cannot be turned off. Why?
Q: I use the transmitter to run a winch and LED lights. They cannot be turned off. Why?
A: Please make sure there are control boards for the winch and LED lights. If they have no control board, please contact the producer or search the control board online.
Here is a tutorial on it:
https://www.youtube.com/watch?v=oEEy_HxCZWU
Q: Can the head track function and TBS Crossfire module be used at the same time?
Q: Can the head track function and TBS Crossfire module be used at the same time?
A: No. They cannot be used at the same time but can be used separately.
Q: There is only throttle in RC8X, but no reverse. How to solve the problem?
Q: There is only throttle in RC8X, but no reverse. How to solve the problem?
A: This problem can be handled in two situations:
The first situation: Pull the throttle trigger and check the servo view on RC8X. There is response of servo display in the throttle direction, but no response of servo display in reverse:
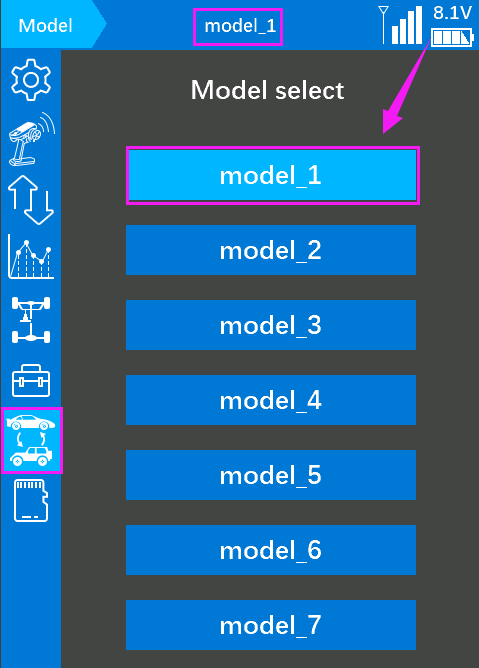
1.Reset the current model. View the current model on the RC8X taskbar, then enter model select, select the current model, and click reset.

2. If there is still no response of servo display in reverse, please calibrate the throttle.
Calibration tutorial: https://www.youtube.com/watch?v=pRnrocA0kKI
The second situation: when the throttle trigger is pulled, the RC8X's throttle channel rudder display is normal, but the model only has a throttle and no reverse.
1. Please make sure you are using a two-way ESC.
2. Please calibrate the ESC. You can check the ESC manual for the ESC calibration method.
Q: The battery of RC8X is draining fast. How to fix it?
Q: The battery of RC8X is draining fast. How to fix it?
A: RC8X is equipped with a 4.3-inch full color IPS touch screen, which consumes power faster than transmitters with small screen. You can refer to following methods to extend the standby time of RC8X:
(1)You can adjust or turn off some functions on RC8X, such as the backlight setting, sound setting, vibration setting, LED setting in the system settings.
(2)The working voltage of the RC8X is 7-17V, and the size of the battery compartment is 92*52*14.5mm. You can use a battery with a higher voltage or capacity to supply power to RC8X.
Q: What is the maximum capacity of the SD card that RC8X supports?
Q: What is the maximum capacity of the SD card that RC8X supports?
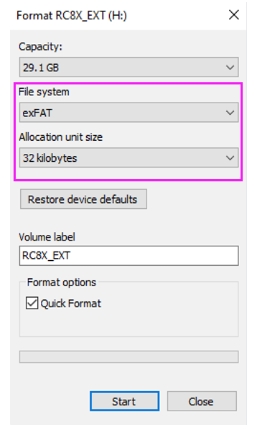
A: RC8X supports SD card with the capacity up to 128G.
Note: If you need to format the RC8X SD card (RC8X_EXT), please refer to the following picture to set the SD card parameters and then format it.
Q: After the firmware of RC8X is updated to the latest version, the response speed becomes very slow and there is servo delay. Why?
Q: After the firmware of RC8X is updated to the latest version, the response speed becomes very slow and there is servo delay. Why?
A: After updating the firmware to the latest version, the "Channel Delay" function (including throttle and steering delay) in the previous models will be turned on by default. If you do not need this function, please turn it off manually. There will be no delay for the new models that are added after the firmware update.
Q: Does RC8X support Scorpio head tracker?
Q: Does RC8X support Scorpio head tracker?
A: No. The PPM range of Scorpio head tracker is 1000-2000, while the PPM range of RC8X is 300-1700, so their PPM range is inconsistent.
Q: How to connect DJI goggles to RC8X?
Q: How to connect DJI goggles to RC8X?
A: Video tutorial: https://www.youtube.com/watch?v=XD9ycqagQeo
Q: How to calibrate the throttle and steering wheel of RC8X?
Q: How to calibrate the throttle and steering wheel of RC8X?
A: Video tutorial: https://www.youtube.com/watch?v=pRnrocA0kKI
Q: How to Replace the Steering Wheel of RC8X/RC6GS/RC4GS?
Q: How to Replace the Steering Wheel of RC8X/RC6GS/RC4GS?
A: Video tutorial: https://www.youtube.com/watch?v=QcyZAmFSE0Q
Q: How to replace the spring of RC8X Wheel?
Q: How to replace the spring of RC8X Wheel?
A: Video tutorial: https://www.youtube.com/watch?v=g8QYnaDA-tc
Q: How to calibrate the ESC with RadioLink RC8X transmitter?
Q: How to calibrate the ESC with RadioLink RC8X transmitter?
A: Video tutorial: https://www.youtube.com/watch?v=u5mk5IhbN7k
Q: How to have your unique RC8X by customizing voice and wallpaper?
Q: How to have your unique RC8X by customizing voice and wallpaper?
A: Video tutorial: https://www.youtube.com/watch?v=TyY5naod3ZQ
Q: How to set throttle delay and channel delay on RC8X?
Q: How to set throttle delay and channel delay on RC8X?
A: Video tutorial: https://www.youtube.com/watch?v=TyY5naod3ZQ
Q: How to set different themes for different models in RC8X?
Q: How to set different themes for different models in RC8X?
A: Video tutorial: https://www.youtube.com/watch?v=_3ybd9drjC4
Q: How to set A.B.S function on RC8X?
Q: How to set A.B.S function on RC8X?
A: Video tutorial: https://www.youtube.com/watch?v=EvUJzLEMPHE
Q: How to set 3 position switch on RC8X?
Q: How to set 3 position switch on RC8X?
A: Video tutorial: https://www.youtube.com/watch?v=6YpKuzUdwQQ
Q: How to set 2 position switch on RC8X?
Q: How to set 2 position switch on RC8X?
A: Video tutorial: https://www.youtube.com/watch?v=WV7ubyNHp2k
Q: How to set timer function on RC8X?
Q: How to set timer function on RC8X?
A: Video tutorial: https://www.youtube.com/watch?v=dSL-cWzmfv4
Q: How to supply power to the Receiver Without Using the ESC?
Q: How to supply power to the Receiver Without Using the ESC?
A: Video tutorial: https://www.youtube.com/watch?v=nquuvM3hmtw
Q: How to set up a bulldozer on RC8X?
Q: How to set up a bulldozer on RC8X?
A: Video tutorial: https://www.youtube.com/watch?v=5tsC_a0M5DY
Q: How to set up a racing boat on RC8X?
Q: How to set up a racing boat on RC8X?
A: Video tutorial: https://www.youtube.com/watch?v=5tGLpIDl6RA
Q:What is PS on RC8X?
Q:What is PS on RC8X?
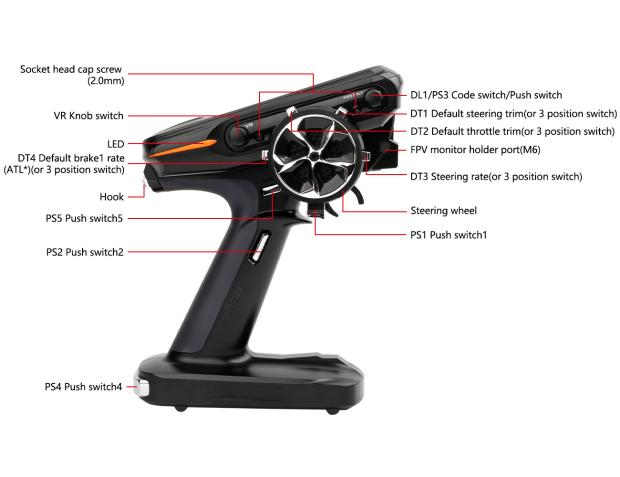
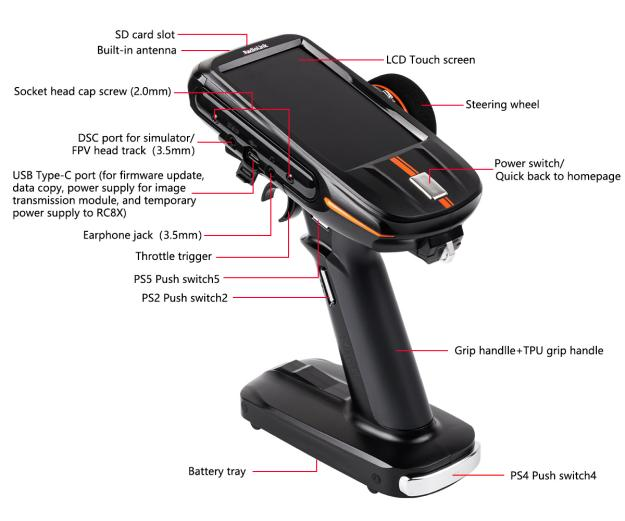
A:Full name is Push Switch. Here below are the introductions of all the buttons and switches of RC8X:
Switch/Knob | Full name | Function | Operation |
DT1 | Digital Trim 1 | default steering trim | Push the button forward or backward to adjust the value. Restore to factory settings by pushing the buttons. Four DT buttons can work as four 3 position switches by setting. |
DT2 | Digital Trim 2 | default throttle trim | |
DT3 | Digital Trim 3 | Default dual rate | |
DT4 | Digital Trim 4 | Default brake1 rate (ATL*) | |
DL1/PS3 | Digital Dial 1 | Code switch, Gyro gain | Turn the dial clockwise and counterclockwise to adjust the value |
Push Switch 3 | Default press PS3 to turn on or turn off backlight, can be programmed | Press switch to enable it | |
PS1 | Push Switch 1 | Default control CH4, can be programmed | lock switch or jog switch can be programmed. |
PS2 | Push Switch 2 | Default control CH6, can be programmed | Two PS2 switches on the left and right side, convenient for left and right-handed users |
PS4 | Push Switch 4 | Default control CH7, can be programmed | |
PS5 | Push Switch 5 | Default control CH5, can be programmed | Two PS5 switches on the left and right side, convenient for left and right-handed users |
VR | Knob switch | Dial, default control CH3, can be programmed | |
HOME | Power switch /Switch for quick back to homepage | ||
SS | Steering switch | Steering switch controls channel 1 by default to turn the vehicle left and right. You can also assign it to control channel 1 and other functions at the same time. | |
TS | Trigger switch | Trigger switch controls channel 2 by default to make the vehicle move forward or backward. You can also assign it to control channel 2 and other functions at the same time. | |
ATL | Adjust Throttle Low | Default brake rate | |
Q: How to do the binding between RC8X and receivers?
Q: How to do the binding between RC8X and receivers?
A: All the binding of RadioLink transmitters and receivers is the same.
Binding steps:
① Put the receiver and the transmitter close to each other (about 60 centimeters).
② Power on the transmitter and receiver.
③ Press the ID SET on the receiver’s side for more than 1 second and the LED indicator of the receiver will flash, meaning the binding process has begun.
④ When the LED indicator stops flashing and turns to always on, binding is complete.
⑤ Test the model servo to make sure it can be operated by the transmitter.
Note:
① The binding between your R8FG and RC8X is already complete by default. Just need to make sure there is the solid light of R8FG and the signal tower in the transmitter.
② NO gyro by default as the factory setting. Since the integrated gyro in R8FG will self-check, it is very important to remain R8FG still when powering it on. GREEN LED (always on) indicates normal working mode while PURPLE and RED LEDs (always on) indicate gyro working mode. When the red LED is off means NO gyro. If binding is not successful, the green LED will keep flashing to notify.
Q: Is there any requirement for the voltage of the power supply if RC8X is powered via the USB port?
Q: Is there any requirement for the voltage of the power supply if RC8X is powered via the USB port?
A: Users can connect RC8X to a computer or power bank through a type-C cable to temporarily power RC8X. The USB port of RC8X supports an input voltage of 5V, so please ensure that the voltage of the power supply meets the requirements. If the voltage of the power supply exceeds 5V, it may burn out RC8X.
Q: Does RC8X have telemetry function?
Q: Does RC8X have telemetry function?
A: Yes. RC8X is capable of returning signal strength, RSSI, transmitter voltage, and receiver voltage. If working with RadioLink receiver R8FG, R7FG, or R8F, vehicle voltage can also be returned. However, telemetry of motor speed and temperature is NOT available yet.
Q: Can RC8X control TRAXXAS or twin-engine RC cars?
Q: Can RC8X control TRAXXAS or twin-engine RC cars?
A: Sure. RC8X is a perfect remote control to all types of on-road electric powered or gasoline cars and twin-engine cars, tracked vehicles, crawlers, drift cars, tractor trucks, nitro cars, mini cars, sailboats, fishing boats.
Q: Can I assign a switch to control dual rate function?
Q: Can I assign a switch to control dual rate function?
A: Yes, you can assign a switch to control the dual rate function in the menu End Point.
Q: How many models RC8X can store?
Q: How many models RC8X can store?
A: RC8X can store 200 models data at most.
Q: What’s the function of USB port of RC8X?
Q: What’s the function of USB port of RC8X?
A: There are three functions that can be set.
① for upgrading the firmware and for copying the data to the computer.
② can be used as the power supply by connecting to the Mobile Power Bank or computer, but cannot charge the battery.
③ can expanse the screen to FPV Screen when working with the 3.5 mm Headphone Jack.
Q: I am driving in 3S and I have set the EXT alarm to 11.1V. But why the alarm goes off when I speed up?
Q: I am driving in 3S and I have set the EXT alarm to 11.1V. But why the alarm goes off when I speed up?
A: When you speed up, the instantaneous voltage is high, so the voltage of the battery may fall. When it slows down, the voltage of the battery will go back slowly. You can set the alarm voltage lower than 11.1V.
Q: I bind RC8X to 2 receivers. Why the two vehicles run at the same time even though I choose different models?
Q: I bind RC8X to 2 receivers. Why the two vehicles run at the same time even though I choose different models?
A: MODEL selection is not for choosing the receiver. It's for different data setting. You need to set ID SEED in the Basic menu(Receiver select menu).
Q: What are PS and DT on RC8X?
Q: What are PS and DT on RC8X?
A: The full name of PS is Push Switch, and the full name of DT is Digital Trim. Here below are the introductions of all the buttons and switches of RC8X:
Switch/Knob | Full name | Function | Operation |
DT1 | Digital Trim 1 | default steering trim | Push the button forward or backward to adjust the value. Restore to factory settings by pushing the buttons.Four DT buttons can work as four 3 position switches by setting. For details of setting, please refer to chapter 1.2.8 Three Position Switch. |
DT2 | Digital Trim 2 | default throttle trim | |
DT3 | Digital Trim 3 | Default dual rate | |
DT4 | Digital Trim 4 | Default brake1 rate (ATL*) | |
DL1/PS3 | Digital Dial 1 | Code switch, Gyro gain | Turn the dial clockwise and counterclockwise to adjust the value |
Default press PS3 to turn on or turn off backlight, can be programmed | Press switch to enable it | ||
PS1 | Push Switch 1 | Default control CH4, can be programmed | lock switch or jog switch can be programmed. |
PS2 | Push Switch 2 | Default control CH6, can be programmed | Two PS2 switches on the left and right side, convenient for left and right-handed users |
PS4 | Push Switch 4 | Default control CH7, can be programmed | |
PS5 | Push Switch 5 | Default control CH5, can be programmed | Two PS5 switches on the left and right side, convenient for left and right-handed users |
VR | Knob switch | Dial, default control CH3, can be programmed | |
HOME | Power switch /Switch for quick back to homepage | ||
SS | Steering switch | Steering switch controls channel 1 by default to turn the vehicle left and right. You can also assign it to control channel 1 and other functions at the same time. | |
TS | Trigger switch | Trigger switch controls channel 2 by default to make the vehicle move forward or backward. You can also assign it to control channel 2 and other functions at the same time. | |
ATL | Adjust Throttle Low | Default brake rate | |
Q: There is only Chinese available for my RC8X in the language setting. It cannot be set in English. Why?
Q: There is only Chinese available for my RC8X in the language setting. It cannot be set in English. Why?
A: There are two versions of RC8X, including the Chinese version and a multi-language version. RC8X Chinese version only supports Chinese in language selection, while RC8X multi-language version supports English and many other languages.
How to distinguish whether it is RC8X Chinese version or a multi-language version?
Enter System menu-- Information, as shown below:
Check the hardware version of RC8X. If the hardware version shows “(CH)”, it is the RC8X Chinese version, which only supports Chinese. If there is no “(CH)” in the hardware version, it is RC8X multi-language version, which supports English and many other languages.

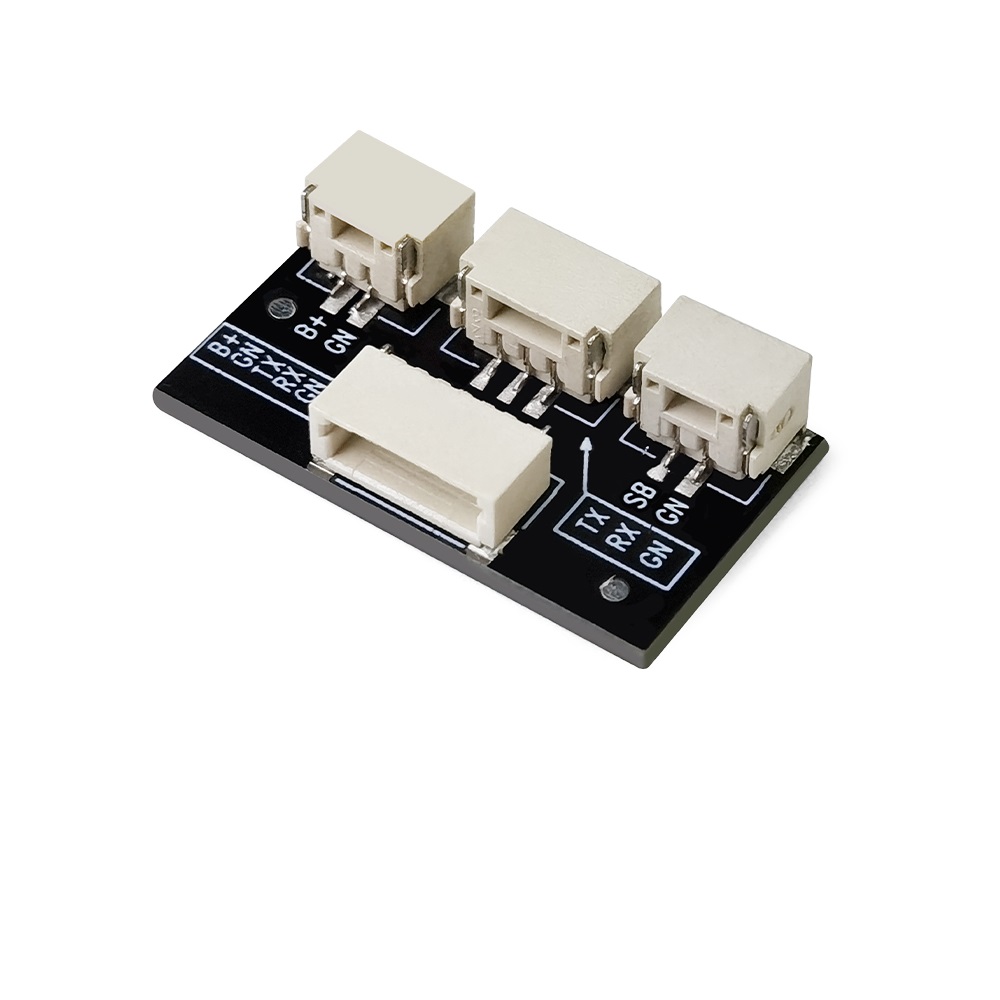
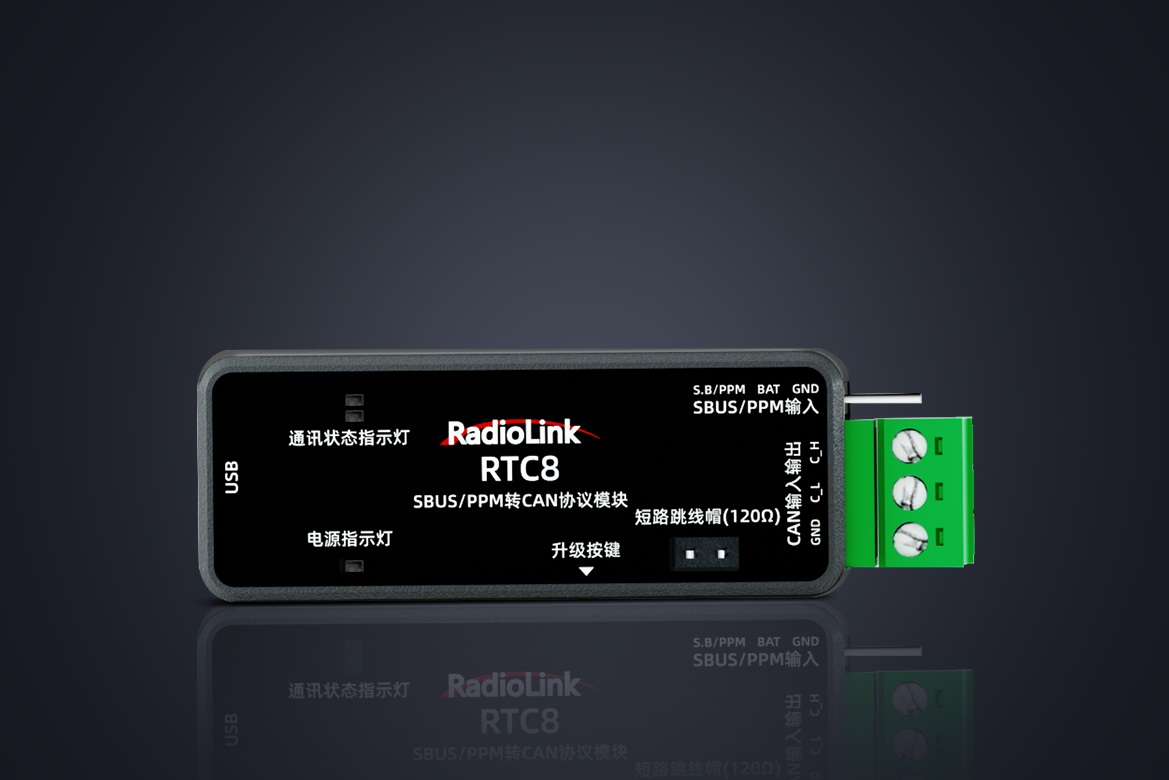
Q: Why do users encounter various problems when reading SBUS signals?
Q: Why do users encounter various problems when reading SBUS signals?
A:
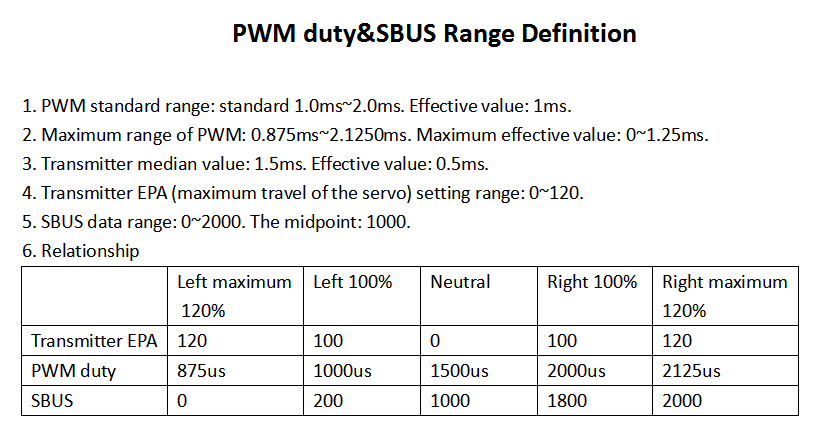
1. When the data read by the user differs from the reference data we provide, please check whether the EPA setting of each channel in the transmitter is the same. If the EPA setting for each channel is different, the read signal range will be different.
2. If the SBUS data cannot be read, please check whether the devices used are working properly and whether there is any problem with the connecting cable.
3. Our products support standard SBUS signals compatible with various flight controllers. Please refer to the chart below for detailed information.
Q: Does RC8X support Scorpion Head tracking?
Q: Does RC8X support Scorpion Head tracking?
A: No, it does not. The PPM range of Scorpion Head tracking and RC8X are not compatible. Scorpion Head tracking has a PPM range of 1000-2000, while the RC8X PPM range is 300-1700.
Q: Why does the response speed of the remote control become very slow and the steering has a delay after upgrading to firmware version 1.3.1?
Q: Why does the response speed of the remote control become very slow and the steering has a delay after upgrading to firmware version 1.3.1?
A: After upgrading to the latest version, the steering delay and throttle delay functions in the controller’s historical model will be enabled. You need to manually modify and disable the steering and throttle delay functions. New models are not affected.


 简体中文
简体中文- English