MINIOSD Module Manual
(Flight Data On-Screen Display)
Compatible with Radiolink Flight Controller
PIXHAWK & MINI PIX
Radiolink Electronic Ltd
www.radiolink.com
* Please be kindly noted that this manual will be updated regularly and please visit Radiolink official website to download the latest version.
Thanks for purchasing RADIOLINK OSD module for image transmission.
To fully enjoy the benefits of this product and ensure safety, please read the introduction carefully and set up the device as described below:
If you found any problems during the operation process, please kindly refer to the manual first. Then you could contact our distributors to find solution orfollow our Facebook homepage https://www.facebook.com/Radiolink-1455452961436694/ to search related key words. Also you can send questions to after_service@radiolink.com.cn or after_service1@radiolink.com.cn and we will answer your question at the earliest.
Due to unforeseen changes in production procedures, the information contained in this manual issubject to change without notice.
For more information please check our website http://www.radiolink.com and follow our Facebook and Youtube homepage.
SAFETY PRECAUTIONS
Never operate model during adverse weather conditions. Poor visibility can cause disorientation and loss of control of pilots’model.
Never use this product in a crowd and illegal area.
Always ensure the trim levers at 0 and battery properly charged before connecting the receiver.
Always check all servos and their connections prior to each run.
Always be sure about turning off the receiver before the transmitter.
To ensure the best radio communication, please enjoy the flight/driving at the space without interference such as high voltage cable, communication base station or lauching tower.
WARNING
This product is not a toy and is NOT suitable for children under the age of 18. Adults should keepthe product out of the reach of children and exercise caution when operating this product in thepresence of children.
Please don't operate in the rain! Rain or moisture may enter the transmitter internal through gaps in theantenna or joystick and cause your car to instability even out of control. If running in the wet weather(such as game) is inevitable, always use plastic bags or waterproof cloth to cover the transmitter.
Chapter 1 Introduction
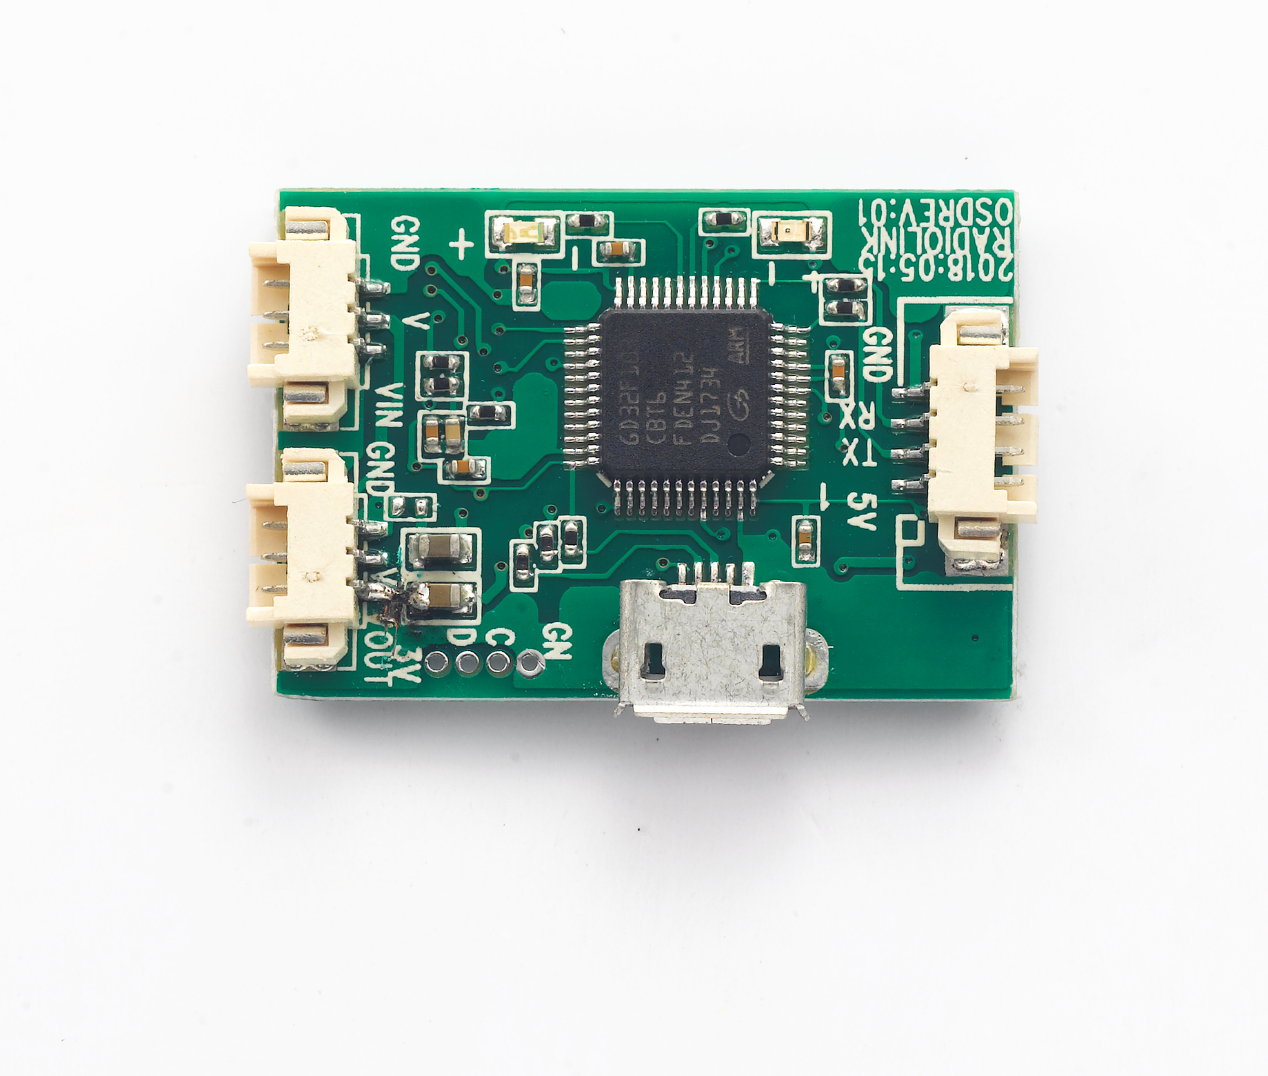
Radiolink OSD for image transmission is a video overlying module to have composite output of the OSD signal and the camera video signal and is compatible with Mini Pix and Pixhawk to output flight data. This OSD module makes all the necessary flight data on-screen display for FPV, enabling RC fans to observe models real-time situation. Besides, USB port to setup parameter is also provided so that RC fans can connect computer with to personalize the flight parameters display and enrich the flight experience.
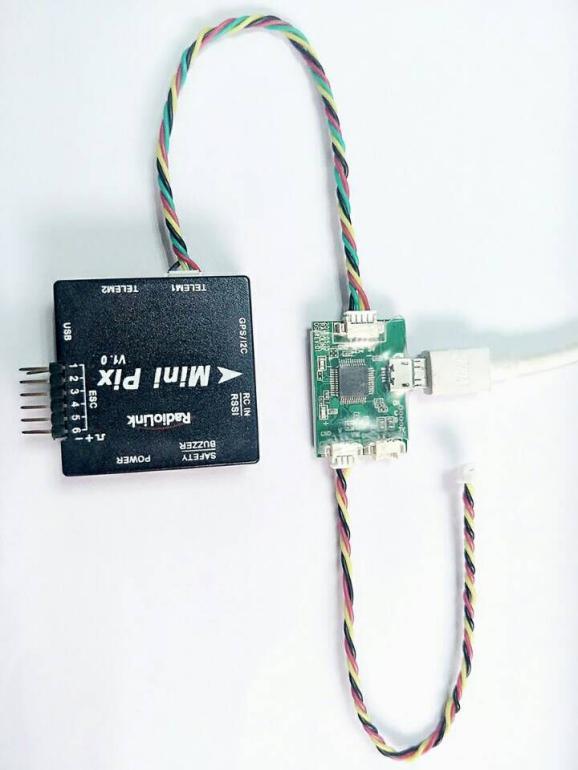
Port &Wires Connection
、
The other end of the 6pin is connected with the telem port of the flight controller.
Note Ports of Pixhawk and Mini Pix are different. Please take the correct one.
Chapter 2 Parameter Setup
In order to personalize the parameters, please download the zip file of osd config tool via below link first https://mega.nz/#!5QE0HC5b!glasKUsrWhpAg-thRMIZyjYf_C4mT4tJzkNT1ol_cPo
Connect the OSD module and computer with an android USB cable (data transmission)
Note Driver is automatically installed under Win10. For Win7/8 system, users can take VCP_V1.4.0_Setup.exe in the file of USB virtual port driver to install.
Double click to open the  in the OSD_Tool file
Right click MY COMPUTER and click “PROPERTY”, then Device Manager to check the corresponding PORT No. Then select the same port at the bottom of the parameter setup interface as below.
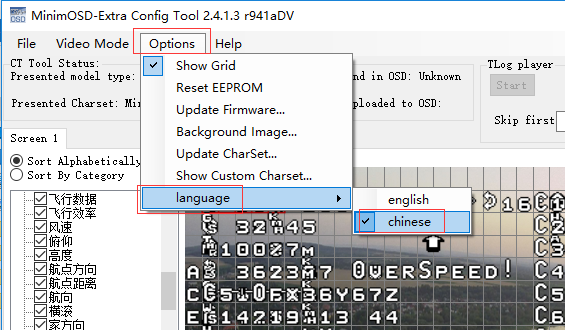
Parameter Language Display
Click Options => Select language=> Switch the language between Chinese/English
Note
The on-screen display language will be the same as the param. Setup language, being set here
If the displayed language doesn’t change to English, please try to set the language to Chinese then to English again.
Parameter Setup and Save
Scroll the left column and select the data needed to display. The parameters display layout can be modified on the right grids by moving the parameters to the preferred positions.
Note Parameters that are not installed can’t be displayed on screen even selected
Video modes may influences the displays result. Eg. For NTSC format, it is advised to have three lines empty at the bottom of the grids under the PAL format when arranging the parameters layout.
Note Video Mode selection differentiates the layout grids space.
When complete the setting, click File on the left top and click “Save OSD file” to save the set parameters. Next time when the same param. needed, click File and “Open OSD File”to directly reach the personalized data.
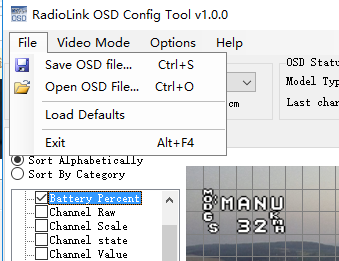
When open the file and input the saved data to the OSD, click “Save Current Tab to” and wait for the note of “EEPROM write done”to complete.

Font File Update
Click Options and select Update CharSet, then open the OSD Font Library.mcm . The font will be updated automatically. When the green bar at the bottom moves to the end and note as “CharSet Done” means charset update complete.
Note
Font can be also personalized. Search the edit tool online to edit preferred font. When finish, save the font in the 256 file, which is the chart bank in system by default. Then input the edit font by repeat the above steps.
Firmware Update
Some flight data of firmware by factory setting may be incorrect, users are very welcomed to send advice to Radiolink tech-support. We will modify and test and release the updated firmware, which users can flash with.
Open OSD_uploader in the file of Firmware Upgrade Tool
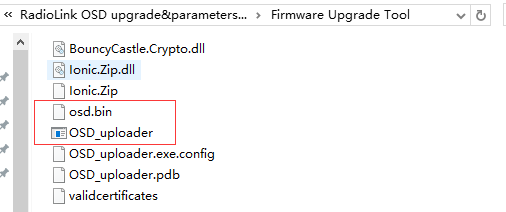 Select the latest firmware released osd.bin
The system will update automatically once the firmware is opened as below.
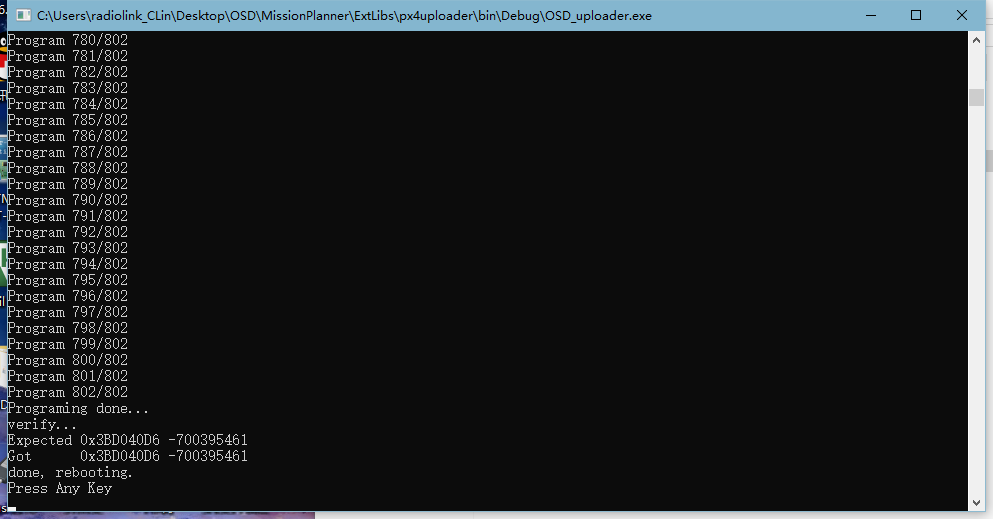
Once complete, double click “ENTER”to exit.
Note
When updating the firmware, the OSD module needs to be powered off.
When the firmware is updated, the parameters need to be reset to realize the on-screen display.
For the com port that can't be identified, it's probably because that it's an previous generation OSD you've bought. Please download the RADIOLINK Mission Planner via this link. http://www.radiolink.com.cn/firmware/MissionPlanner/MissionPlanner-latest.exeThen the driver will be installed automatically then the port would be identified.
1/ Install the MP ( which you have done)
2/ Click OSD_uploader.exeto open
3/ Select the firmware osd.bin and double click
(If the driver/MP is successfully installed, it will start searching right port immediately and automatically)
4/ Quickly connect (better within 8s) your OSD module with the computer with a USB cable
5/ When the port is identified, the firmware will be flashed