
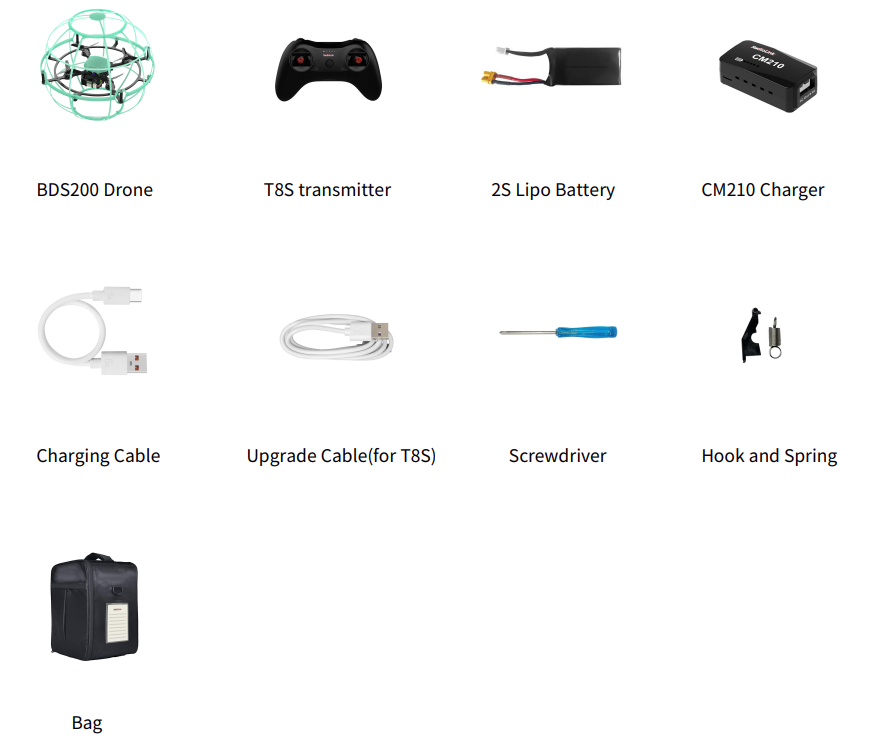
Packing List
Chapter 1 BDS200 Introduction
1.1 Features of BDS200
BDS200 is a professional drone for competitions. The inertial navigation of the gyro, accelerometer, and barometer and the Kalman filter altitude-hold algorithm perfectly solves the contradiction between high speed and stability, greatly reducing the difficulty of beginning and allowing the public to experience the flying pleasure of competitive racing.
The RTF version comes with an 8-channel remote controller which can be adjusted parameters by mobile phone APP. Equipped with the top potentiometer made in Noble from Japan, the control accuracy of the joysticks is 0.25 microseconds. Parameters can be easily set up and modified with an Android or iOS mobile APP connected via Bluetooth. The low transmitter, receiver, and power battery voltage alarm value can be set according to actual needs.
The receiver R8XM integrated the fly-by range telemetry function. When the power battery voltage is lower than 6.7V, the green light of the flight controller starts to flash slowly to indicate the return of flight, and the soccer drone slowly descends 5 seconds later to ensure a safe landing.
Altitude-hold and Stabilize Modes can be switched with one button. After the soccer drone is flipped, the CH8 roller switch can be used to trigger anti-turtle mode.
The soccer drone can be quickly restored to its original position after falling at any angle, which solves the problem that it is difficult to flip over after falling on its back, ensuring that all three players in the team can continue to participate in the competition effectively.
Made of new crash-resistant material, it will be safe even in the case of strong collisions and violent falls in competition.
1.2 Specifications
Name | BDS200 |
Weight (Battery included) | Within 200g |
Dimension | 200mm*200mm(±10mm) |
Material | Carbon Fiber (Frame), Plastic (Ball shells, cover, battery case) |
Transmitter | RadioLink T8S |
Motor | SZ-SPEED Brushless Motors |
Propeller | Gemfan Propellers |
Output Frequency | 2.4G |
Receiver Signal | SBUS |
Flight Controller&ESC | RadioLink Stack(Flight Controller and 4-in-1 ESC) |
Battery | Gensace Battery |
Charger | RadioLink CM210 |
Flight Modes | Altitude-hold Mode, Stabilize Mode, Anti-turtle Mode |
Flight Time | 6 Minutes |
Flight Environment | Indoors/Outdoors |
Package | Portable Bag |
Chapter 2 Before Flight
2.1 Power Supply
Power for transmitter T8S: Make sure the transmitter is fully charged.
Power for BDS200: The voltage of 2S LiPo battery packed with BDS200 is not fully charged by default, so the battery needs to be charged with the charger CM210 before flight.
The LiPo battery charger CM210, specially designed for 2S LiPo battery, sharing the professional development and high precision of CB86PLUS, ensures safer charging and battery life span.
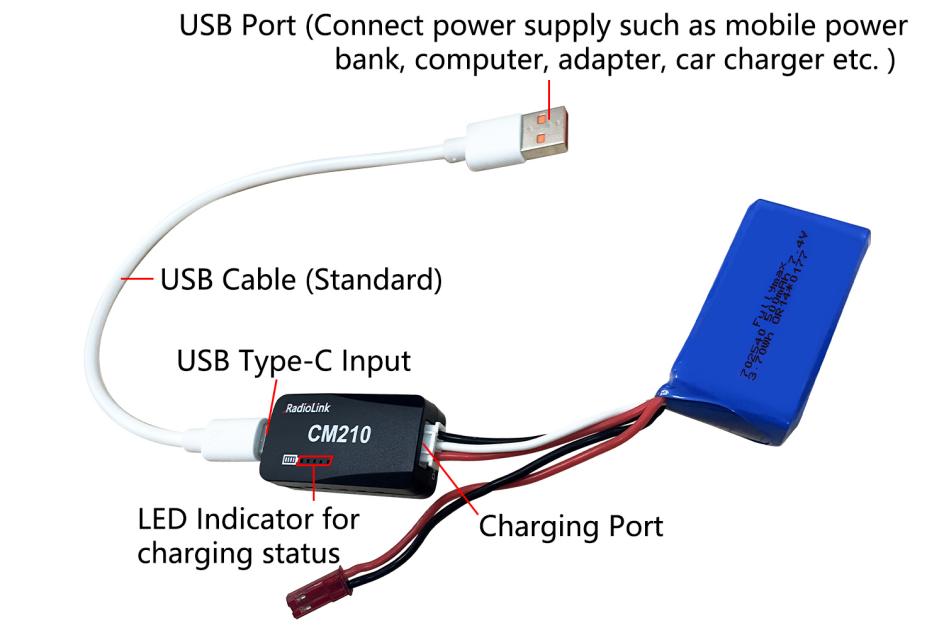
CM210 Instruction for Use:
Insert one end of the standard USB cable into the Type-C input port of the CM210 charger (as shown in the picture below), and then connect the other end of the USB cable to power supply equipment such as power bank, computer, mobile phone adapter, etc.(Input Voltage: 5V) After the right connection, the red LED indicator will be always on.
Insert the balance port of the standard 2S lithium battery of A560 into the charging port of CM210 (as shown in the picture below). Then the green LED indicator starts flashing, which means it starts to charge the battery. (Note: The green LED indicator flashes during the charging to indicate normal charging; If the red LED indicator flashes during the charging to indicate abnormal charging. Please reconnect battery and cable to troubleshoot the abnormality.)
When all four LED indicators turn solid green, the battery is fully charged, and the charger will automatically stop charging.
Remove the battery and then disconnect the power supply.
CM210 LED Indicator Status:
LED color | Status | Meaning |
Red | Flash | The charger detects abnormality. |
Always on | No battery is connected. | |
Green | All four green LEDs flash once. | The charger is powered on. |
The first green LED flashes, and the other LEDs are off. | The battery voltage is lower than 7.4V. | |
The first green LED is always on, and the second green LED is flashing. The other LEDs are off. | The battery voltage is lower than 7.8V. | |
The front two green LEDs are always on, and the third green LED is flashing. The other LEDs are off. | The battery voltage is lower than 8.2V. | |
The front three green LEDs are always on, and the fourth green LED is flashing. The other LED is off. | The battery voltage is lower than 8.4V. | |
All four green LEDs are always on. | The battery is fully charged. |
2.2 BDS200 Direction Indication
There is a power cable at the tail of the aircraft. When it
is powered on, the flight control indicator at the tail will light up (see below for color explanation), making it easy to distinguish the directio
n of the aircraft.

2.3 Joysticks & Flight Movements
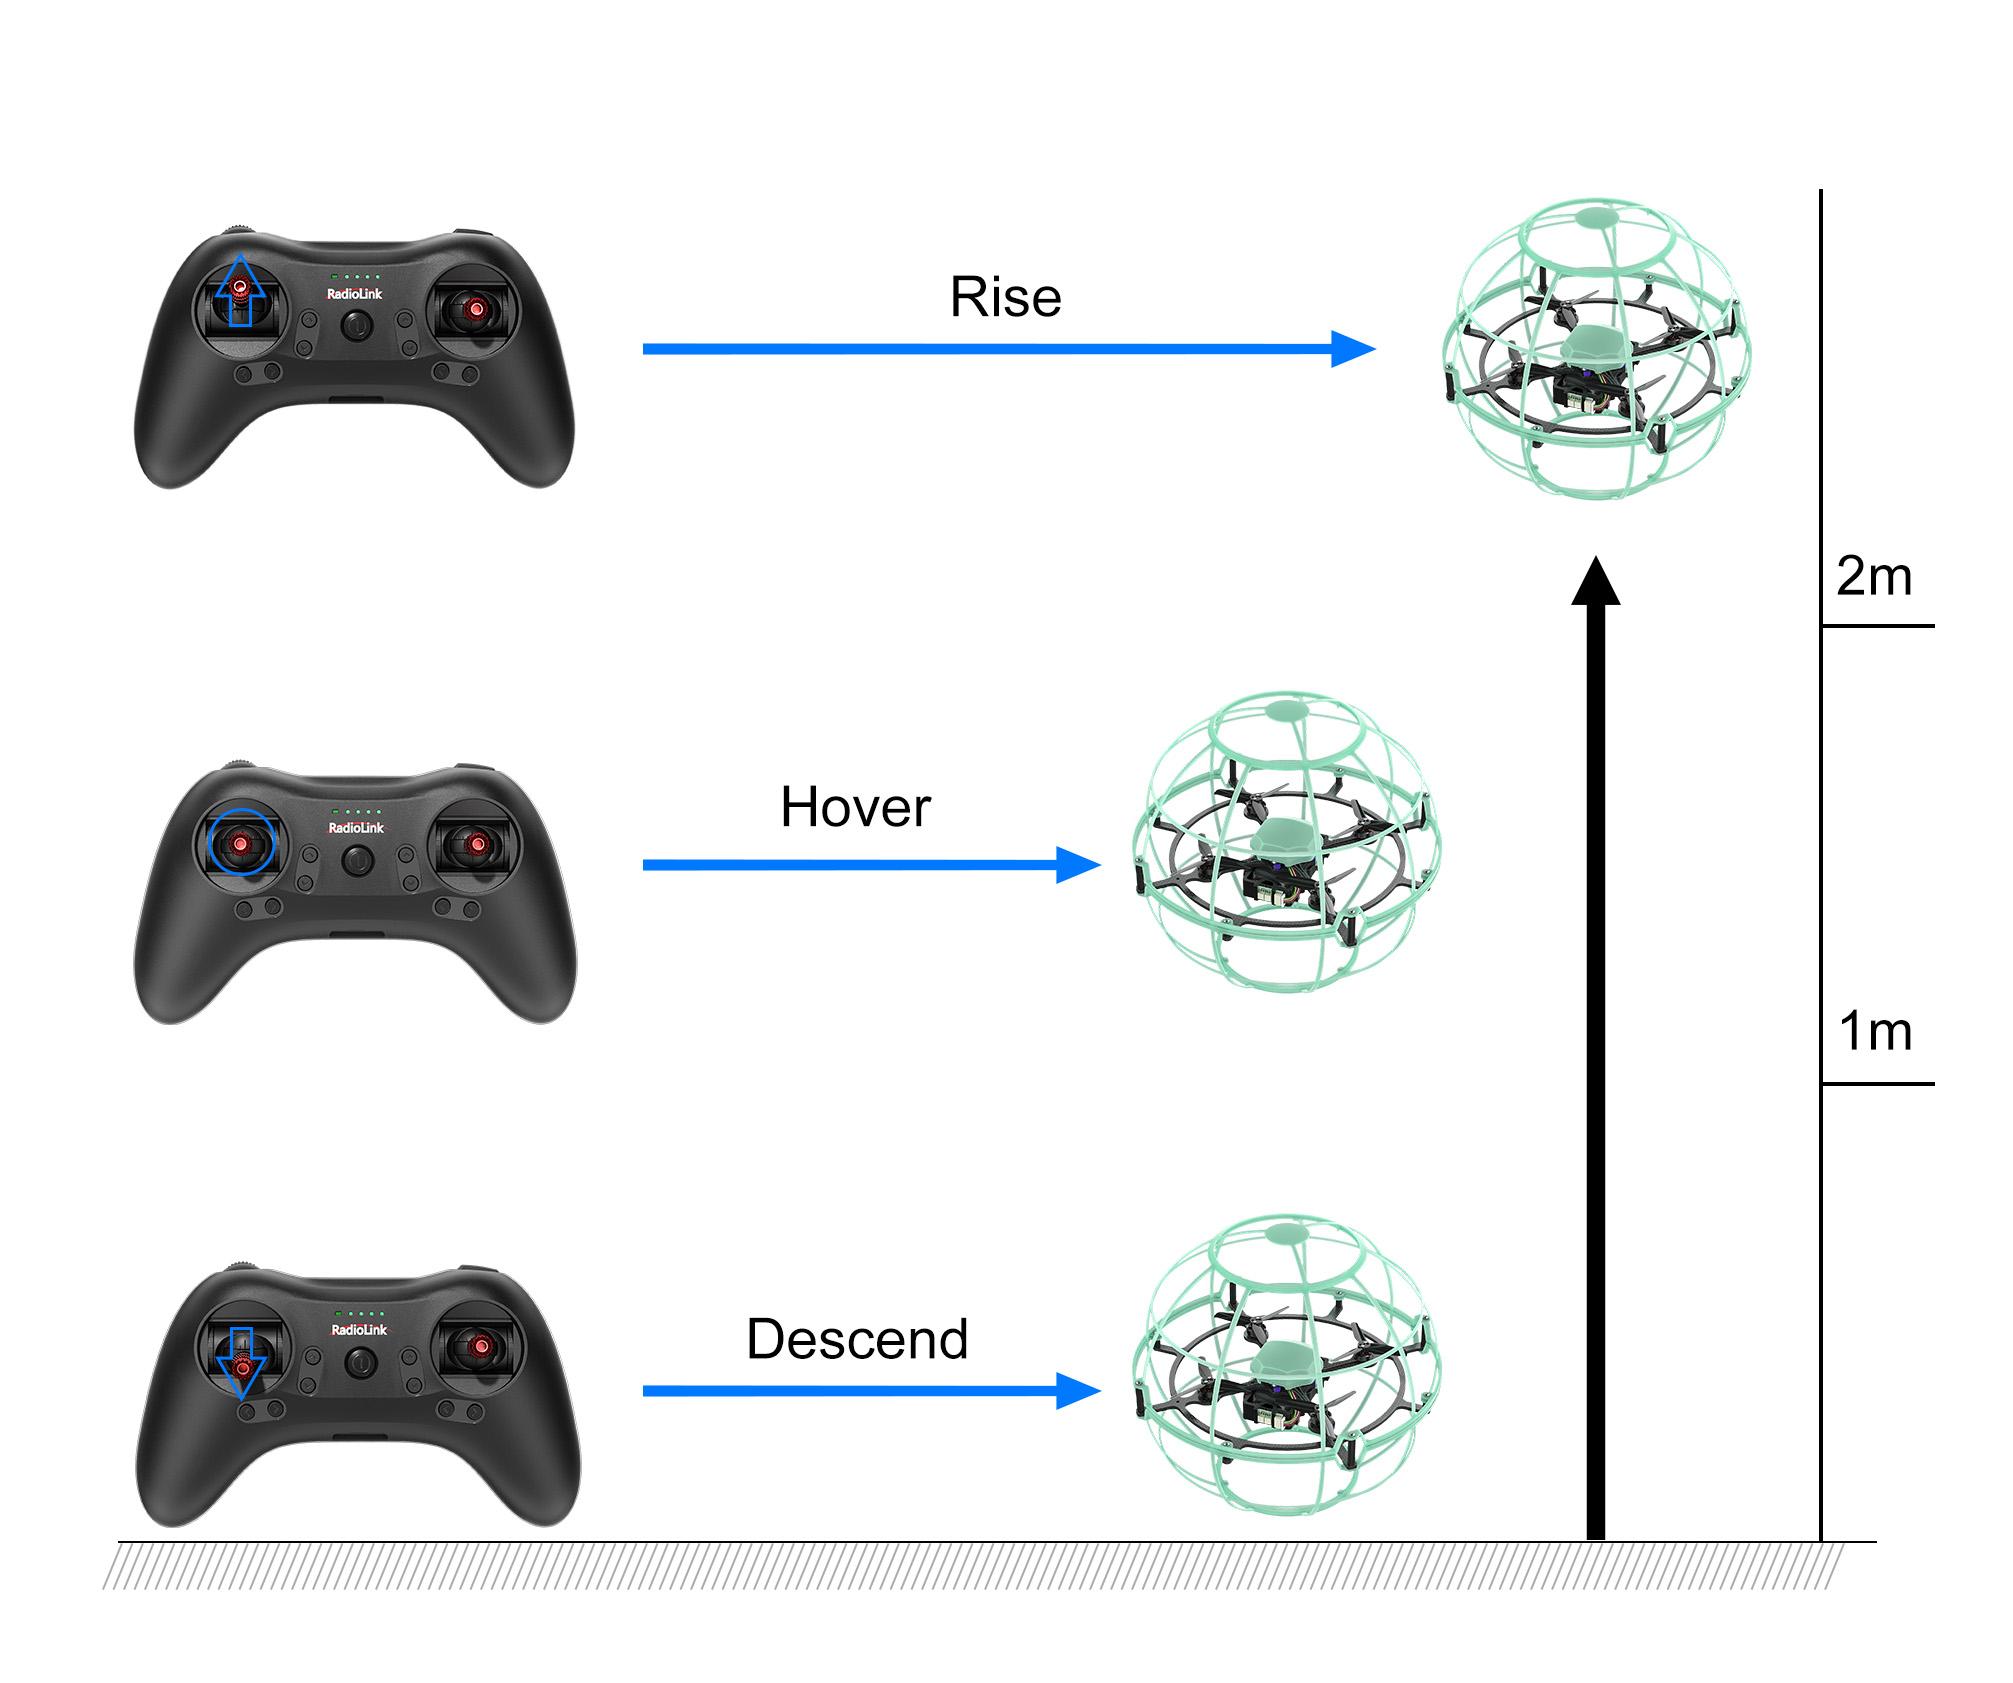
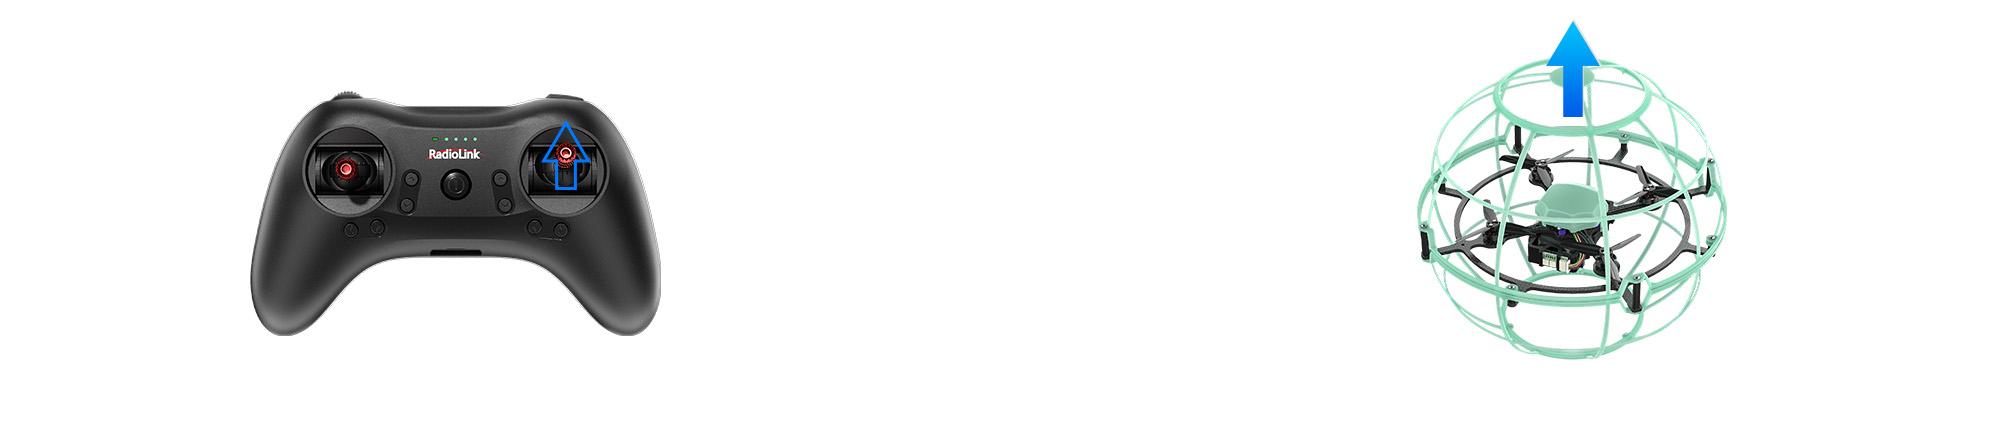
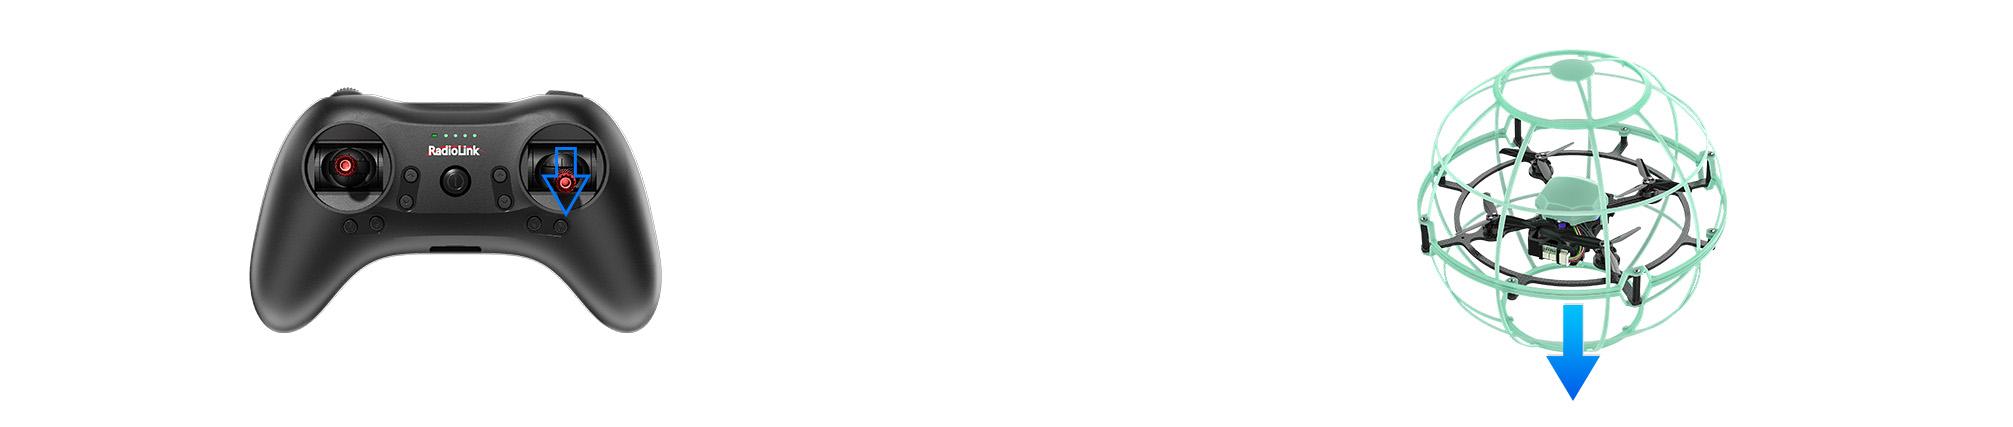
A. Throttle: Rise/ Descend/Hover
Toggle the throttle stick (on the left) vertically upward and BDS200 will rise and toggle the throttle vertically downward, then BDS200 descends.
If at Alt-Hold Mode, toggle the throttle stick vertically upward till the BDS200 rises to the preferred height, then toggle back to center position and release, the BDS200 will remain at this height.
Yaw: Clockwise/Anticlockwise
Toggle the yaw stick (on the left) to the left and BDS200 will turn anticlockwise and toggle the yaw stick to the right, then BDS200 turns clockwise.
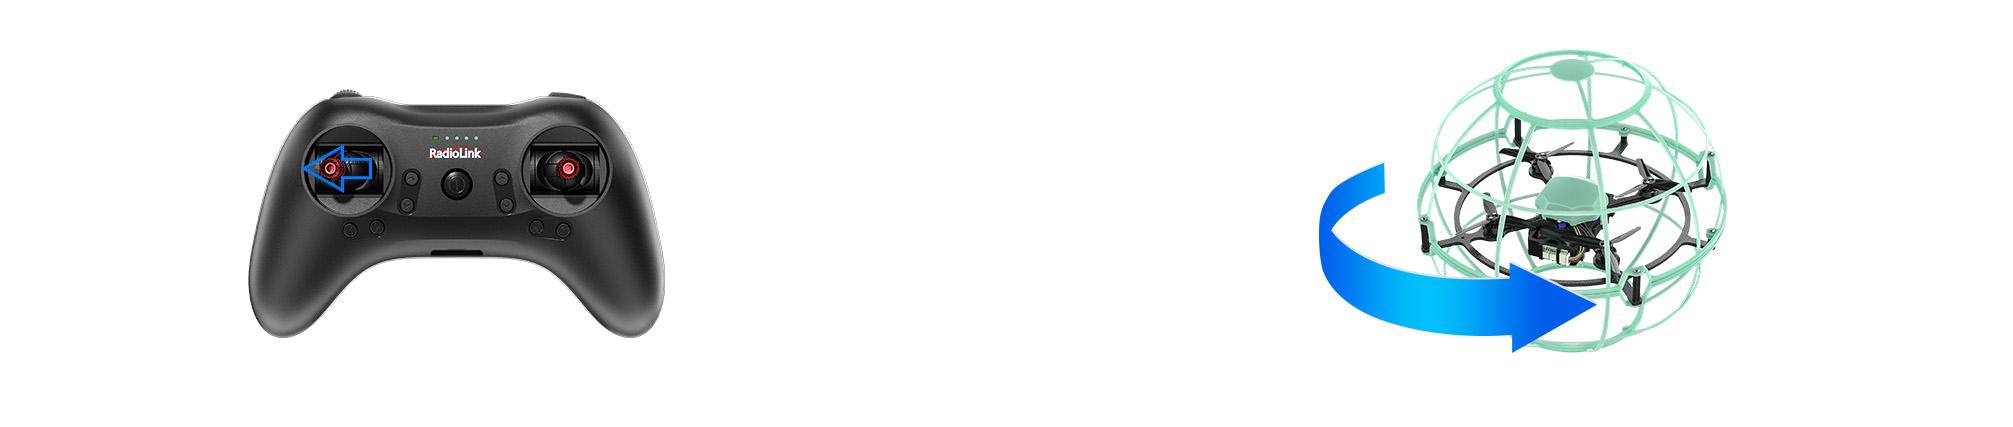
Yaw stick to the left , BDS200 turns anticlockwise
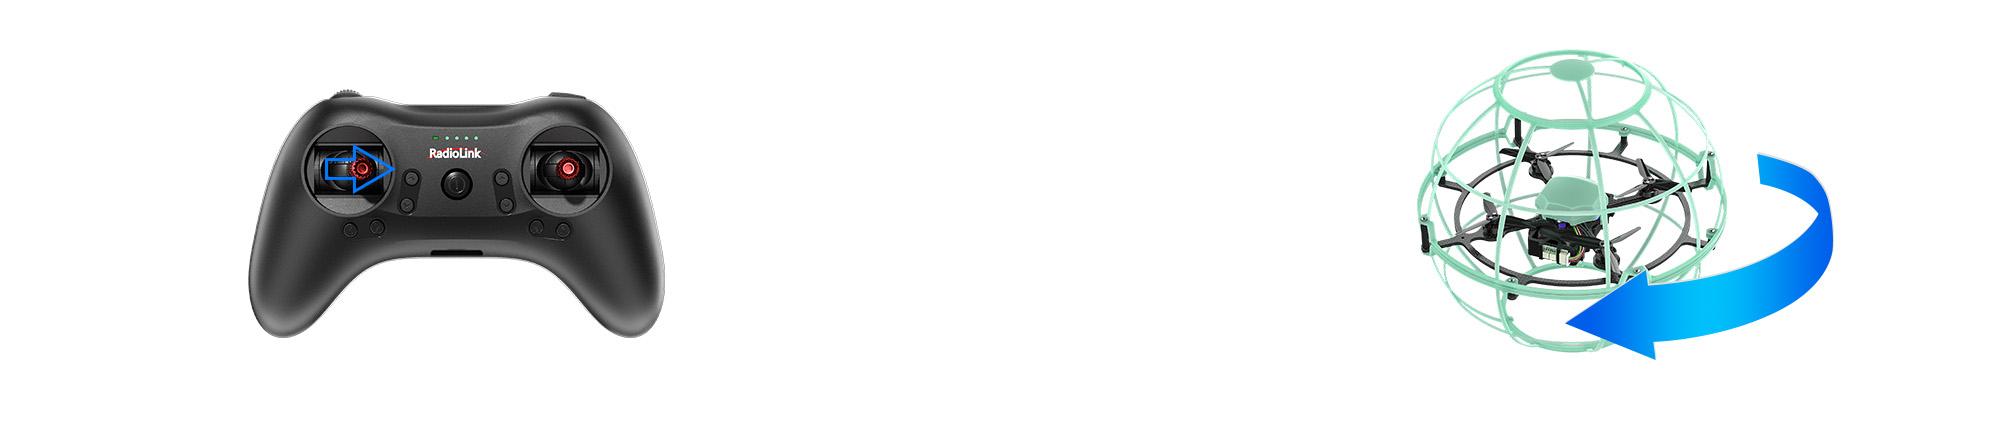
Yaw stick to the right, BDS200 turns clockwise
Pitch: Forward/Backward
Toggle the pitch stick (on the right) vertically upward and BDS200 will fly forward and toggle the pitch stick vertically downward, then BDS200 flies backwards.
Pitch stick upward, BDS200 moves forward
Pitch stick downward, BDS200 moves backward
Roll: Right/Left
Toggle the roll stick (on the right) to the left and BDS200 will fly to the left side and toggle the roll stick to the right, then BDS200 will fly to the right side.
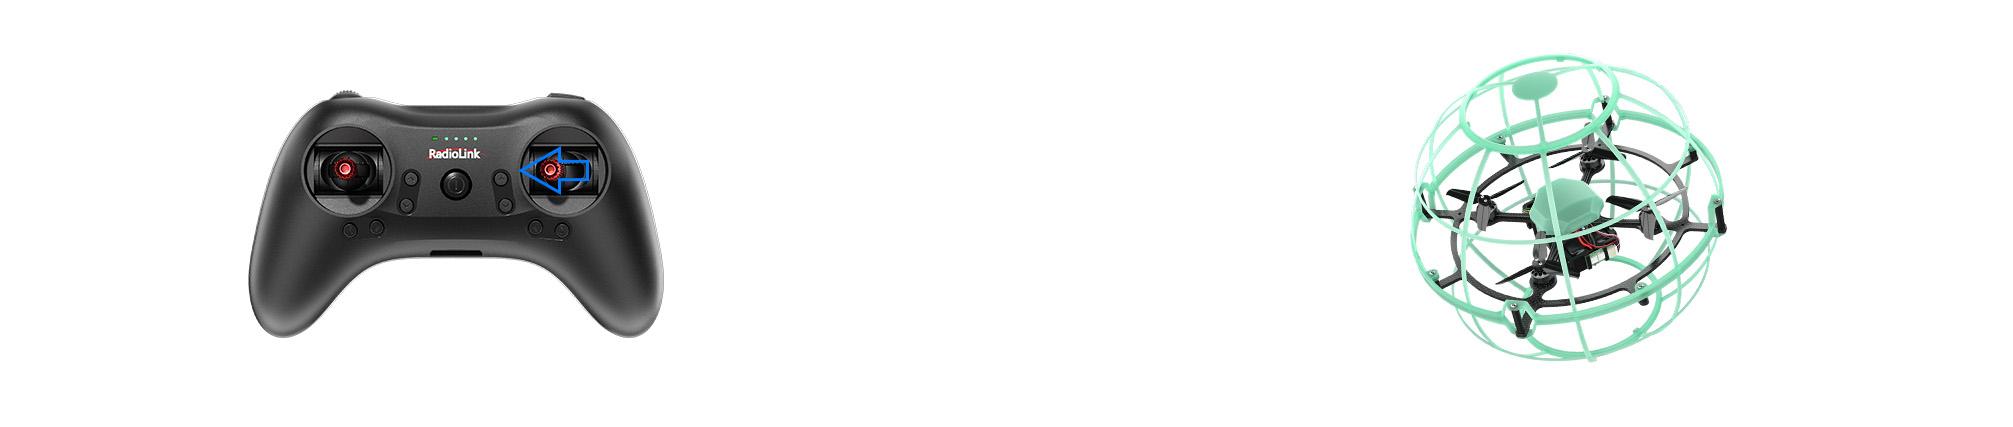
Roll stick to left, BDS200 flies to the left side
Roll stick to right, BDS200 flies to the right
2.4 LED Indicator Introduction
The drone comes with two light panels, located in front and behind the battery compartment of the drone, which are the team LED indicator light and the tail LED indicator respectively.
Team LED indicator: When the aircraft is not unlocked, you can switch colors by short pressing the CH6 switch of T8S. There are seven colors that can be switched, including red, yellow, blue, green, cyan, blue and purple.
Tail LED indicator: You can know the status of the flight controller through color changes.
When the aircraft is powered on but not armed, the yellow LED flashes;
When the aircraft is armed, the blue LED is always on;
When the battery voltage is low, the red LED flashes slowly;
When the battery voltage is seriously low, the red LED flashes fast;
When the aircraft is in anti-turtle mode, and the colored LED flashes.
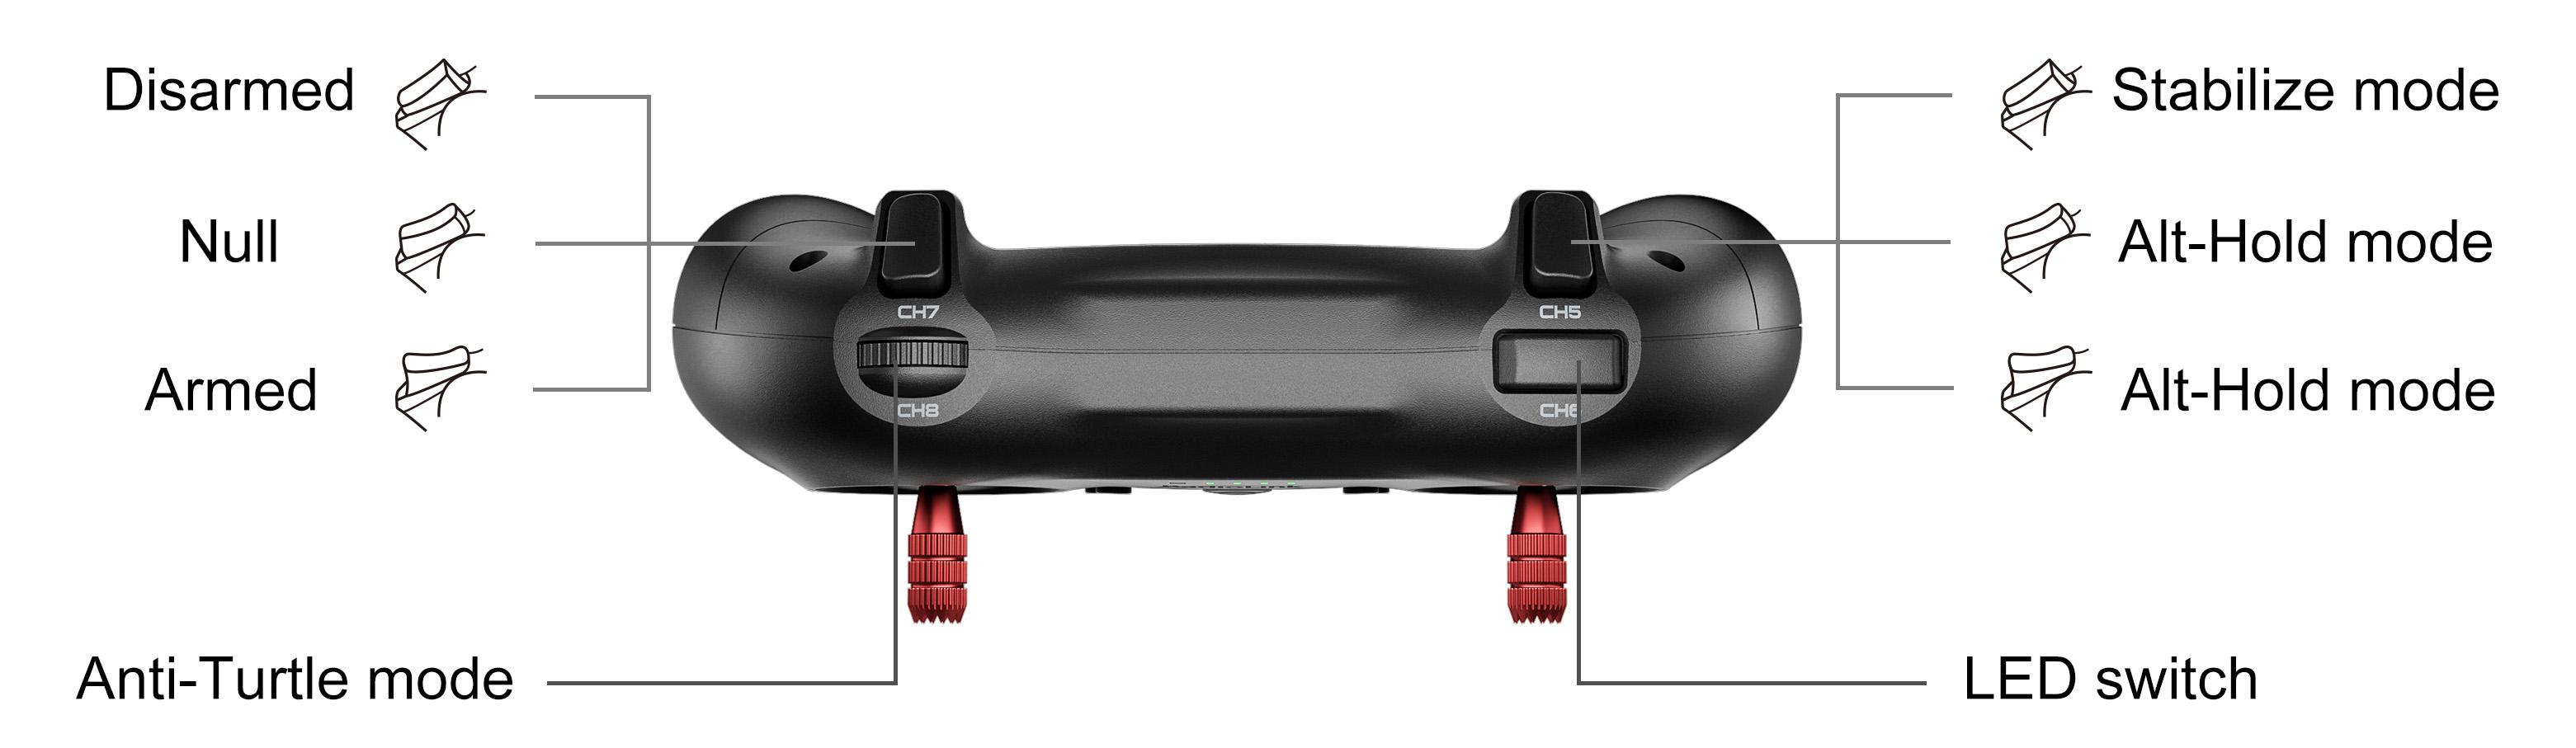
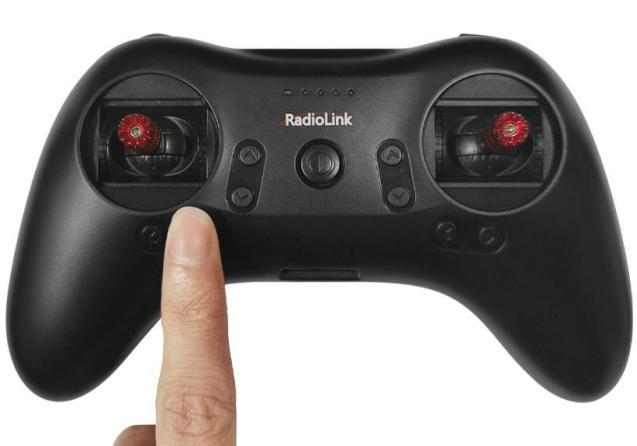
2.5 T8S Transmitter Switch Introduction
T8S has 2 three-position switches, 1 knob-switch, and 1 push-button.
CH7 three-position switch is used to arm/disarm the aircraft. When CH7 switch is moved to the direction of CH8 switch(the top), it is armed (the throttle stick must be at the lowest position). When the CH7 switch is moved to the bottom, it is disarmed.
CH5 three-position switch controls the flight modes: stabilize mode and alt-hold mode. When the CH5 switch is moved to the bottom, it is in stabilize mode. When CH5 switch is in the center or moved to the direction of CH6 push-button (the top), it is in alt-hold mode. In alt-hold mode, the aircraft can maintain a constant altitude and hover in the air when the throttle stick is at the midpoint. The aircraft will rise above the midpoint of the throttle and descend below the midpoint of the throttle.
CH8 knob-switch controls the anti-turtle mode. When the aircraft is tilted at a large angle, the motor cannot take off after arming. Turn CH8 knob-switch fully clockwise to activate the anti-turtle mode. In anti-turtle, the tail LED will flash colored lights.
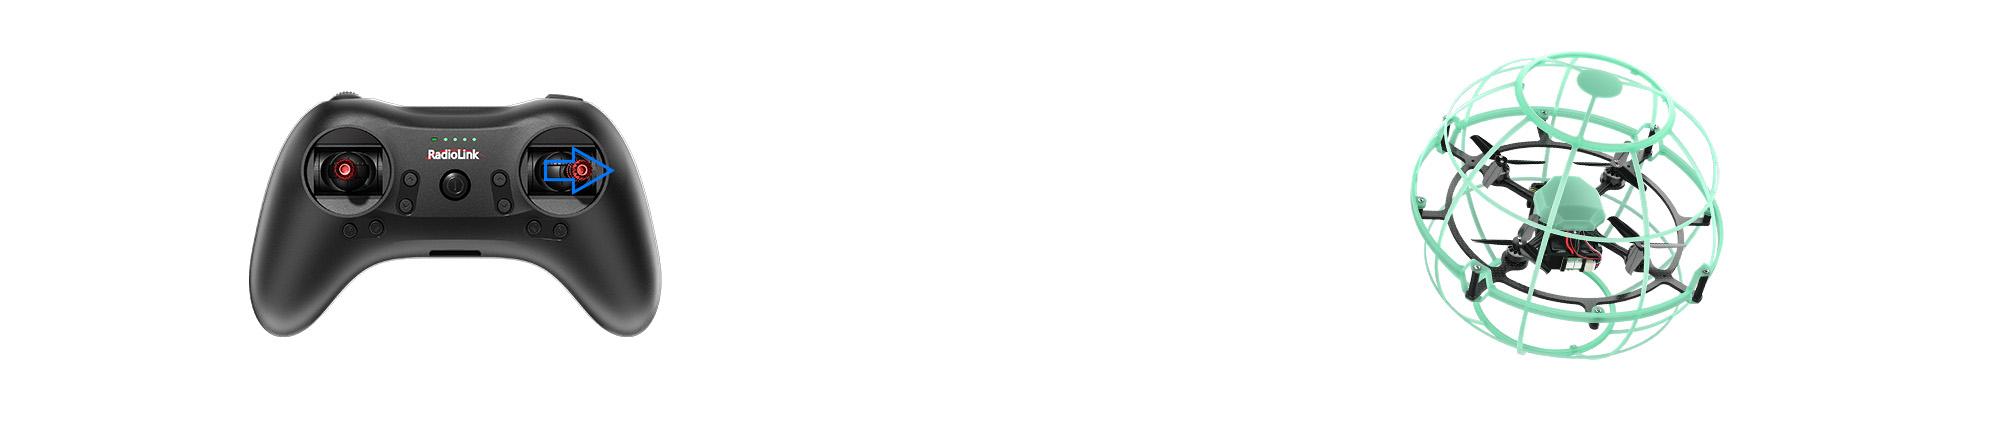
CH6 push-button switches the color of the team LED indicator. The picture below shows the functions of the remote control. Short press once to change one color. There are seven colors that can be switched, including red, yellow, blue, green, cyan, blue and purple.
2.6 T8S Transmitter Joystick Calibration
When the joystick of the T8S is not in the center position, or there is large difference of the travel amount, T8S needs to be calibrated. T8S joystick calibration method is as follows:
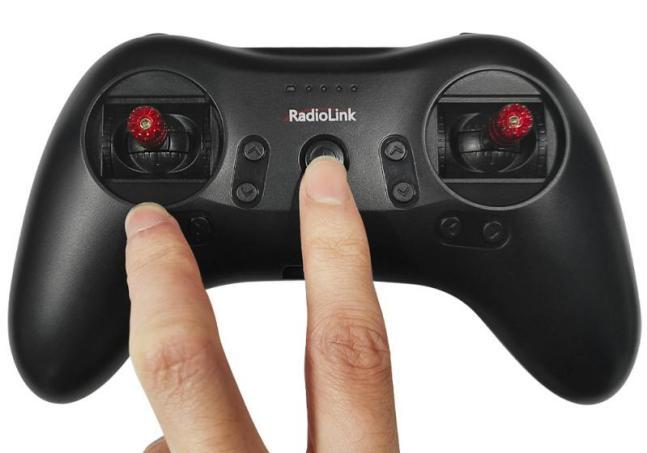
When the transmitter is power-off, toggle both sticks at the central point. Press rudder trimmer button (The first button on the left) and turn on transmitter at the same time. Four green LED indicators will start flashing and T8S is ready to be calibrated.
2. Range Calibration: Toggle both sticks (Ch1-4) to the highest point/maximum and the lowest point/minimum. Then back to the central point. (Refer to image below)
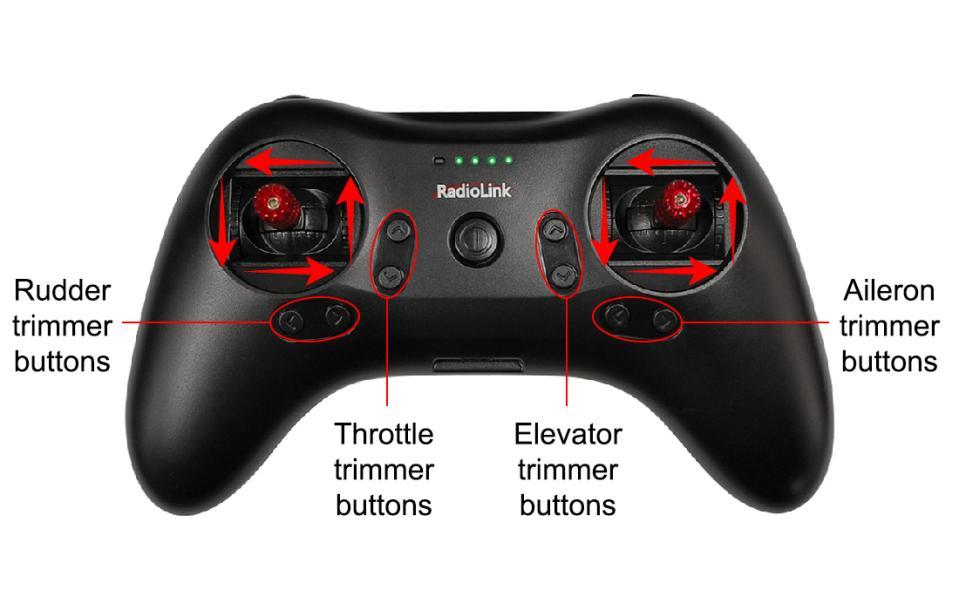
3. Central Point Calibration: When the joysticks are placed in the central point, press rudder trimmer button (The second button on the left), there will be DD sound. Four flashing LED indicators turn solid green means stick calibration is complete.
Chapter 3 Get Ready to Flight
Drone inspection:
1. Make sure the battery is installed securely and fully charged, and the battery is not bulging, deformed or damaged.
2. Inspect the propeller. Check whether the propeller is in good condition, without damage, cracks , aging and softening. Make sure the propellers are installed firmly and rotate smoothly, without jamming.
3. Inspect the fuselage and components. Scan the appearance of the fuselage to see if there is any damage, whether there are cracks in the screw connections, and whether the screws of each component are tight.
4. Check whether the motor installation is tight, and manually turn the motor to check whether the rotation is smooth.
5. Check the transmitter:
① Make sure the transmitter is fully charged.
②The joystick has no deformation in appearance and can be rotated flexibly without lag.
③The LED indicator of T8S lights up normally and there is no abnormal alarm signal.
Chapter 4 Three Flight Modes
CH5 three-position switch controls the two flight modes: stabilize mode and alt-hold mode. When the CH5 switch is moved to the bottom, it is in stabilize mode. When CH5 switch is in the center or moved to the direction of CH6 push-button (the top), it is in alt-hold mode. After the drone is turned over, turn CH8 knob-switch fully clockwise to activate the anti-turtle mode. In anti-turtle, the tail LED will flash colored lights.
Chapter 5 Flight Steps
5.1 Battery Installation
Prepare a 2S lipo battery that comes with BDS200.
Put the battery into the battery compartment as shown below. Please note that the battery power cord needs to be in the same direction as the team LED indicator.

Use Velcro straps to tie the battery to the body.
Shake the drone to ensure that the battery is firm and does not fall off.
5.2 Power on BDS200
Long press the power button to power on T8S transmitter. Please make sure the throttle is at the lowest position, and CH7 switch is moved to the bottom, the disarm position.
Connect the battery to BDS200.
Make sure the LED of the receiver is always purple (as shown on the right).
5.3 Take off
Place the drone on a flat ground and ensure that there are no interfering objects such as walls within 1 meter nearby.
Push CH7 switch to the top position to arm BDS200, and slowly raise the throttle joystick to the hover position. (It is recommended to fly in "Alt-Hold Mode" for your first flight)
Hold the joystick tightly and hover the drone in the air according to the flight attitude of the aircraft.
5.4 Landing
Hover the drone over the landing site and slowly lower the throttle joystick.
After the drone lands, push CH7 to the bottom, the disarm position.
Note: When the battery voltage is lower than the set voltage, the drone will automatically land slowly and the throttle stick cannot control the drone.
5.5 Power off BDS200
Unplug the battery of BDS200.
Power off T8S transmitter.
Store the drone and transmitter appropriately to avoid being squeezed, exposed to moisture, or placed in a high temperature environment.
Chapter 6 Troubleshooting
Problems | Solutions |
The aircraft cannot take off even though the throttle stick is at the highest position. | The battery voltage is low. Please charge the battery and try again. |
The aircraft rolls after taking off. | The propellers may be installed in wrong direction. Please adjust them and try again. |
There is an abnormal sound after the aircraft is armed. | Arm the drone and turn the propeller by hand to check whether there are any objects or parts interfering with the propeller. Remove the objects. |
The aircraft shakes after it is armed. | Check whether the propeller is intact. If not, please replace the propeller. |
The aircraft sways after takeoff. | Check whether the propellers are securely installed. Please use propellers that come with the drone. |
The aircraft sways after taking off. | Check whether the fixing screws at the bottom of the motor are loose and tighten the screws. |
The aircraft sways after taking off. | Check whether the fixing nuts of flight controller is loose and tighten the nuts. |
Some motors do not rotate after arming. | Check whether the solder joints between the motor and the flight controller have fallen off and re-solder them. |
The tail LED indicator cannot light up. | Check whether the connection cable of the indicator is detached and re-plug the connection cable. |
In the stationary state, the drone cannot stand on the ground. | Check whether the shell is damaged and replace the shell components. |
After taking off, the aircraft deflects in one direction. | Turn the trim button. When the trim returns to the center, it will emit a long beep to determine whether the trim position is correct. |
The drone loses control after taking off. | Check if there is any strong signal interference source nearby. Please fly away from the interference source. |
The drone loses control in a short distance after taking off. | Check whether the receiver antenna is broken or damaged. If damaged, replace the receiver. |
Unable to arm the drone. | Calibrate the transmitter. For specific methods, please refer to Chapter 2.6 T8S Joystick Calibration. |
Thank you again for choosing RadioLink products.
If the above communication cannot solve your problem, you can also send emails to our technical support: after_service@radiolink.com.cn
Thank you again for choosing the RadioLink product.